Howdy folks! As this is my first post of the year, I think it's fair to say Happy New Year!
This is going to be a cheat sheet with some installation notes/tips to have the CA API Gateway 9.2, in its VMWare CentOS OVA form factor, quickly installed for education purposes. I say education purposes because it's not the goal of this tutorial provide you any recommendation when comes to a production environment. So, let's get started!
First of all, you must download the latest version of the CA API Gateway, which in the time this tutorial has been written is the 9.2. I'm going to use the CentOS virtual appliance in this tutorial. Assuming you are ready to rock and roll, with your OVA properly downloaded and imported into your VMware, let's jump into it.
1. Log in to your gateway either using the vmware console or via SSH. When you first login in you MUST change the default password to a complex one. After change it you can use the privileged shell (root) to change it back to a simple password. Of course we do not recommend a simple password whenever you are exposing your gateway, but for educational purposes and for a stand alone gateway, that's perfectly fine.
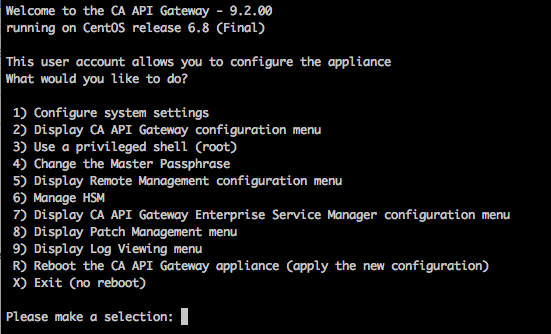
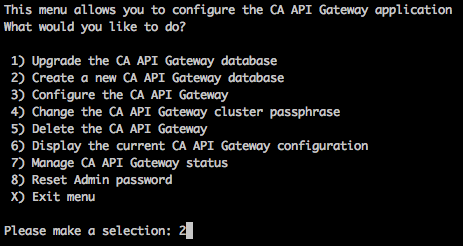
2. This is the CA API Gateway 9.2's main menu:
3. First of all you have to configure the system settings which includes the network and timezone. You can do that by picking the menu option 1) Configure system settings:
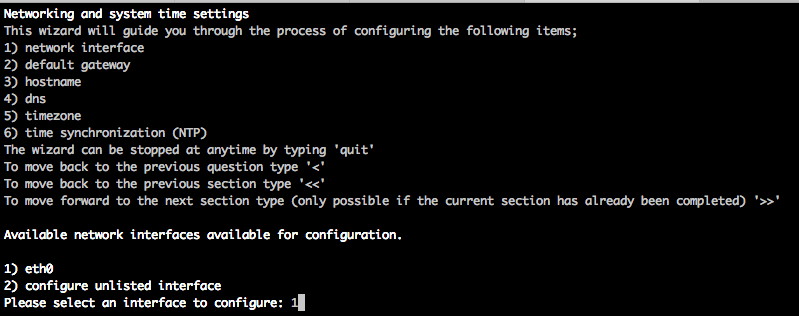
4. Inside the configure system settings menu, pick the option 1 again, to start the network configuration. At this point you will be able to pick a static IP address for your gateway, or let your virtual DHCP does the job for you. Go ahead and type 1 to start the configuration:
5. Type 1 to use the eth0 interface:
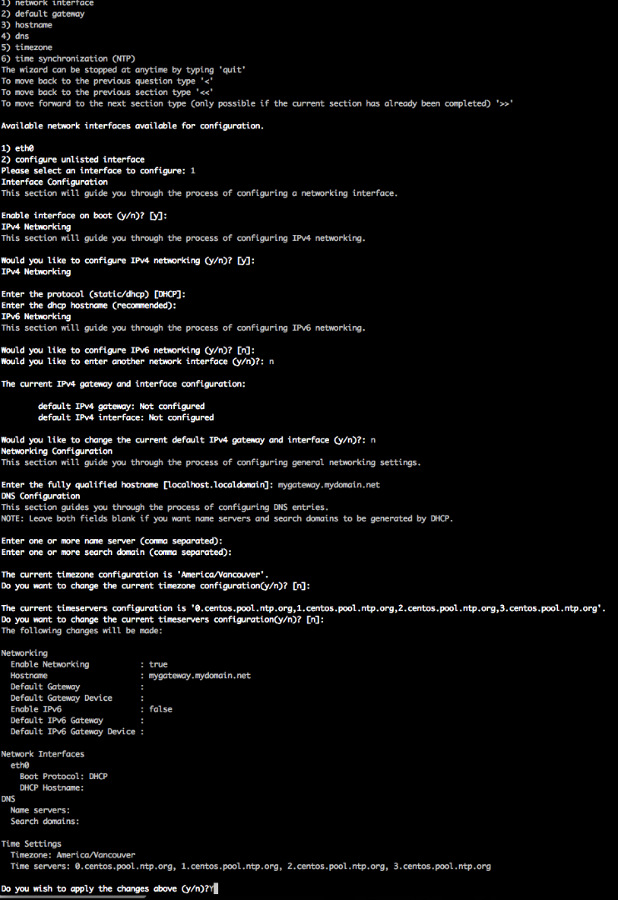
6. This is my selections during the configuration. You can change it and use whatever you want to match your network requirements. Make sure you answer Y for the last question to apply the changes you have made:
7. You may want to add your new hostname to your gateway local hosts file.
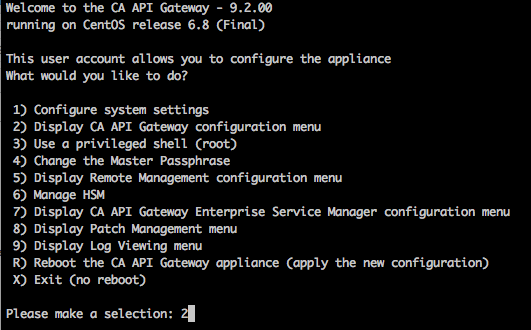
8. With the network configuration done, it's time to configure the API Gateway itself. This will configure the local MySQL database, which is used to store the gateway's stuff such as policies and configurations. To do so, get back to the main menu and pick the option number 2, as follows:
9. In the configure CA API Gateway menu, select the option 2 to Create a new CA API Gateway database as follows:
10. Answer the questions based on the following:
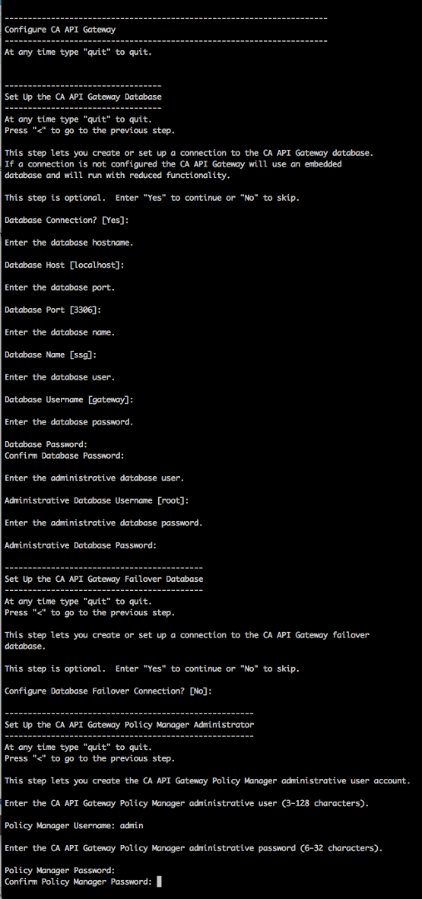
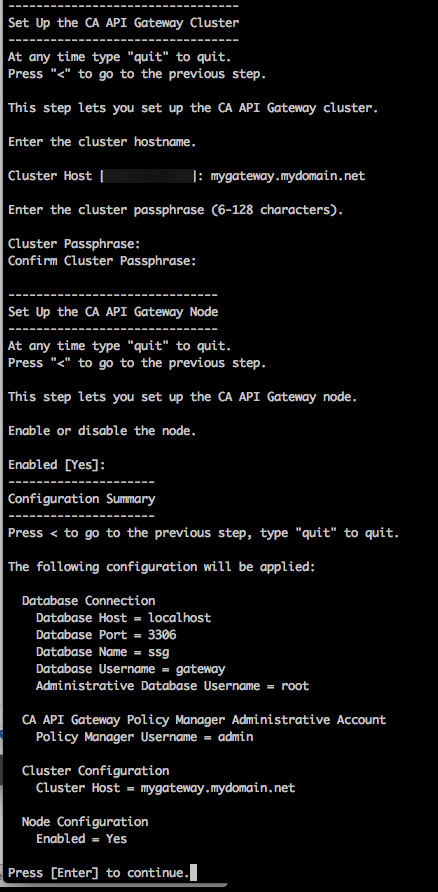
11. Please note that I was just hitting the ENTER when I didn't want to change anything that was presented to me as the default option, I mean, inside the "[ ]". Also make sure you use a password you can remember for all the users. You're going to need them later.
12. At this point your gateway is configured and you need to restart it. To do so, get back to the main menu and hit the option R to reboot your gateway. This is going to take few minutes for it to come back up.
13. When your gateway is back up, that means, you can ping it again, login back via SSH. It's important to mention that the fact you can ping your gateway doesn't necessarily mean you can access it. Remember, now you have the gateway database configured, which means, that this new service needs to come up for you to access your gateway either using any web interface or the Policy Manager. To check if your gateway is running properly, you can pick the option 2 again and then the number 7, to check the CA API Gateway status:
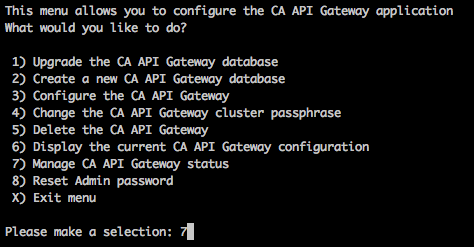
This is what you want to see when checking the gateway status:
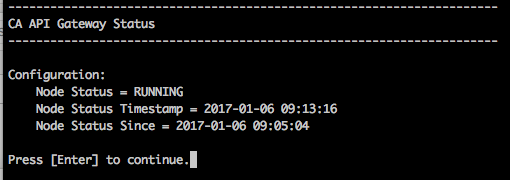
Depending ou your environment the first start of the service can take somewhere between seconds to minutes. So be patient and wait for it to show RUNNING. After that your gateway is ready to rock and roll and you can now access the Policy Manager, pointing it to either the IP address or the hostname you defined, as long as the desktop running the Policy Manager can resolve the name to the gateway's IP address. You can use your hosts file if you don't have a DNS name for your gateway.
I really hope this can help you out somehow. It's just a simple tutorial that can help those who are not familiar with the CA API Gateway.
Have a great year!!