Original article is posted here.
While Workflow is typically associated with ServiceDesk (as SD is built on the Workflow platform) for ticketing, Workflow can be used to send data to any supported and available web service, and thereby can be used to integrate with other ticketing systems. In this case, I’m going to detail the process for creating ServiceNow tickets with Workflow.
Let’s start with a short overview of how the ServiceNow web services work.
At this ServiceNow web services wiki, we see that we can simply plop the table name into a URL as a parameter:
To retrieve the direct web service WSDL description and XML schema for any given table, point to the relative URL of <tablename>?WSDL. For example, to retrieve the WSDL for the Incident table on the online demo system, use the following URL:
<instance name>.service-now.com/incident.do?WSDL http://<instance name>.service-now.com/incident.do?WSDL
Using this as a template, let’s configure a webservice library to integrate with our ServiceNow instance.
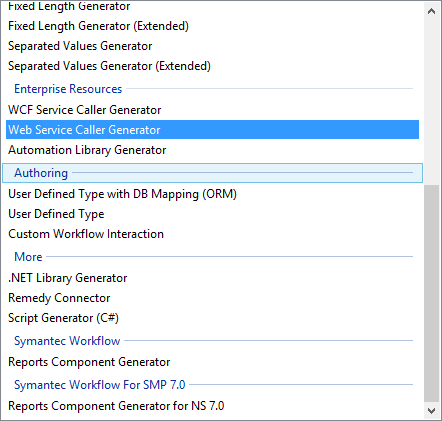
Create a new Integration project, and select “Web Service Caller Generator” from the list, and give it a name.
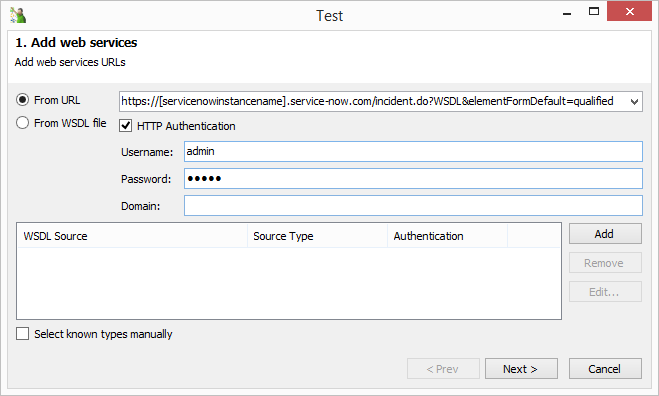
Enter the URL of your ServiceNow instance (preferably a test instance, if available) and format like this:
https://{}.service-now.com/incident.do?WSDL&elementFormDefault=qualified
where your SN instance replaces the {} brackets. So if my SN test instance is called atmaworkflow.service-now.com, the URL for the “From URL” field will look like this:
https://atmaworkflow.service-now.com/incident.do?WSDL&elementFormDefault=qualified
There are several places in the ServiceNow web services documentation that mention editing a specific value in the Web Services section. I had some issues in my test lab, but by also adding the parameter “elementFormDefault=qualified” to my web services URL, no further issues occurred between my component library and the published Workflow project. For this test, do both.
Errors such as:
The critical error failed execution on component [ComponentName] : Null return is not allowed
will occur if the previous steps aren’t followed.
Note – any corrections or changes that are made to components in the integration library may not affect the components you’ve already configured on the Workflow canvas. The “Url” value is an example of this. Any changes made to the URL in the generator should be checked on the Workflow project side to ensure a match, and the generator wizard’s page 2 “Default URL” field should be validated as well.
Enter an admin account (or an account scoped to achieve whatever you need to do with this integration) and admin password. In the case of this test, I’m using the internal admin account, and so the domain is blank. Click “Add” to add the URL to the generator.
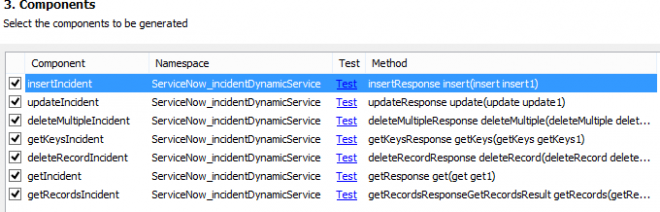
Your component names may look different than mine depending on how you configured the “Name pattern” field on the second page. The “insert” component is the one we’re going to use to create a ticket. “getRecords” will retrieve incident data.
Click through the wizard and “Finish” on the final page. Compile and close the integration library. The component is now ready to configure.
Drop an “insert” component onto the Workflow canvas, and ensure that the “Url” field either populated automatically from the library, or that you enter the proper Url as either a constant (not so good) or variable (better plan) value.
The “insert” value is the main input of this component, and will allow for mapping in any field exposed by the webservice.
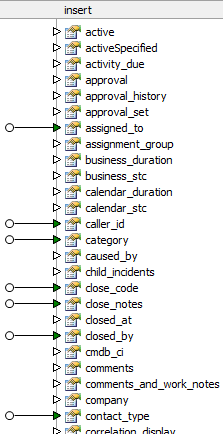
Map over any values you want to have carried over into a ticket. Note that while no values are required for this component, a blank-mapped ticket will not be very usable or useful.
Here are a few guidelines to follow with common mappings
{source variable part -> destination variable part}:

user.user_name -> incident.caller_id

category.value -> incident.category

location.name -> incident.location
Note that any sys.choice return will use the “value” piece for mapping. sys.choice returns include lists like Category, Subcategory, State, Impact, Urgency, Priority, etc., and all pull from the same web service. The difference between the components that pull each list is a filter input. We’ll cover more on that later. (if you want to experiment in the meantime, here’s the URL: {https://atmaworkflow.service-now.com/sys_choice.do?SOAP&elementFormDefault=qualified}. for example, to pull State choices, set the filter parts in the “getRecordsComponent” to {element=state} and {name=task})
The output of the “insert” incident component will include a ticket number (“number”) as part of the output. Note that this component may not output data if the elementFormDefault values aren’t configured properly in ServiceNow.