You are going to want to downgrade the VM hardware version to 19 or lower. This can be down by powering down the VM, editing the vmx file, and powering back up. Make sure not to have any snapshots, but do have backups. You can test this by cloning one first. I do want to do this is not recommended, but I have had to resort to this to when hard times come knocking.
1. An option I have not tried, but have read articles that says it should work is:
- Power Off the VM: Ensure the VM is powered off.
- Export the VM: Use the "Export OVF Template" option in vCenter to export the VM.
- Import the VM: Import the OVF template into the target ESXi 7 host.
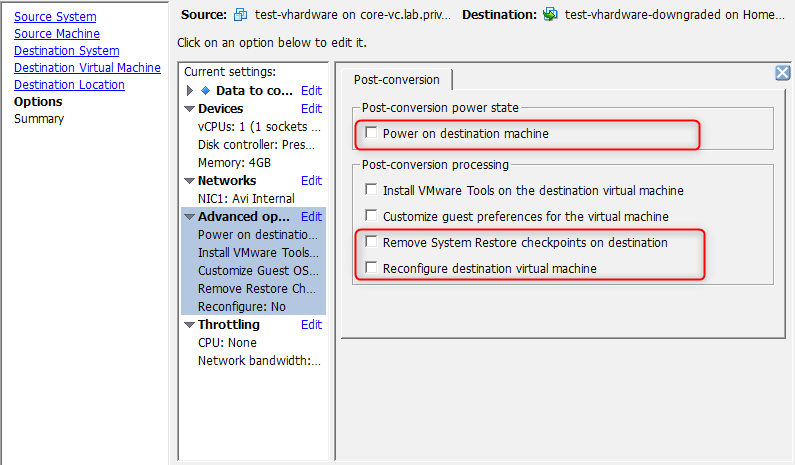
2. A less strenuous option is using VMware vCenter Converter which allows you to effectively migrate it to another host and select a hardware version in the process.

3. Downgrading VM Hardware version via CLI / VI.
-
- Make sure the VM to downgrade is powered off.
- Enable SSH on the host and connect to it with a client such as putty. You can also use the local ESXi shell if that works better for you.
- Once connected to the host, change directory to the VM’s folder.
cd /vmfs/volumes/my_datastore/my_vm |
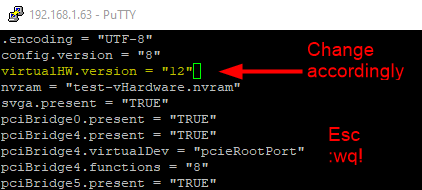
4. Edit the vmx file using vi and change the line “virtualHW.version” to whatever version you need. Refer to the table displayed earlier. In the screenshot I picked 12 as a random number.
Once in vi, hit “ i ” to enter edit mode, hit “ escape ” to leave edit mode and type “ :wq! ” to save and exit vi.

“The virtualHW.version key controls the VM’s compatibility level.”
-
- The VM is still at the same version in vCenter. We need to reload the vmx file to see the change. First, find the VM’s inventory ID (Replace “test-vHardware” with your VM’s name).
vim-cmd vmsvc/getallvms | grep test-vHardware |
|
6. Finally, reload the VM’s config file by using its inventory ID, in my case it is 11.

Let us know how it goes. Fingers crossed!