Perhaps it would be useful if I stepped through a typical workflow or two so we can check if there are differences. I'll be using a VIO 3.1 lab for the screenshots below. I'll start by grabbing a generic Ubuntu 14.04 image in qcow2 format from Ubuntu's cloud image download site:

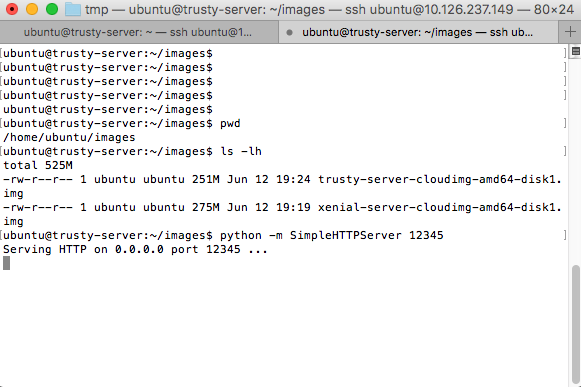
The first method we'll try is the import task method I mentioned earlier. When you create an import task, you basically tell Glance "please go get the following image from the specified location and convert it for me". That means it needs the image to be reachable via HTTP. To take care of that, I'll just use a Python one-liner to temporarily start a webserver on port 12345 of the machine I downloaded the image to (you could also use a real HTTP server of course):
That done, we're ready to create the import task. Notice here that I'm setting the adaptertype and disk type in the process. An improperly set adapterType is the most common cause of the "Operating system not found" error when booting an instance (if you don't have it set on an image, you can add that property to it via the CLI, API, or Horizon without recreating the image):

This will take a few minutes to process and Glance downloads the image and converts it for you. You can monitor progress via Glance or the CLI. Once it's done, you should see the image available with all the proper attributes set:

And we can try booting it:
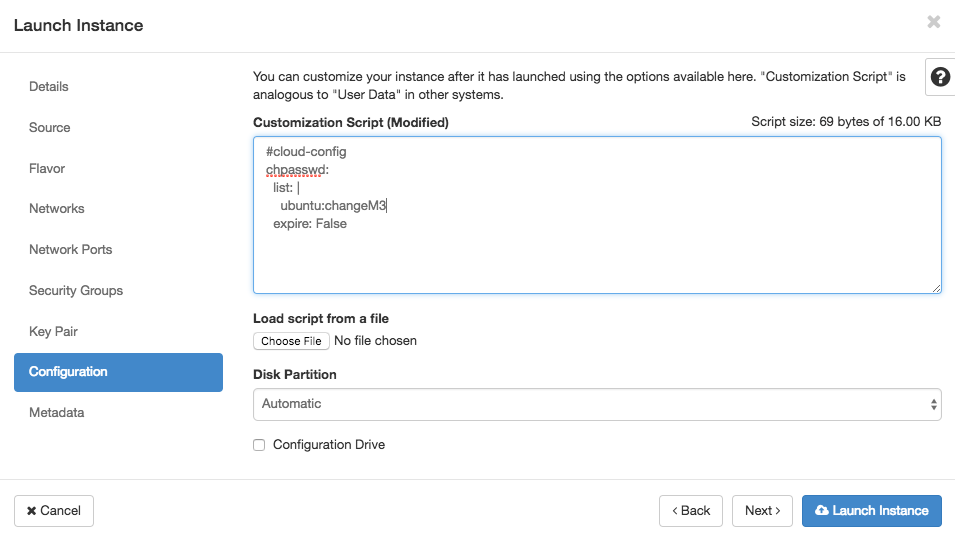
Since you asked about passwords here, I'll go ahead and use cloud-init to set the password for the Ubuntu user:
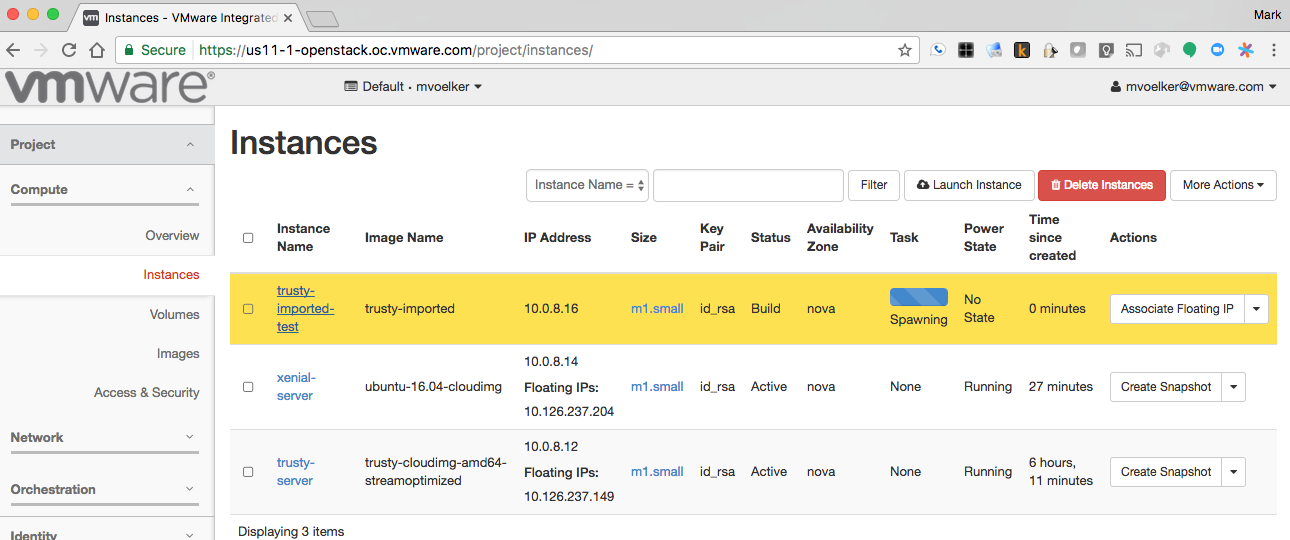
Once I click the Launch button, the image will start spawning:
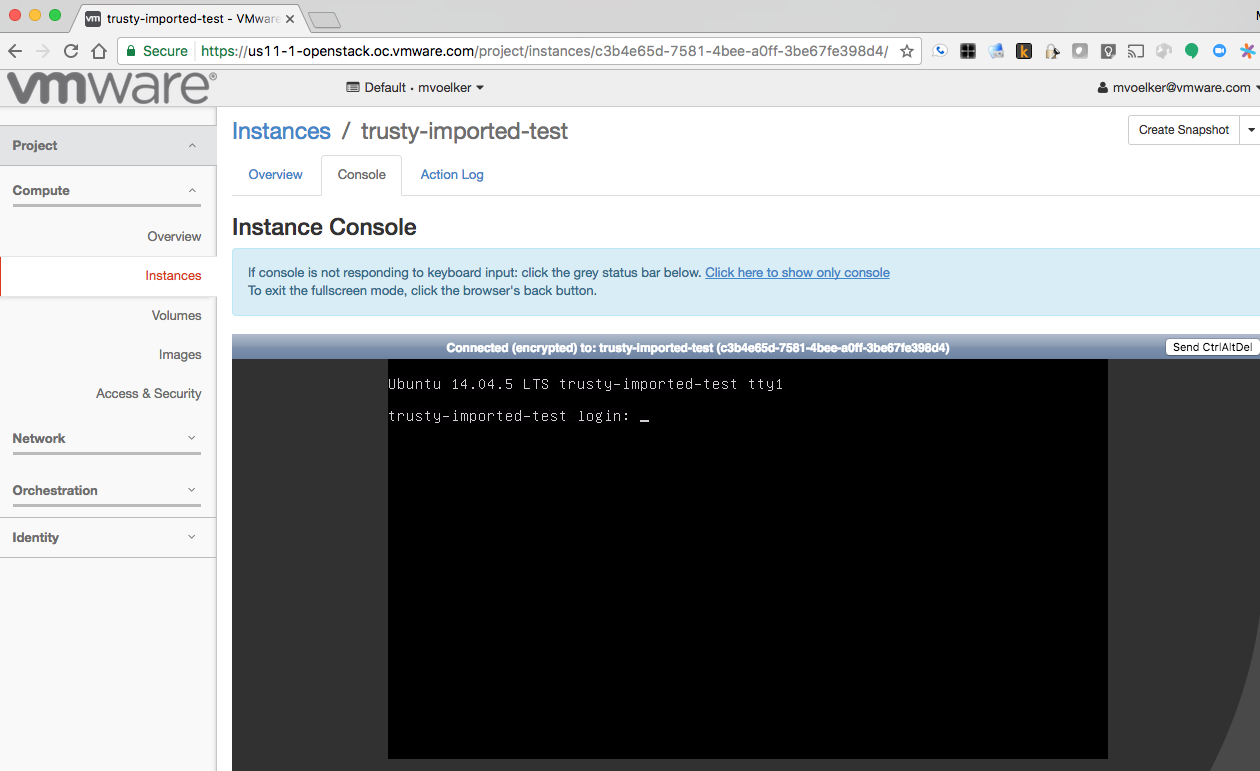
Once it's done booting, I can use the Horizon console to verify that Ubuntu started up properly and shows me a login prompt:
Next, I'll try logging in with the credentials I set via cloud-init:
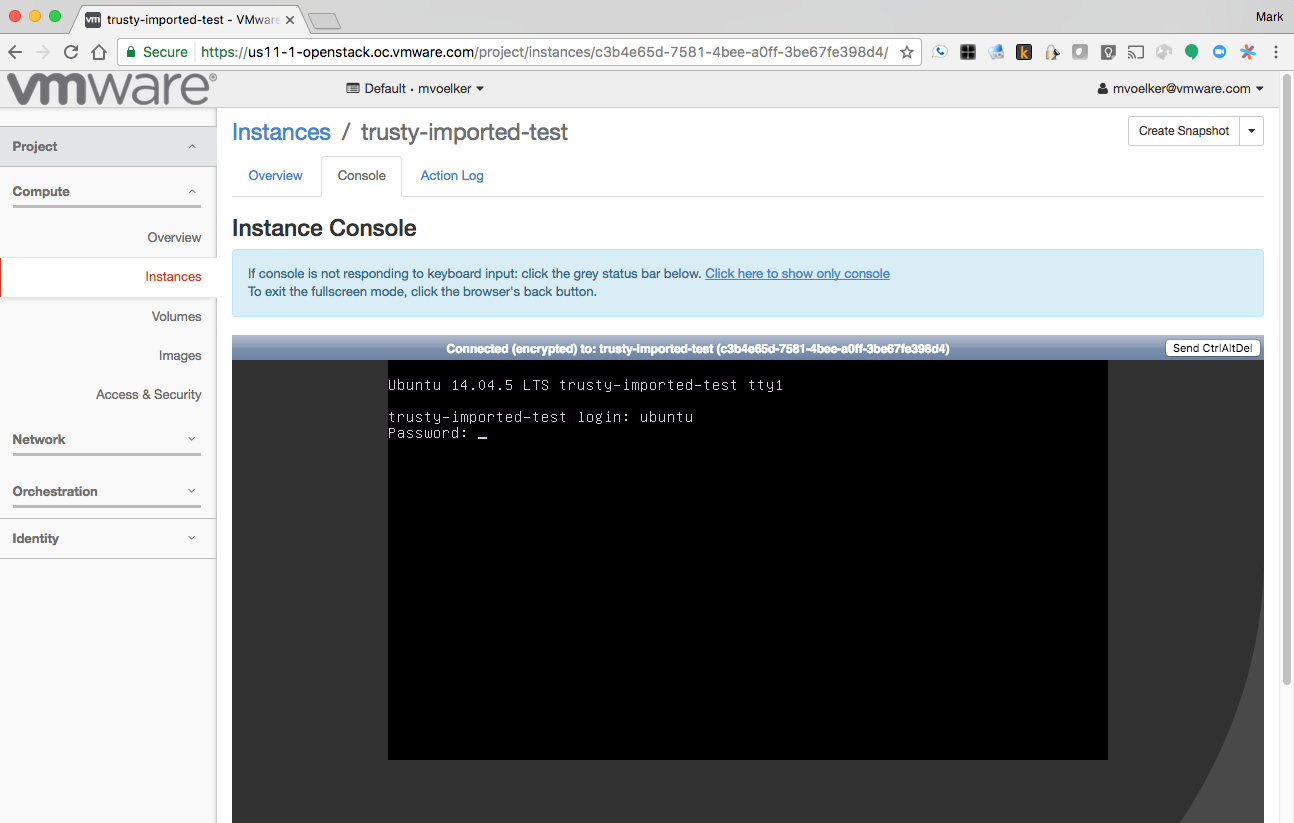
Success!

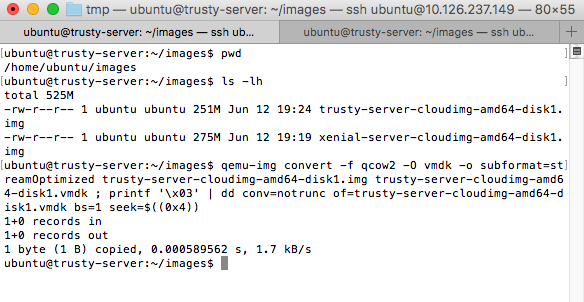
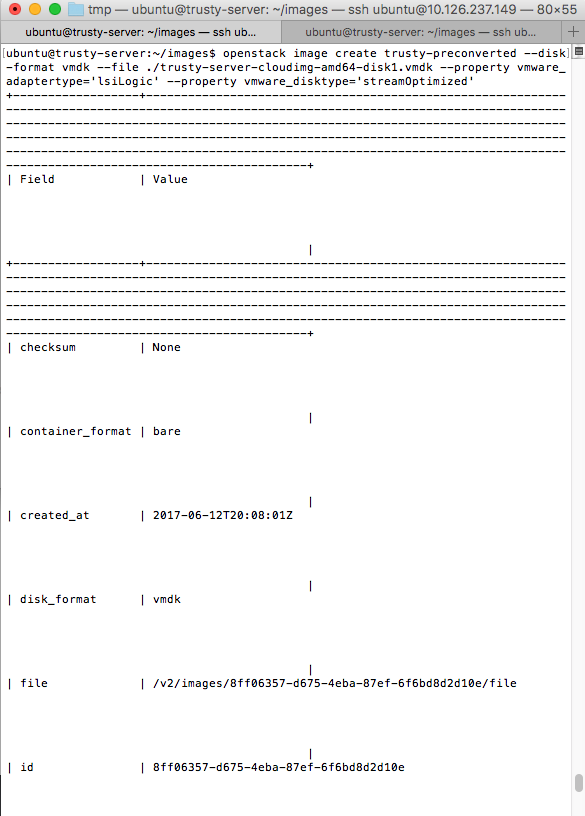
So, the import method appears to be working well here. I may want to pre-convert my image to a VMDK instead though. To see how that works, let's go back to the machine I downloaded the image to in the first place and use qemu-img to convert it (note: you'll need to "sudo apt-get install qemu-utils" if you haven't already). Notice here that after I run qemu-img, I also run a printf command. This is due to the fact that in this lab I'm using an older version of qemu tools which had a bug when creating a streamOptimized image. Off the top of my head, I believe the fix we sent upstream for that got merged in version 2.5 (but don't quote me on it; I'm just working from memory here...if you're curious I'll be happy to check and get back to you):
I can then upload the image to Glance. This time I'll just use the "openstack image create" command since we don't need to use an import task (although we could, if we wanted--import tasks don't have to convert between formats; it's just something useful they can do):
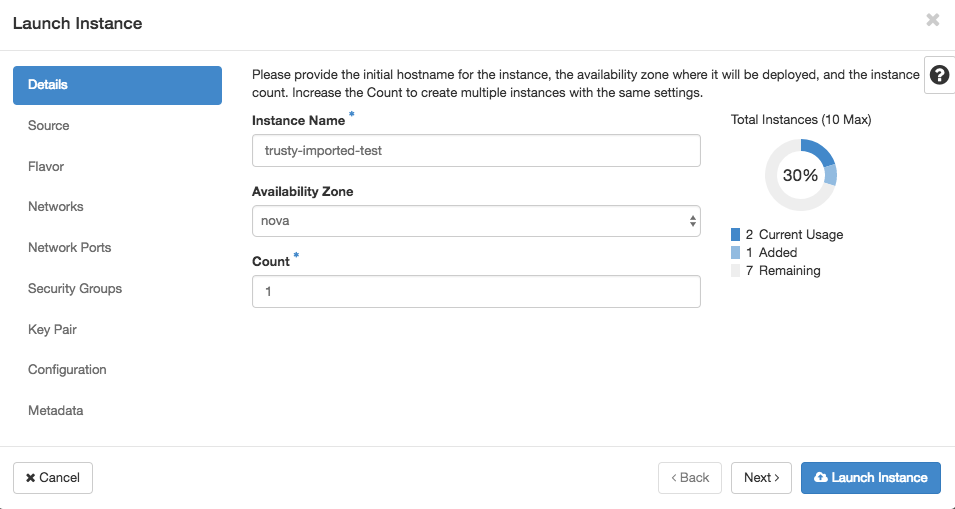
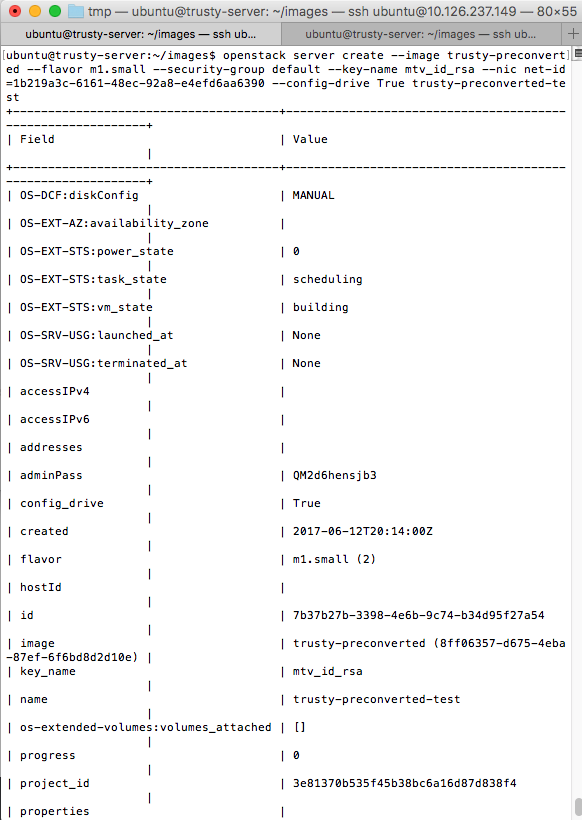
Once the image has been created, I'll boot a server from it. Notice I used the config drive option here--that's not necessary (we didn't use it when booting the last instance); I was simply in the habit of typing it since I was working on something involving config drives earlier in the day. Once I had the screenshot and I realized I'd used it, I figured we may as well leave it in there to demonstrate that config drive also works. =)
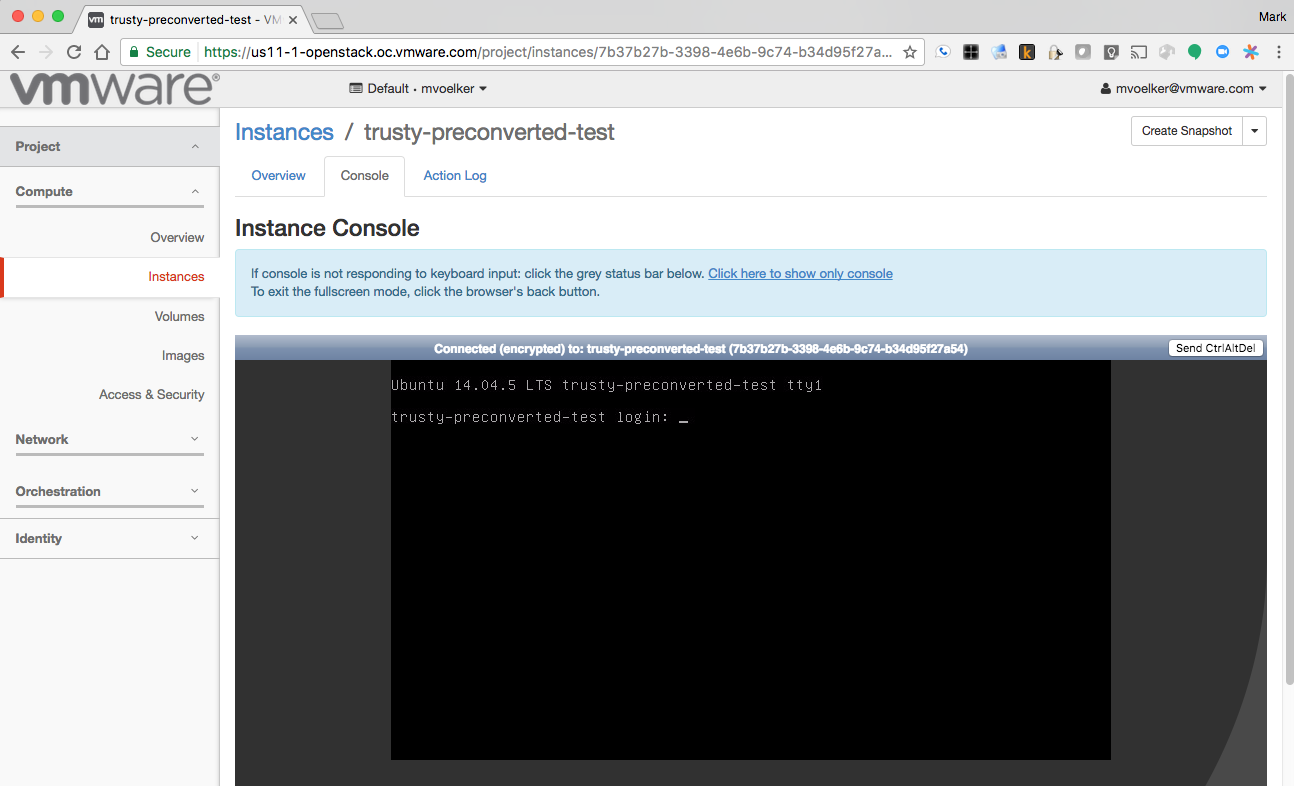
And again, we'll switch over to Horizon to verify that Ubuntu started up correctly:
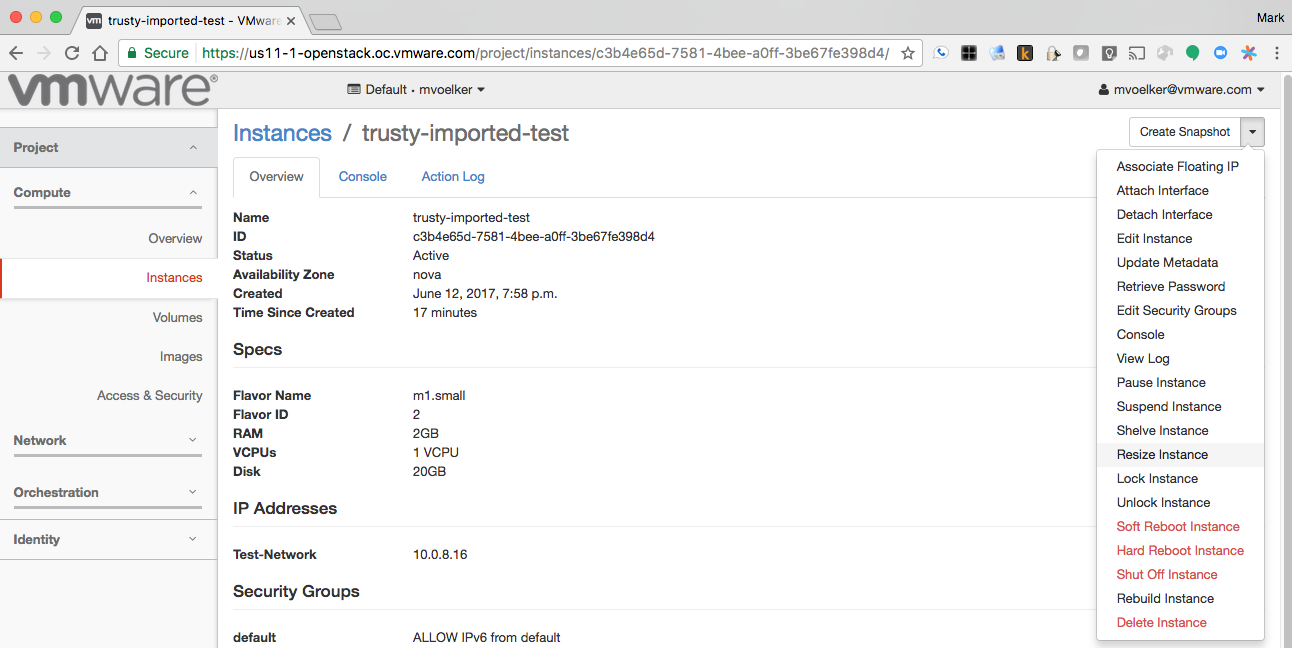
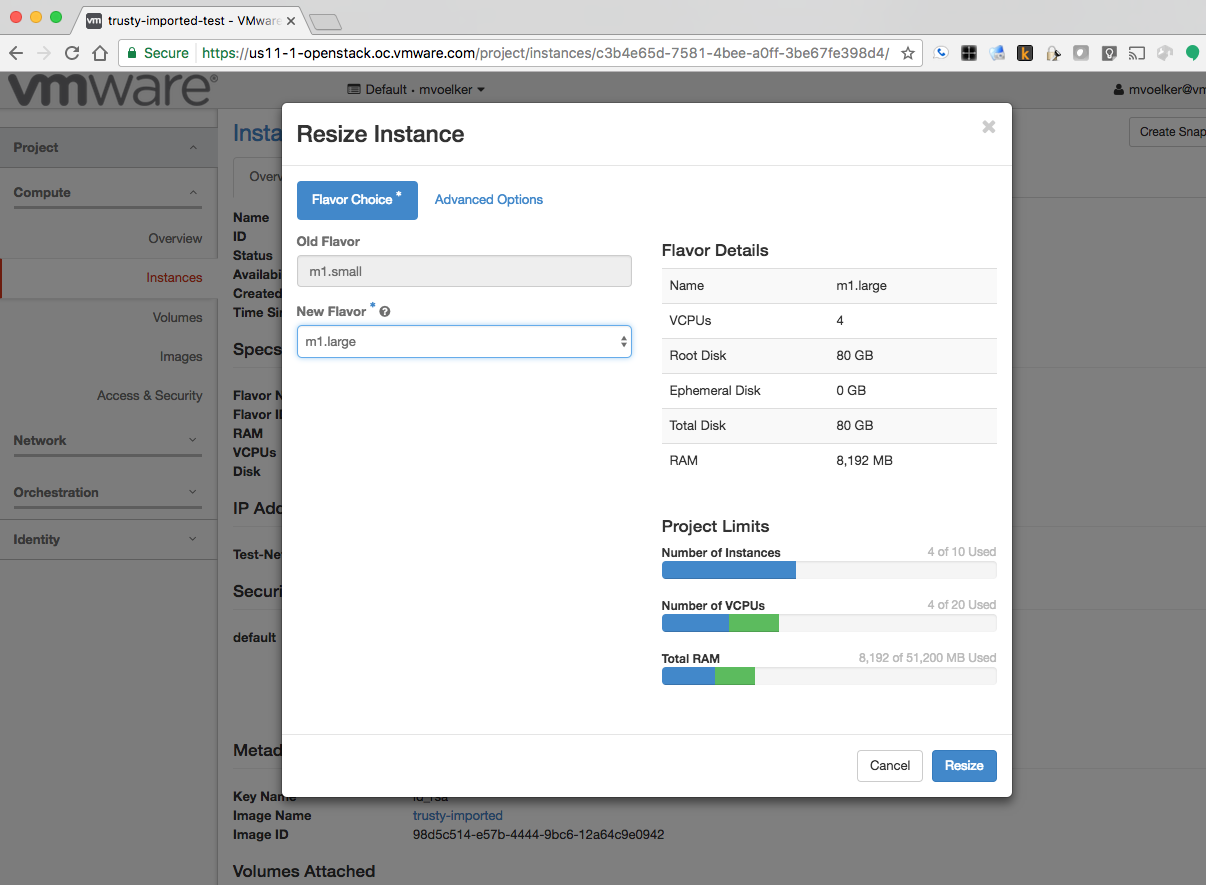
You also asked about resize, so let's take a look at that too. First, we verify that the first instance we booted is an m1.small with 1vCPU, 2GB RAM, and 20GB of disk. Then we'll click on "Resize Instance" in the dropdown menu on the right:
We'll ask for the instance to be resized to an m1.large with 4 vCPU's, 8GB of RAM, and 80GB of disk:
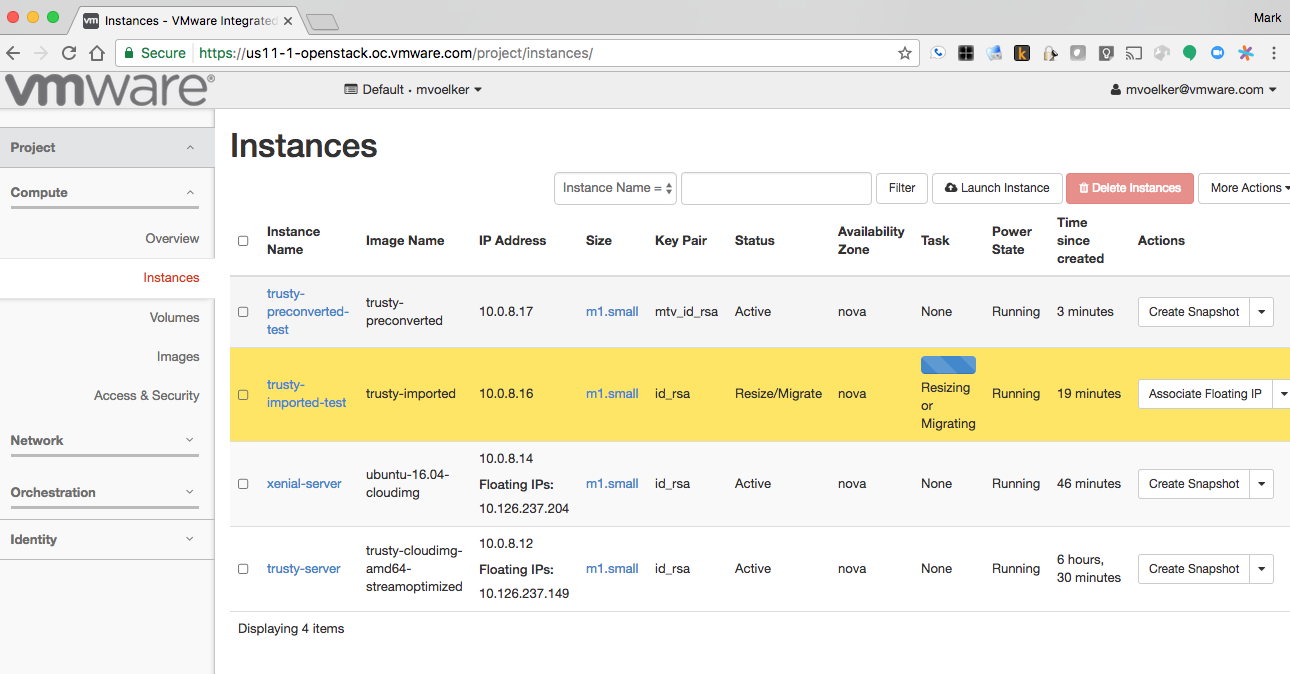
The instance should start resizing:
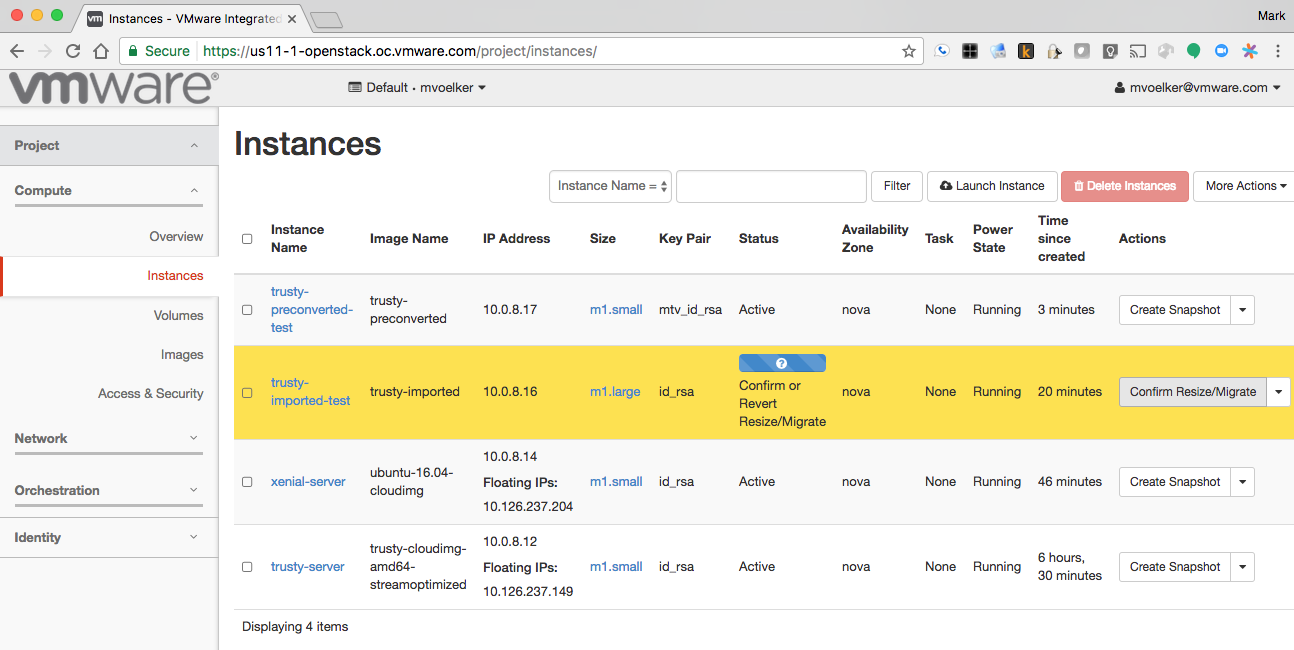
Eventually we'll be asked to confirm the resize:
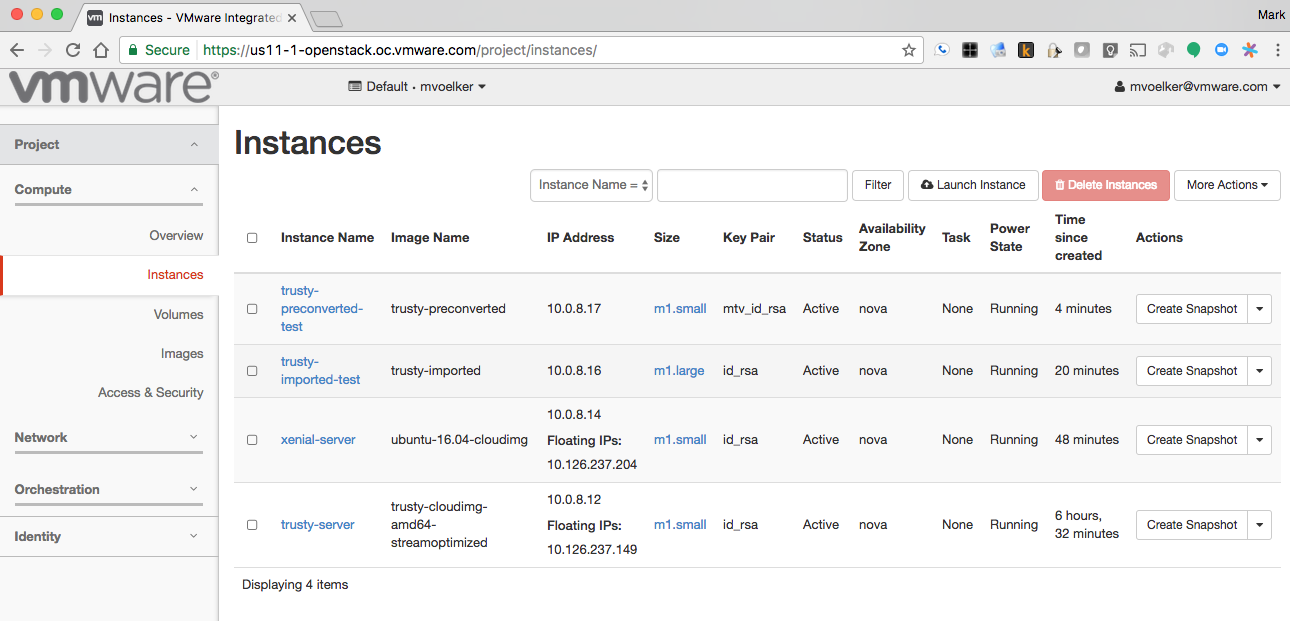
Once we click the confirm button, we're finished and can see that the instance listed as m1.large:
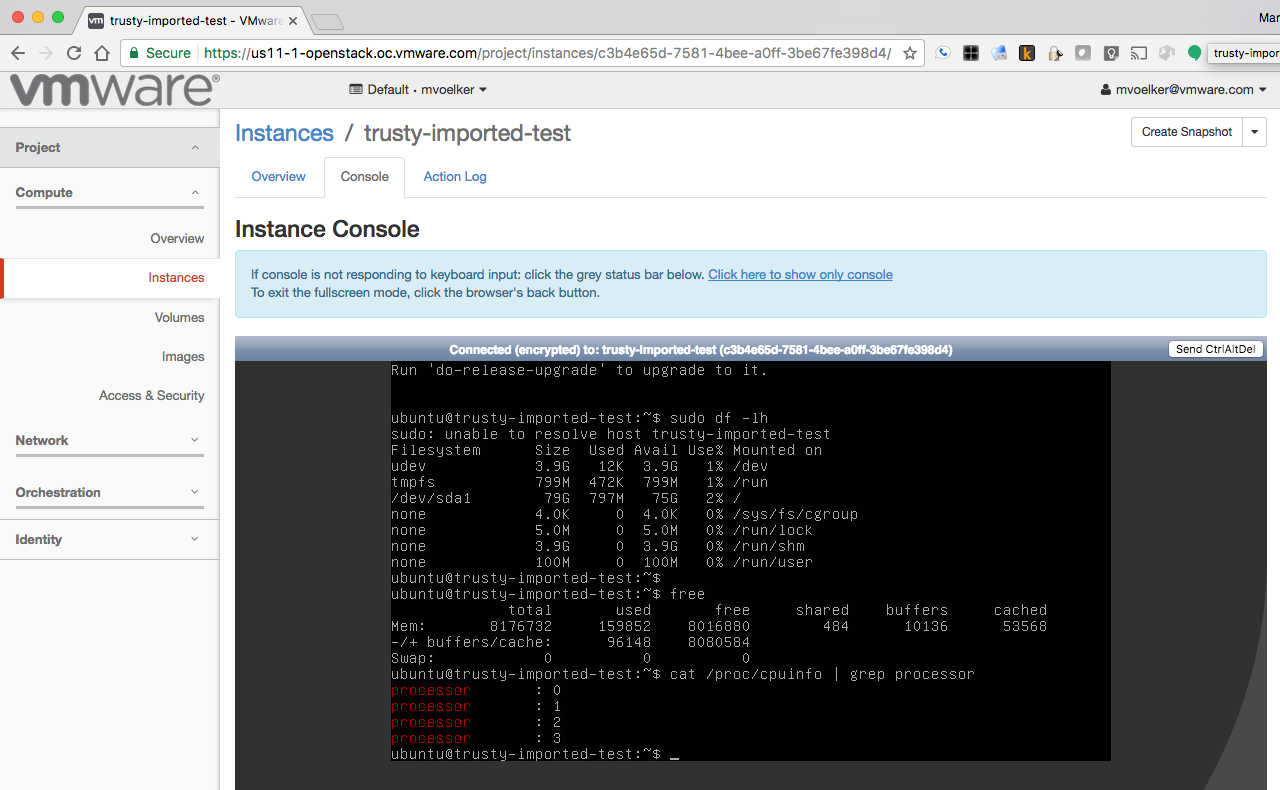
If we log back in to the console, we can verify the new specs: