This article will show you how to use Ghost Solution Suite 3 to take and deploy images across a network using drive mapping. This is a method that bypasses the Ghost console, and will work even if the console is inaccessible for some reason (such as a SQL or IIS issue). This method is for creating and deploying images to one machine at a time. If you have a mass deployment, Ghostcasting is a better solution.
Prerequisite:
You will need a method to boot the client machine(s) into a Pre-OS environment. I recommend these steps for creating boot media. These instructions assume that you have boot media created with those instructions.
To Create an Image
1. Boot the machine with a stand-alone boot disk with Ghost (see Prerequisite, above).
2. Ghost will launch; exit Ghost. You will have a command prompt.
3. In the command prompt, use the following to map to the location where the image you want to deploy resides:

net use T: \\servername\C$\foldername /user:username password
An explanation of the above command: It will name the folder (foldername) in the C share on server (servername) to T:. Please note that T is just a suggestion for the drive letter, and is not to be used if there is already a mapped drive T on the network. It will connect with the credentials specified. More info from Microsoft: http://www.microsoft.com/resources/documentation/windows/xp/all/proddocs/en-us/net_use.mspx?mfr=true
4. Once the command line above has been reported to complete successfully, from the command prompt (it should be at X:\Ghost>) type Ghost64.exe and press Enter. Ghost will launch.
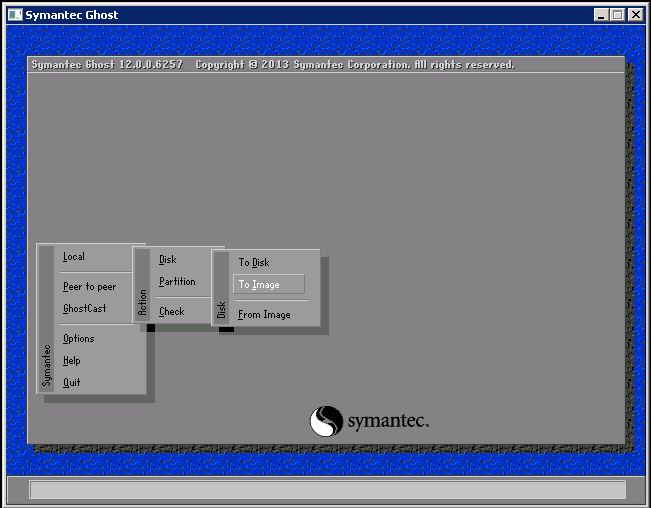
5. In Ghost, choose Local > Disk > To Image.
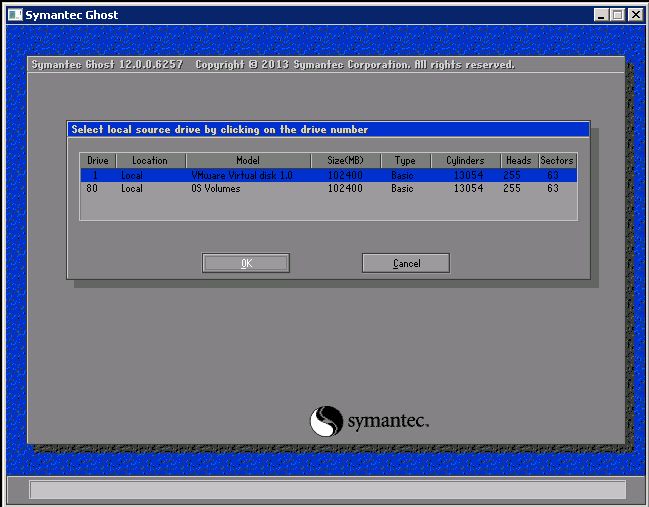
6. It will ask for the source drive, and you will typically be choosing Drive 1. Please ignore 'Drive 80 - OS VOLUMES'. Also note that if you used USB boot media, the USB drive will show up on the list. If there is any confusion, check the 'SIze(MB)' column to verify it based on size.
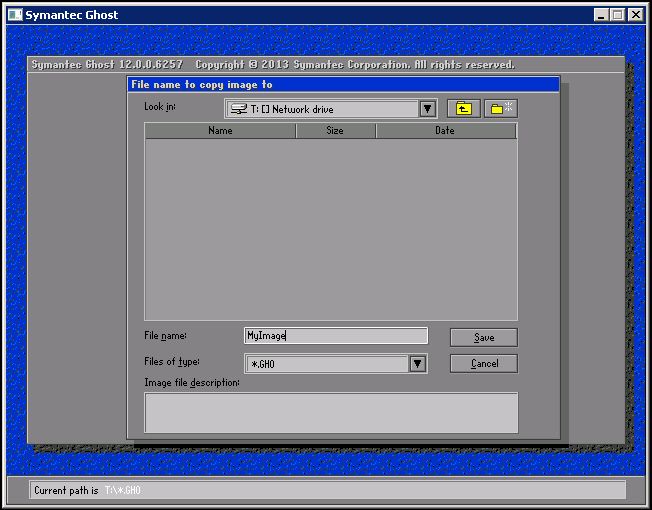
7. Make sure you select the mapped drive in the 'Look in:' dropdown menu at the top, then specify a filename for the image file.
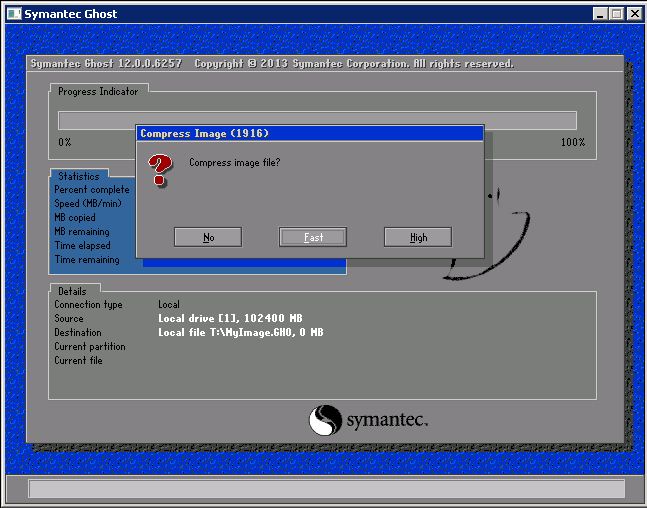
8. Select the compression level. We recommend using 'Fast' compression.
9. Proceed with image creation.
To Deploy An Image
1. Boot the machine with a stand-alone boot disk with Ghost (see Prerequisite, above).
2. If your boot disk automatically launches Ghost, close Ghost. You will have a command prompt.
3. In the command prompt, use the following to map to the location where the image you want to deploy resides:

4. Once the command line above has been reported to complete successfully, from the command prompt (it should be at X:\Ghost>) type Ghost32.exe or Ghost64.exe and press Enter. Ghost will launch.
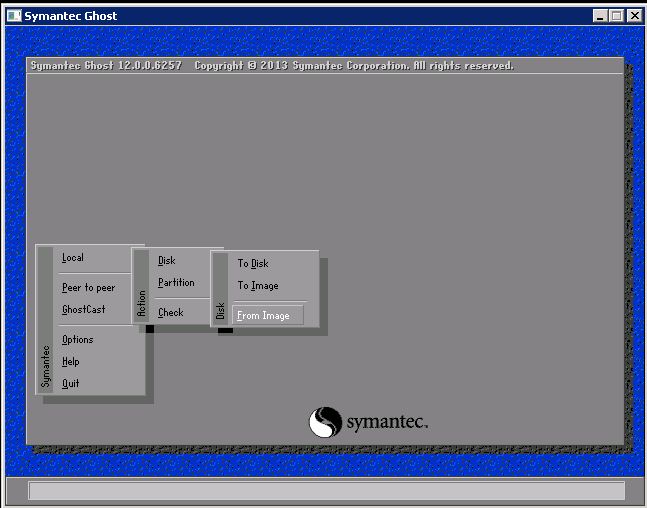
5. In Ghost, choose Local > Disk > From Image.
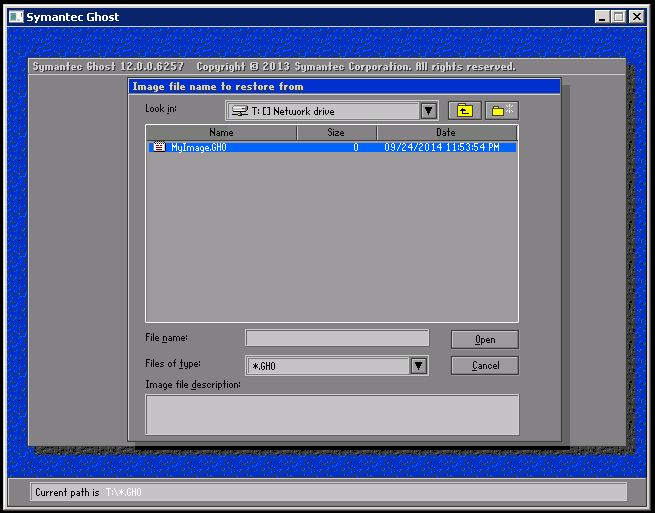
6. It will ask for the source image and destination drive. The source image will be in T: (mapped above). Select the appropriate *.GHO file. The destination drive will be the drive you are deploying to.
7. Proceed with image restore