Original article is posted here.
Note that this method can be manipulated to perform other actions when the CheckBox state changes.
In response to another post, I built a quick Workflow demo project to show how to use CSS and Javascript to highlight a required section panel when a CheckBox is checked.
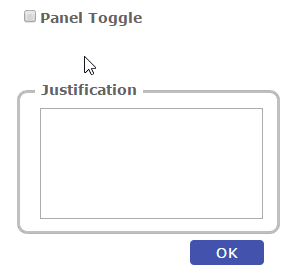
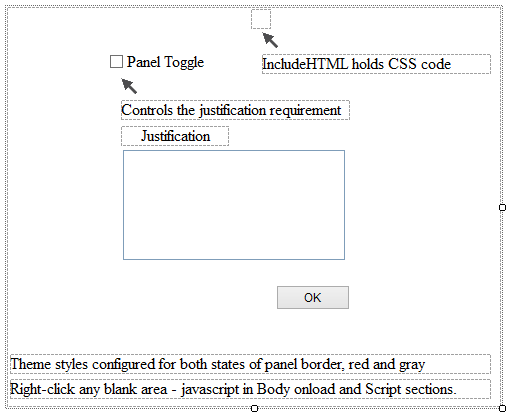
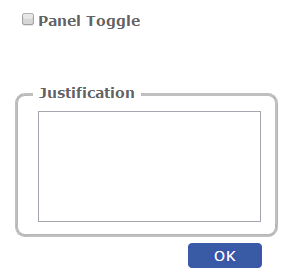
There’s not a lot to it – here’s the layout in the form designer.
There are 2 different methods of achieving the “validation” effect in the demo package – one way (oninput/onchange) is as seen in the gif image at the top of this article. The second way (onsubmit) is tied to the button press, illustrated below.
We’ll cover the first method first.
In the demo, we will place several components on the form palette and give some of them Control Ids:
- CheckBox (TestCheck)
- Panel (TestPanel)
- TextBox (TestText), set to multiline mode
- IncludeHTML to house the CSS
- Button
- Label is optional, simply for context
Create 2 custom theme styles to handle the CSS classes.
- .aNormalPanel (apply this one to the Panel in the Workflow form designer)
- .aAttentionPanel
Pertinent CSS code (remember to wrap all CSS code in style tags in the IncludeHTMLcomponent):
.gaNormalPanel {
border: solid 3px #c0c0c0;
border-radius: 10px;
}

.gaAttentionPanel {
border: solid 3px #cd5c5c;
border-radius: 10px;
}
Create a function to handle the class name swap and state evaluation. This function will sit in the Script section for the form.
function SetPanel() {
var checkBox = document.getElementById('TestCheck');
var testPanel = document.getElementById('TestPanel');
var testTextBox = document.getElementById('TestText');

if (checkBox.checked && testTextBox.value === '') {
testPanel.className = 'gaAttentionPanel';
}
else {
testPanel.className = 'gaNormalPanel';
}
}
Create a Body onload event. This is where we will create the “onchange” and “oninput” properties for the CheckBox and TextBox elements. Those properties will call the function in the script section.
var checkBox = document.getElementById('TestCheck');
var testPanel = document.getElementById('TestPanel');
var testTextBox = document.getElementById('TestText');

checkBox.parentNode.setAttribute('onchange','SetPanel()');

testTextBox.setAttribute('oninput','SetPanel()');
That should do it for the first method – test it out!
Method 2 is about validation upon the user attempting to submit the form. We’re going to be creating a Form onsubmit event that will call the same function we used in the first method, but with a slight adjustment.
Our CSS code looks the same in this method; that part hasn’t changed.
Here’s the adjusted javascript for the function in the Script section:
function SetPanel() {
var checkBox = document.getElementById('TestCheck');
var testPanel = document.getElementById('TestPanel');
var testTextBox = document.getElementById('TestText');

if (checkBox.checked && testTextBox.value === '') {
testPanel.className = 'gaAttentionPanel';
return false;
}
else {
testPanel.className = 'gaNormalPanel';
return true;
}
}
The difference here is that we are now returning the result of our evaluation. That result will be used to determine whether the form may be submitted.
Here’s the Body onload section, where we add the onsubmit attribute to the Form element:
var form1 = document.getElementById('form1');

form1.setAttribute('onsubmit','return SetPanel()');
That’s all there is to it! This concept can be applied in any variety of ways. The potential comes from using the Body onload event to add event attributes to elements, such as oninput, onchange, and onsubmit.
Demo attached to this article.
Featured Components
TextBox
CheckBox
Button
IncludeHTML
Panel
Label