This article is meant to provide an overview of using Adobe Application Manager Enterprise Edition (AAMEE) in conjunction with the Symantec Management Platform to package and distribute Adobe Creative Suite 5 solutions.
Adobe solutions are used across many industries and businesses every day, and the Creative Suite is no exception. Comprised of multiple applications, Creative Suite 5 poses a somewhat unique set of complexities when it comes to the packaging and deployment of the various products in the suite. Thankfully Adobe has provided a great set of resources to assist with the packaging and deployment of their solutions, and the aim of this article to highlight those resources and how they can be integrated with the Symantec Management Platform.
Adobe Application Manager Enterprise Edition.
Per Adobe's website, AAMEE "...offers IT specialists in enterprise organizations a straightforward and customizable way to wrap Creative Suite applications as MSI or PKG for silent deployment via industry standard tools..." This section will help you get acquainted with where to get the AAMEE and associated resources as well as a few screen shots to walk you through the process of creating a package from CS5. It is assumed that you already have access to the CS5 install files for creating these new packages.
First off, you will want to download the version of AAMEE that is appropriate for your platform from the following site (I will be using the Windows version for this article):
http://www.adobe.com/devnet/creativesuite/enterprisedeployment.html
Once downloaded, the first package will extract the install files to a directory of your choosing
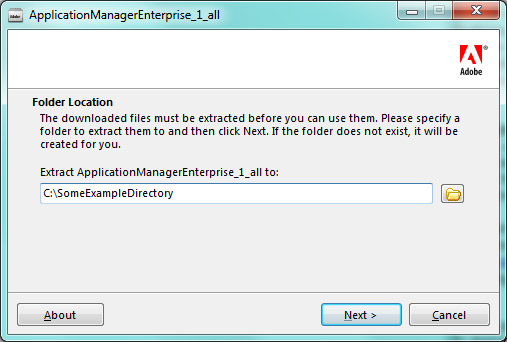
To install AAMEE, go to the directory where you extracted installation files and run Setup.exe. Follow the prompts to finish the installation.
Now that the solution is installed, we can get started by launching AAMEE and you should be presented with the following screen. (UPDATE! For version 1.2 of AAMEE, the version of AAMEE is displayed on the bottom of the screen)
(NOTE: the package fields are enabled only after you select either the Installation Package or Update Package button. )

I decided that I want to just package up Photoshop and Illustrator for this particular package so I named it as such (this can be whatever you want) and the package will be created and saved to my local drive. The most important field here is "Locate the Product Install Folder", as this will be the location that you have your CS5 install files stored.
Next you have the option of add a serial number for the install, in this case I have decided to proceed without serializing. You will note that it says "Users will be able to input a serial number later". This is important to note as there is an Adobe Provisioning Toolkit Enterprise Edition that we will discuss later. It will provide us a CLI for tracking and managing the serialization of CS5 products post-install.

Now we will be able to select which options (products) and their subcomponents we want to install. Again, for this example I am selecting Photoshop and Illustrator, and you'll notice that there are subcomponents to each application that you can choose to include or not. One particularly nice feature of AAMEE is it also lists the sizes of each package and each component as well as the total size of the package. (NOTE: In this case I also selected all the subcomponents of Photoshop, but I did not include a screen shot).

Once you have made your selections, you will now have a nice set of configuration items that help do a lot of the heavy lifting that was the domain of command line switches previously. Things like "Disable EULA" and being able to change Adobe Updater options (even just where you want to install the applications) are all yours to configure. If you have ever packaged some of the older Adobe products this is a welcome relief.

Since we are dealing with software, inevitably there are going to be patches/updates. Adobe provides a mechanism to both stage updates on an internal server, and then you can point AAMEE to those updates to include in the installation package. While I won't get into how to set up the update server in this article, but you can download the tool from the initial link I provided earlier or directly from here:
http://download.macromedia.com/pub/developer/creativesuite/AUSST/AdobeUpdateServerSetupToolCS5.exe
(NOTE: it is command line driven, but it's pretty straightforward)
This series of screen shots show me including updates; that said, you do not have to include any updates at all. To just build the package simply click build.
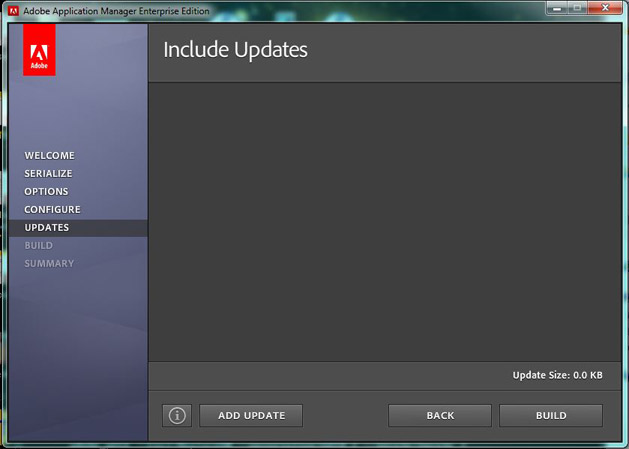
(NOTE: Selecting the "Add Update" option you are required to point to the CS5 update zip/dmg files directly instead of the directory. As of AAMEE 1.2 mass import of zip/dmg files is supported. Also, technically you can add any updates you please, meaning even though I have created a package that only includes Photoshop and Illustrator; I could, for example, select and add an update for After Effects. If this were to occur, this will not affect the installation of the package and would be applied to the endpoint if After Effects is installed otherwise it's ignored.)
Finally, when you select the "Build" button, it will create the package (MSI for windows in this Case). And output it to the "Save To" directory you specified earlier. The process will vary in length of time depending on number of applications, packages, updates etc.

USING SMP TO IMPORT YOUR NEWLY CREATED PACKAGE
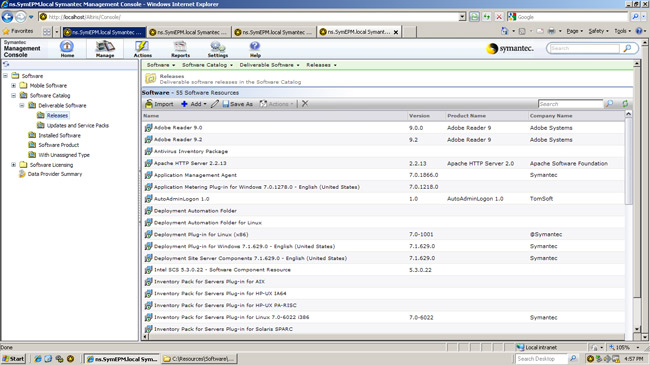
Now that we have created out installation files, we can import our package into the Symantec Management Platform. First we need to navigate to Manage>Software:

We will then need to navigate to Software>Software Catalog>Deliverable Software>Releases (since this will be a release and not an update or service pack:
Select Import and you should see the following screen:
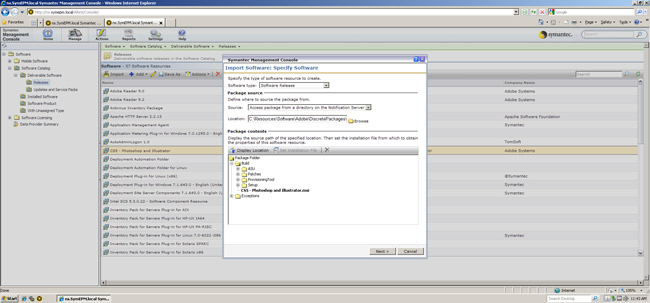
In this particular case I am using the SMP console from the physical server, so my "Source:" is "Access Package from a directory on the Notification Server". You will then select browse to search through your local disk on the SMP server. Once that is select click the "Display Location" button and select your files that are part of the package. IMPORTANT! You will need to set the Installation File by selecting the file name responsible for starting the installation (in this case CS5 - Photoshop and Illustrator.msi) and then click the button "Set Installation File". Notice in the picture above, that once I have selected my installation file the text is bolded.
Select Next and you should see the following screen:

In this particular case you will select "Create a new software resource" (have run through this once before, so I could choose to update an existing software resource). Fill out/select the appropriate information, this will be the meta data associated with out new software resource and will come in handy the more detail you provide. IMPORTANT! Ensuring that the Company is correctly selected/identified in the "Company" field is very important as this will affect Asset and License Management accuracy.
Since we left the "open software resource for editing when finished" checked, you should now be brought to the following page:

The properties page provides a high level overview of some of the items we created initially for our package. Note that the category is one I created specifically for the various Adobe product bundles I can create with AAMEE.Adobe. IMPORTANT! The "Software Product" field directly correlates to how licenses are tracked. It is crucial during the creation process to get this right based on how you are tracking your licenses for Adobe products. In other words, during the "software product" creation process think ahead to how that will map to the deliverable software package; this will be used to correlate different versions of the same product, and assists in reporting purposes I would highly suggest watching the following Symantec Connect video that Mark Hopper created on software license management with Altiris Asset Management Suite: Manage Software Licenses with Asset Management Suite 7
As well as referencing the following article by Joel Smith: Symantec Software Management 7.0 Best Practices
The "Package" tab provides us the various msi switches that were parsed out of the MSI file during the software import. You can also choose to add your own command lines, but since the platform has done the work for us we don't need to! NOTE! During testing, the "Install" commands will not work as it requires a "silent" installation. Make sure you select Install - no UI. Also, the reason I have duplicate entries is due to importing the software twice via different methods, but that is out of scope for this article. Lastly, always always always test your command lines. Most deployments are executed silently, so if a prompt does appear (due to an error in the command line) it will hang waiting for user input until the Symantec Management Agent kills the process due to a timeout.

The next tab, "Rules" allows us to build detection and applicability rules. These are particularly useful when trying to detect if the software is already installed or if there another item that would determine if the software even applies (an example would be OS language, where if the OS XP Japanese you don't want to deploy an English piece of software). Again, the SMP has already parsed out the MSI Product Code (GUID) and built a detection rule for us.

The "Associations" tab is particularly useful for the Software Catalog, here we can define "Parent" and "Child" relationships. Things like "This software resource depends on 'X'" or "Software 'X' depends on this software", you can build conflicts, supercedence, updates, contains, etc.

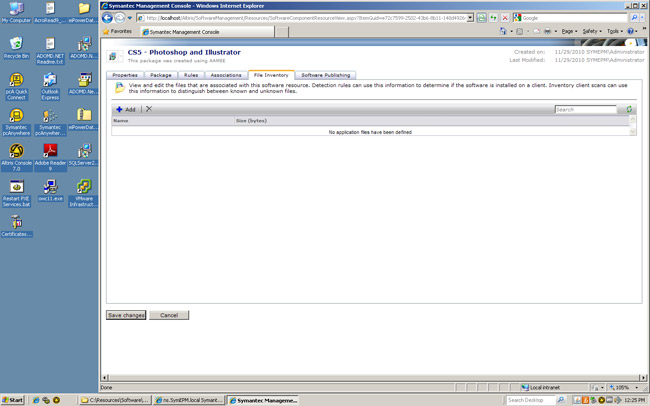
"File Inventory" allows us to set known associated files (illustrator.exe for example) to build detection rules. These are particularly helpful when using a Managed Software Delivery, as it helps to determine if the software is installed. It will also enable Inventory solution to distinguish between known and unknown files. These files can be "local" or "server" based. These files are also an integral part for using Software Metering. The metering policies you want to create are based on the exe's listed in this tab. NOTE! In the case of a suite or bundle of products (like the one we created with AAMEE) we would need add all associated products exes in this list (Photoshop.exe and Illustrator.exe for example).
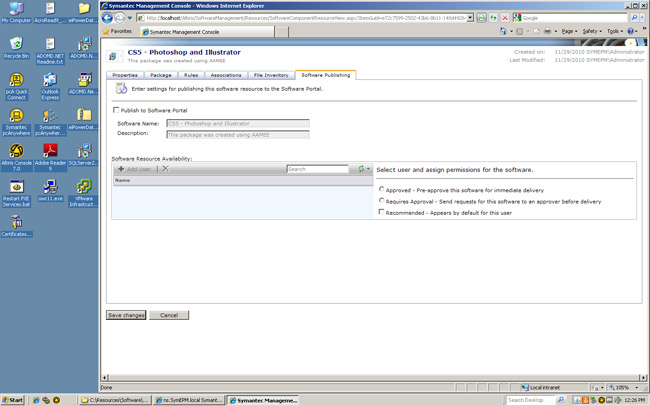
Finally, we can configure the "Software Publishing" option. This is handy for enabling users to self-deploy software. Notice that if you do choose to publish it to the Software Portal you can enable/disable access by user or group (even AD objects). You can also select if it's pre-approved or requires approval (which can send an automated email to an approver). NOTE! This is a topic unto itself; I would highly suggest reviewing another great article by Joel Smith: Leveraging a Software Portal to Improve End-user Productivity in 7.0
USING SMP TO DEPLOY YOUR NEWLY CREATED PACKAGE
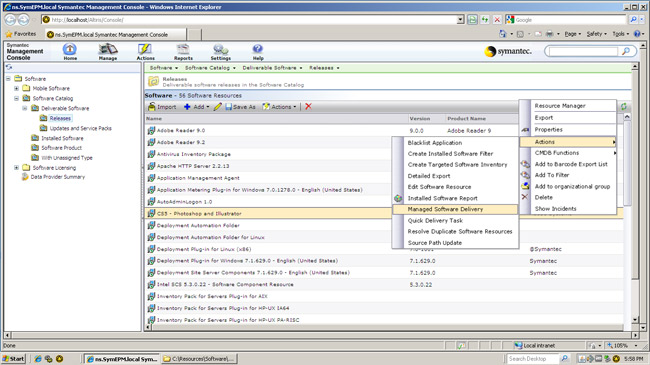
Now that we have created and imported our package, it's time to deploy! Go back to the main Software page (Manage > Software). You should now see your package listed by name, right click it and select "Actions" > "Managed Software Delivery"
You may have noticed there was another method to distribute this package, called a "Quick Delivery Task". While this is a great option as well, we are sticking with a "managed" delivery as it affords us some more flexibility as well as some persistence since it's a policy versus a task.
A new window should come up, this is the wizard for creating our managed delivery.
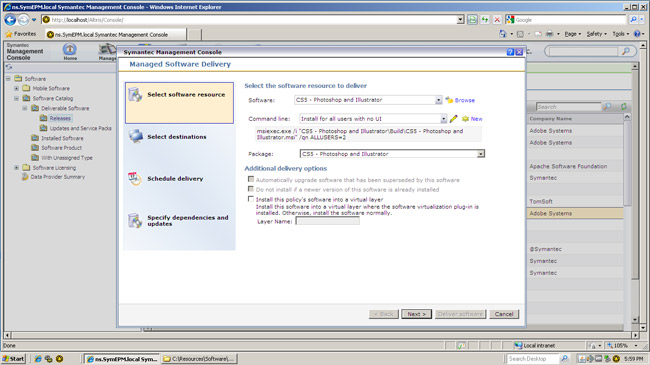
The initial screen should contain some preselected items (since we right clicked the resource we wanted to create the delivery for). Double check that these are the intended selections and click "next".
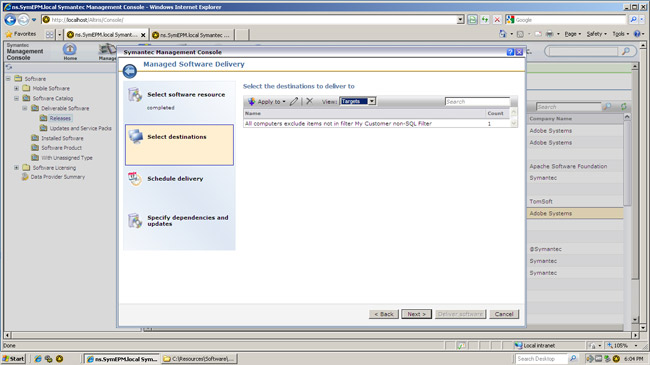
The "Select Destinations" screen is where we select which targets (computer, user, group, etc) we want to apply the managed delivery policy to (i.e. deliver the software to). In this particular case, my target is a custom filter (we won't cover targets and filters in this guide but here is a resource to get started).
Since we are using a "Managed Software Delivery", when it comes time to schedule the deliver we have two items to set up. When to "check compliance" (is the software installed or not) and when to "remediate" (install the software if the compliance check fails). These can be scheduled in windows, at a specific interval, or in this case when the computer starts up.

There are additional "advanced" options for the "scheduled" tab such as "only perform check if computer is connected to network, or is available at the exact scheduled time, user is or is not logged on, etc).
Lastly, you can specify any "dependencies or updates", in this case I have not tied any applicable patches or service packs to this particular software resource (since I packaged them with AAMEE I can include the patches with the installer). This is particularly handy though in case something needs to be installed before or immediately after the installation of our main package.

Now that we have created our policy, we can go to the Policies management page by selecting "Manage">"Policies" and you should now see our newly created Managed Software Delivery policy:
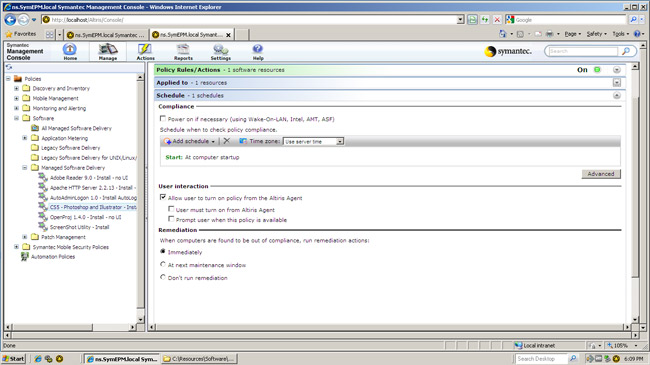
Here we can make any changes to the policy, as the needs of users, IT rules or the environment change.
AUTHOR:
Kyle Champlin
Symantec End Point Management SE
Kyle_Champlin@symantec.com