Hello API community!
In this tutorial I'm going to show you how to build your own iOS app from scratch, using Swift 3.0 and the MAG/MAS SDK. This is going to be a very simple app that will register the device, challenge the user for credentials using the default SDK login screen, and make a GET HTTP request to read a JSON file, protected by the CA API Gateway using the Mobile API Gateway assertions. Before you keep going I'd like to say that I'm not a developer by any means. I'm just a very curious guy that likes to learn new things and also share what I learn from my experiences That said, I encourage you to leave your comments and feedbacks suggesting any improvements, ok? I thank you in advance.
Although this is supposed to be a development tutorial, you can get your own app by only following the steps. Let's go through the requirements to execute this tutorial:
For this tutorial I'm going to be using my Docker MAS environment. So, let's get started!
Open up your Xcode and create a new project and select the Single View Application: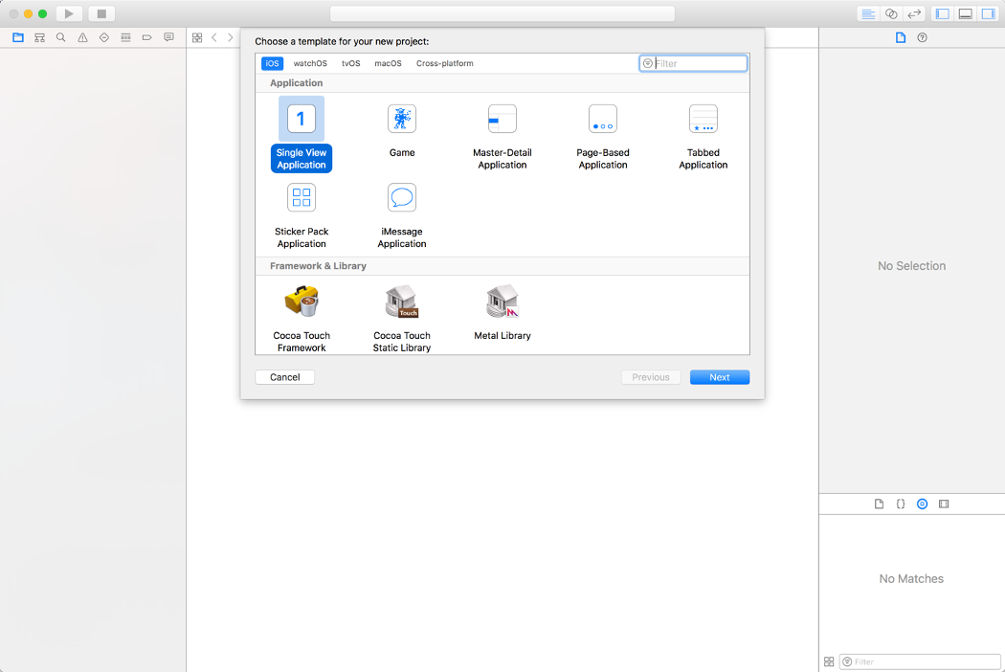
Chose a cool name for your new brand Swift app like so:
Make sure you select Swift as the language and then click Next.
Once we are not using the MAS Templates (MobileSDK.dmg) we have to do some extra stuff in order to get our app ready to support the MAS Framework. By the way, here you can find the official guide of how to prepare your iOS app to use the MAS Framework: iOS Guides | CA Mobile App Services
Please, follow these steps in order to get your new app ready to use our mobile SDK:
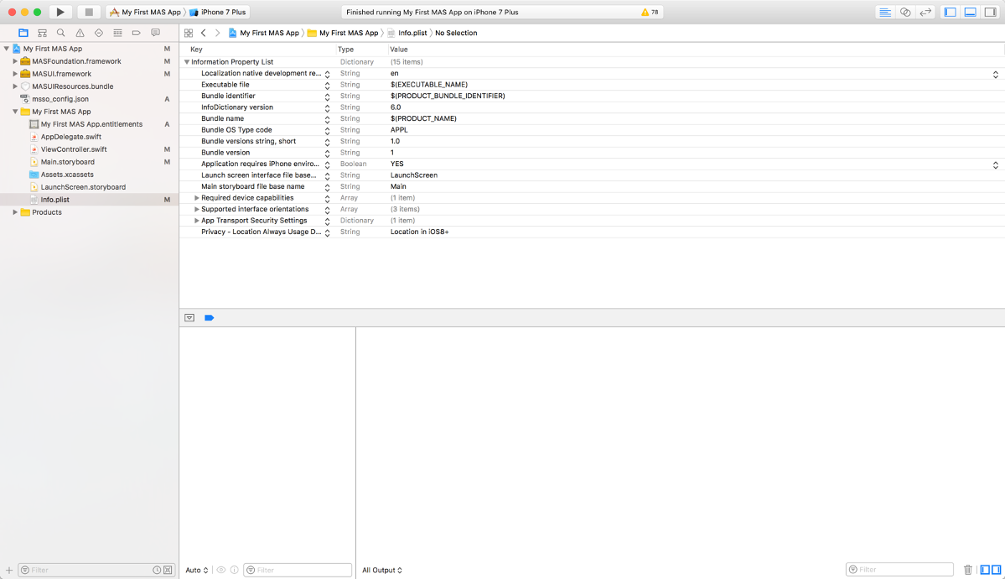
1. Open info.plist.
2. At the end of the table, right-click Add Row.
3. Name the new row App Transport Security Settings
4. Set the type to Dictionary
5. Click + and add a sub line: Allow Arbitrary Loads
6. Set the type to Boolean.
7. Set the value to YES.
8. Right-click Add Row.
9. Name the row NSLocationAlwaysUsageDescription
10. Set the type to String.
11. Set the value to Using Location in iOS8+.
This is how your Info.plist should like:
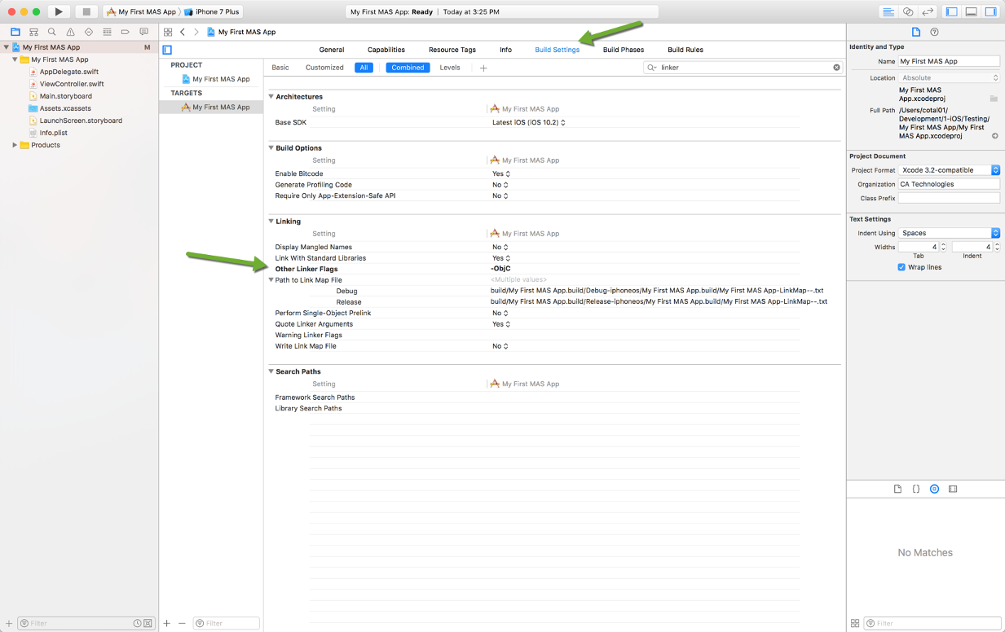
Now go to your Build Settings and search for Other Linker Flags then add -ObjC to it as follows:
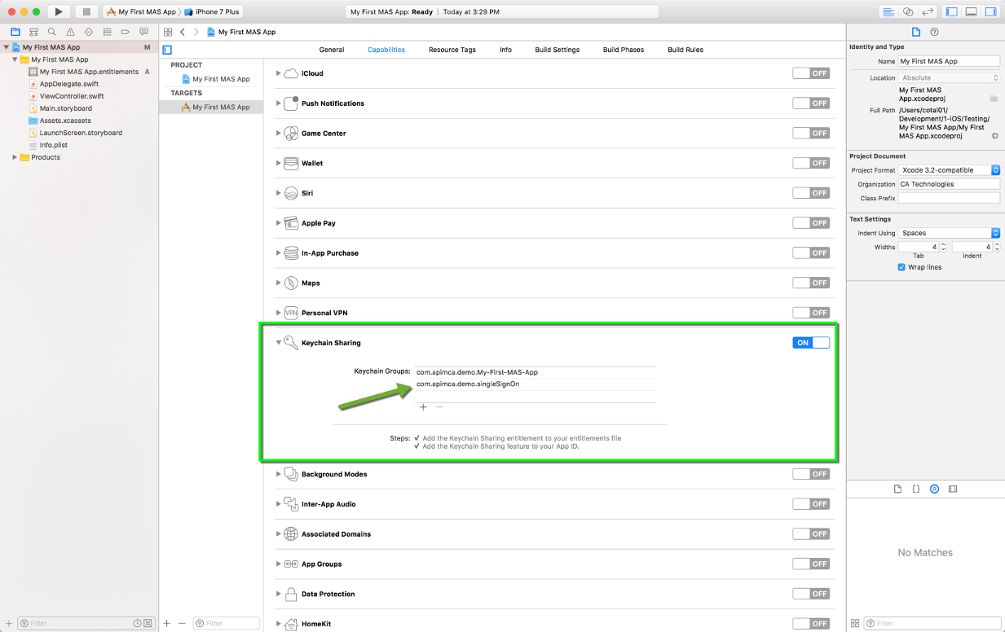
Go to the Capabilities and enable the Keychain Sharing and add a new group with the builder identifier and .singleSignOn as follows:
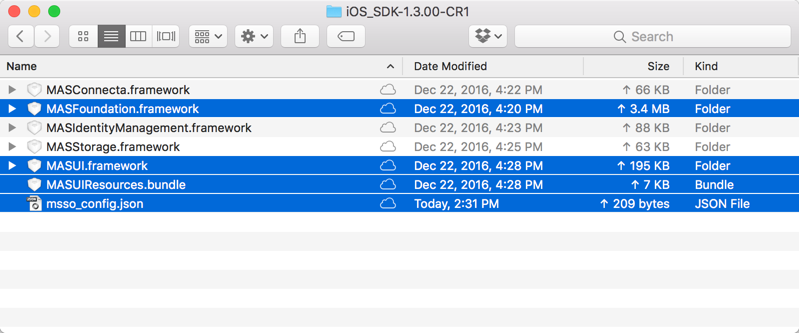
Now it's time to import the SDK (MAS Framework) and your previously exported msso_config.json file. For this tutorial you just need the MASFoundation and the MASUI frameworks. Drag and drop these files into your Xcode project, on the top:
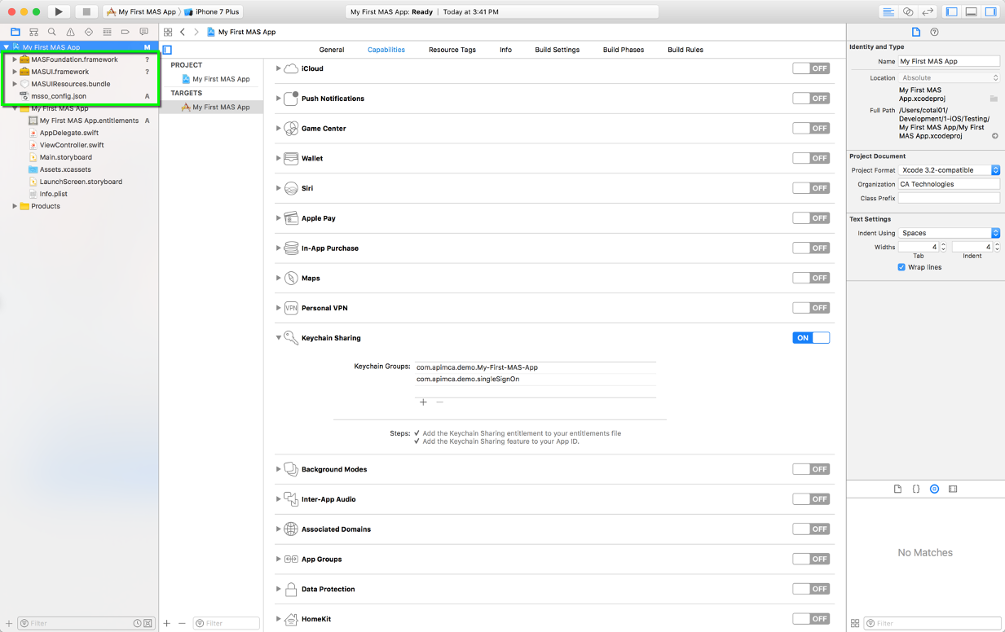
Your project should look like this after you drag and drop those files:
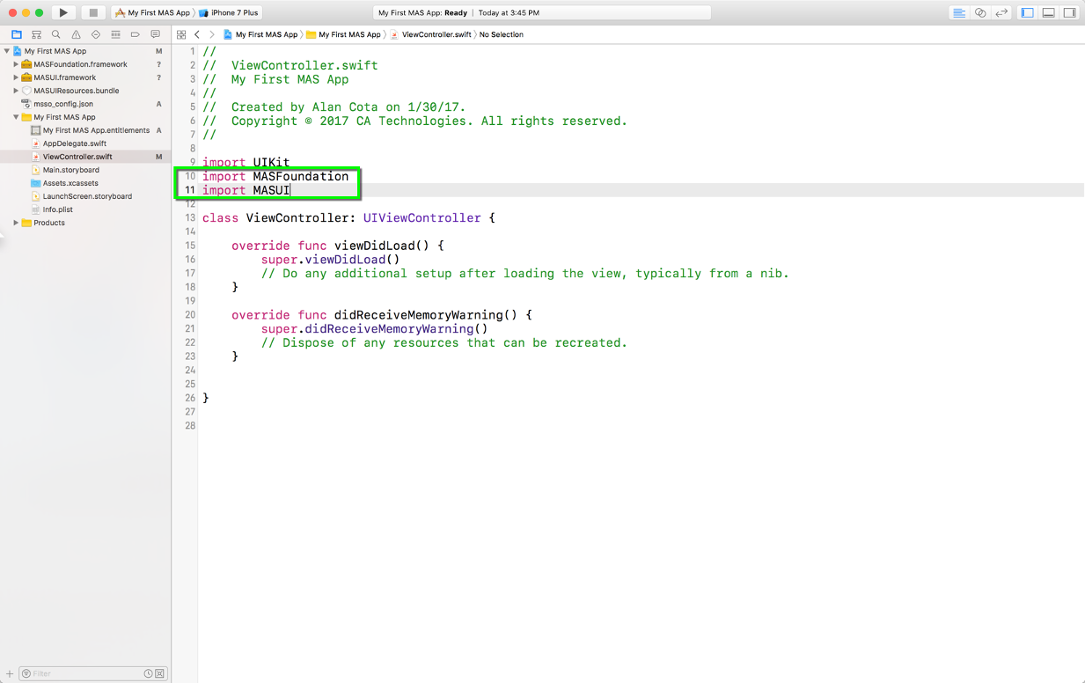
At this point you have everything that take to start the SDK. Let's dive into some code shall we? When comes to way to start your MAS SDK you can either use the AppDelegate to do so, or put it into your ViewController and do everything there. For the sake of this tutorial, I'm going to put everything inside the ViewController. Open up your ViewController.swift and import the frameworks by adding these two lines after the line #9 as follows:
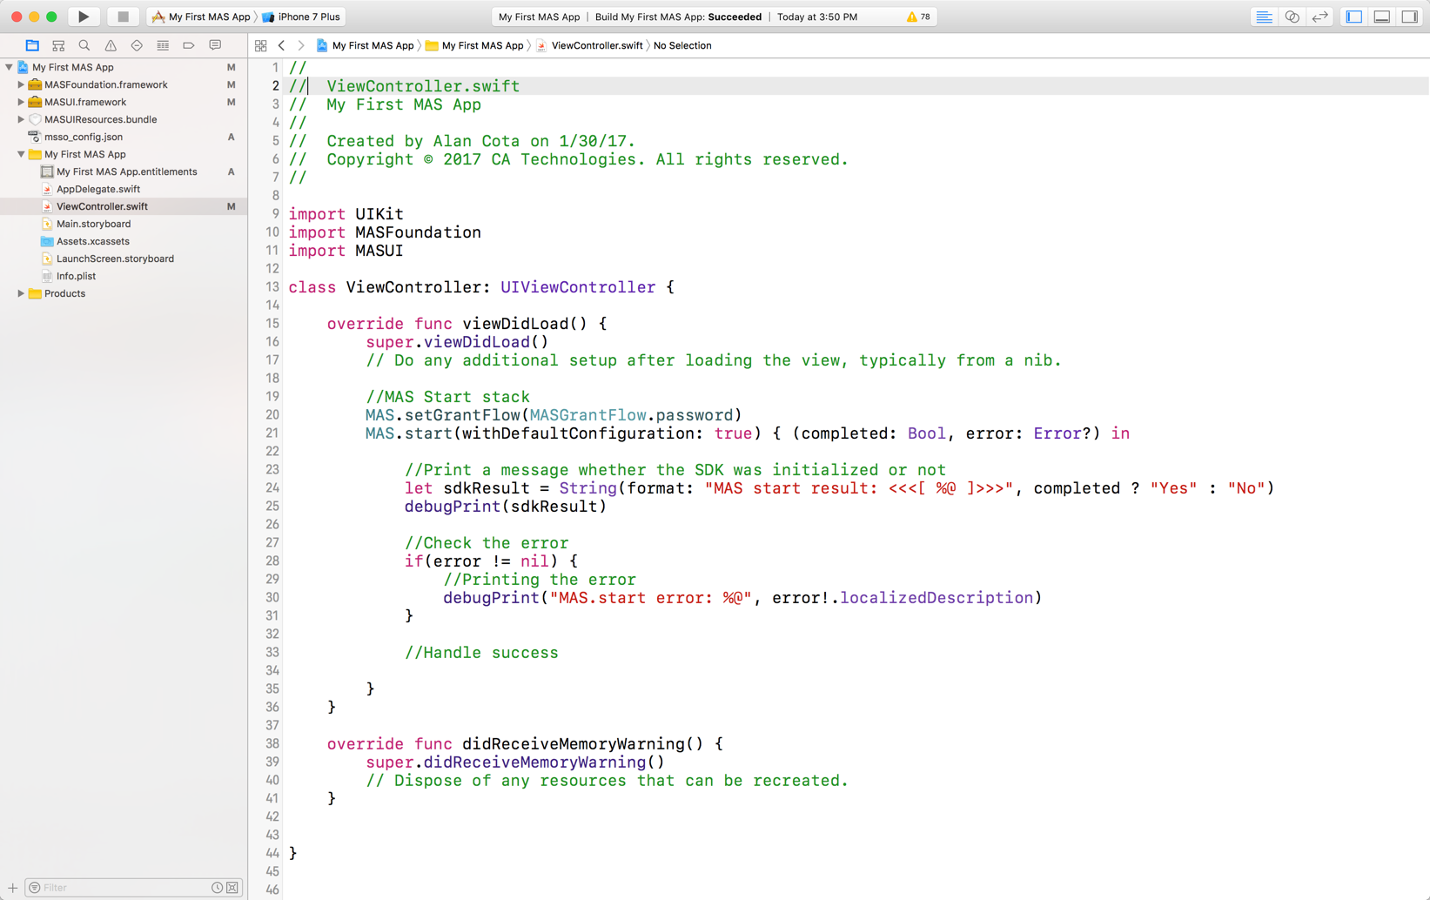
Add the following snippet to start your MAS and also tell the SDK you will be using the Password Grant Flow, instead of the Client Credentials which is the default:
| MAS SDK start snippet |
|---|
//MAS Start stack MAS.setGrantFlow(MASGrantFlow.password) MAS.start(withDefaultConfiguration: true) { (completed: Bool, error: Error?) in //Print a message whether the SDK was initialized or not let sdkResult = String(format: "MAS start result: <<<[ %@ ]>>>", completed ? "Yes" : "No") debugPrint(sdkResult) //Check the error if(error != nil) { //Printing the error debugPrint("MAS.start error: %@", error!.localizedDescription) } //Handle success } |
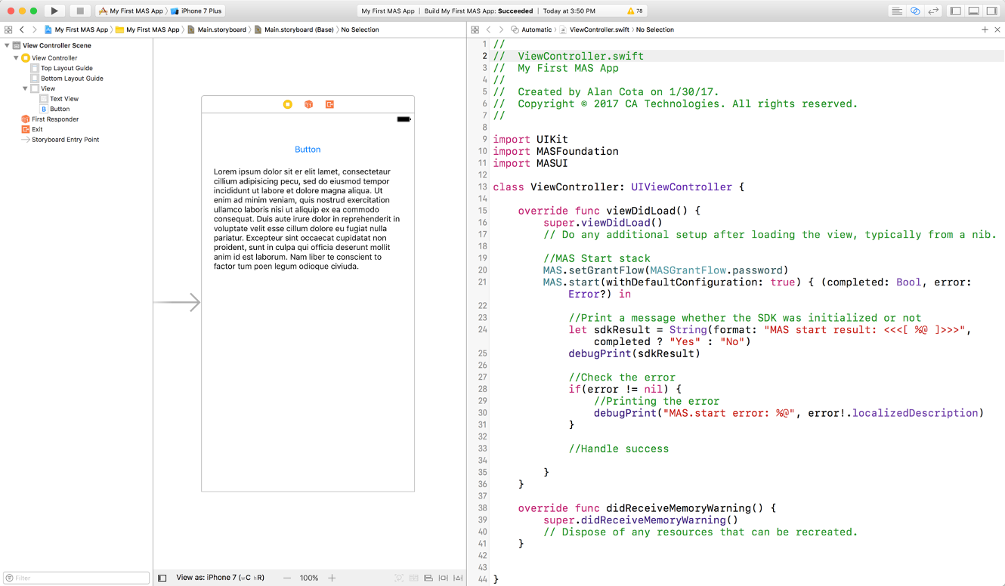
Your ViewController.swift should look like this now:
If you run this app now, you will see a message on your debugger screen saying that the MAS has been successfully started. But we're not there yet. We will now create some new UI objects and connect it to your code. The idea is yo have a button and a text view. The button will trigger a function, that will use the MAS SDK method getFrom to pull a JSON from the gateway and present it inside the text view. Let's get to it now.
Open the Main.storyboard file and add a Button and a Text View as follows:
With the two components added up to your UI it's time to connect them to your code, so you can do stuff with them. To do that open up the Assistant editor by clicking at the top menu View > Assistant Editor > Show Assistant Editor:
The following video shows you how to connect the components to the UI:
After connecting your UI components to the code, your ViewController.swift should look like this:
| Your ViewController.swift should look like this at this point: |
|---|
// // ViewController.swift // My First MAS App // // Created by Alan Cota on 1/30/17. // Copyright © 2017 CA Technologies. All rights reserved. // import UIKit import MASFoundation import MASUI class ViewController: UIViewController { //Class properties go here: @IBOutlet weak var btnAPI: UIButton! @IBOutlet weak var txtView: UITextView! override func viewDidLoad() { super.viewDidLoad() // Do any additional setup after loading the view, typically from a nib. //MAS Start stack MAS.setGrantFlow(MASGrantFlow.password) MAS.start(withDefaultConfiguration: true) { (completed: Bool, error: Error?) in //Print a message whether the SDK was initialized or not let sdkResult = String(format: "MAS start result: <<<[ %@ ]>>>", completed ? "Yes" : "No") debugPrint(sdkResult) //Check the error if(error != nil) { //Printing the error debugPrint("MAS.start error: %@", error!.localizedDescription) } //Handle success } } override func didReceiveMemoryWarning() { super.didReceiveMemoryWarning() // Dispose of any resources that can be recreated. } //Action to be triggered when the button gets tapped @IBAction func btnAPITapped(_ sender: Any) { } } |
So, what exactly did we just do? We added two components to the UI: a button and a text view. Later we connected it to the code by creating the Outlets. In a simple way, these outlets will be used later to reference the objects and its properties. We also added a function (btnAPITapped) to handle the action when the button gets clicked, which will trigger the API call and put the response inside the text view. Let's get to it by coding the btnAPITapped action:
| Snippet to do a GET HTTP Request through MAS SDK: |
|---|
//SDK has been started successfully MAS.getFrom("/protected/resource/products", withParameters: ["operation":"listProducts"], andHeaders: nil, completion: { (response, error) in //Print out the response (JSON from the Gateway) print("Available products response: \(response?.debugDescription)") //Add the response to the textView self.txtView.text = response?.debugDescription }) |
By adding the above's lines of code you will be printing out the response coming from the gateway and also adding it to the Text View object. This is how your complete btnAPITapped function should look like after adding the code:
| Complete function btnAPITapped |
|---|
@IBAction func btnAPITapped(_ sender: Any) { //SDK has been started successfully MAS.getFrom("/protected/resource/products", withParameters: ["operation":"listProducts"], andHeaders: nil, completion: { (response, error) in //Print out the response (JSON from the Gateway) print("Available products response: \(response?.debugDescription)") //Add the response to the textView self.txtView.text = response?.debugDescription }) } |
Now the only thing left is to build and run our new iOS app. You can do that by pressing CMD + R together or using the top menu Product > Run. I'm going to be using an iPhone 7 Plus as my simulator. When you run it for the very first time, and if you had done everything right until this point, you will have to chose a location BEFORE click on the Allow button, that's going to be presented by the SDK asking your permission to use the device's location. You can either use the Xcode or the simulator's top menu Debug then Location. I'll be using the Xcode to pick one of my saved locations as you will be seeing in the next video:
There you have it folks! I hope you have enjoyed this tutorial and also were able to get to the point of running it and getting the expected results. Please share and leave your comments/feedbacks below. I also hope this app can help you to seek further information and to learn more about Swift and the CA MAG/MAS as well.
Some things I'd encourage to try yourself: change the text of the button and also add some constraints to the UI to make sure you would have the same layout regardless of the device using your app.
I keep the code of this project on my git repository: https://github.com/alancota/SwiftMASFirstApp.git