Follow up: Request from customer to use the sandbox image on MS Windows Hyper-V.
Customer's corporate desktop policies allow use of Hyper-V, but not Vmware Workstation.
### ###
Note: Vmware Workstation will not work on a workstation/laptop(s) that have MS Windows Hyper-V enabled and running.
If you plan to use both, you will need to switch Hyper-V on/off as needed.
Hyper-V Conversion of VmWware Disk On Local Workstation
Step 1: Install MS Hyper-V Converter Tool
https://technet.microsoft.com/en-us/library/dn873998(v=ws.11).aspx
https://www.microsoft.com/en-us/download/details.aspx?id=42497
Step 2: Deploy Hyper-V Components/Features on local workstation [via powershell or DISM]
Enable-WindowsOptionalFeature -Online -FeatureName:Microsoft-Hyper-V -All
DISM /Online /Enable-Feature /All /FeatureName:Microsoft-Hyper-V
Step 3: On / Off Hyper-V Service on local workstation [Note: Vmware workstation will NOT function with MS HyperVisor Service Enabled]
bcdedit /set hypervisorlaunchtype auto / bcdedit /set hypervisorlaunchtype off
Step 4: Convert VMDK (Vmware) to VHDX (MS) Disk format via Powershell from MS Hyper-V Converter Tool.
Import-Module 'C:\Program Files\Microsoft Virtual Machine Converter\MvmcCmdlet.psd1'
ConvertTo-MvmcVirtualHardDisk -SourceLiteralPath 'C:\temp\vmware\IMAGE_NAME.vmdk' -VhdType DynamicHardDisk -VhdFormat vhdx -destination 'C:\temp\vmware\NEW_PATH_FOLDER’
Step 5: Use MS Hyper-V Manager GUI
Create a NEW “Generation 1” Image & 16384 MB RAM & use existing “converted” Hard Drive & Create a new virtual NIC to be referenced by the image
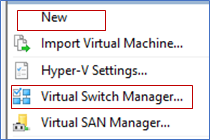
Select “Virtual Switch Manager”, create a new NIC name & checkbox as Internal; accept all other defaults.
Open MS Windows (on host) Network Properties for this new virtual NIC; and add IP address for “host” that will be on same SUBNET as the new “guest” image. This process assumes that “guest” IP is STATIC.
Note: There is NO default DHCP service with MS Hyper-V solution [Not like Vmware Network Service]


Step 6: Start up “guest” image
If “guest” image does NOT already have a static IP, allow solution to continue (with errors), until a command line login prompt is provided. Ensure static IP is in same subnet as “host” NIC.
Login to solution and update the Linux CentOS 6.x network services files.
/etc/sysconfig/network-scripts/ifcfg-eth0 [BOOTPROTO=none; IPADDR= IP_ADDRESS_HERE]
/etc/udev/rules.d/70-persistent-net.rules [Ensure one entry with correct MAC address of guest image or delete all entries, e.g. echo -n > 70-persistent-net.rules]; then reboot image
Step 7: After successful re-start with new NIC, create a Hyper-V checkpoint
Step 8: Done. Login to user console / remote web services to validation conversion has no issues.
### ##
Example of the two (2) files on the vmware guest, that require static values for Network settings:
Minimal information required for /etc/sysconfig/network-scripts/ifcfg-eth0
- Add HWADDR= if needed but not required with single NIC.

Two (2) options: Empty & allow auto-regeneration or replace MAC address in /etc/udev/rules.d/70-persistent-net.rules

Cheers,
A.