Once Symantec Information Centric Analytics (ICA) is installed and integrated with the various data sources within the environment, there are some additional configurations which should be completed to maximize the capabilities of the tool. While most features in Symantec ICA will be functional automatically simply by importing data, as highlighted in the previous sections, every customer will have different environments and processes that should be accounted for to ensure a successful implementation. This starts with ensuring the organizational data in ICA is updated and accurately reflects the organization hierarchy for the business.
Once ICA has been installed, you can leverage the same user interface to begin defining the Countries, Regions and Users that you will be used in your implementation. Alternatively, you can use SQL to populate organizations (see the optional configuration section at the end of this document).
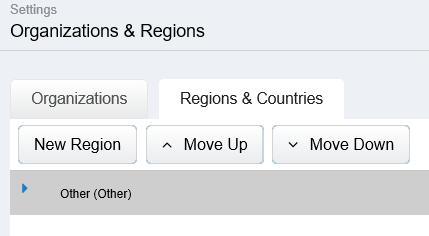
1. Navigate to Admin -> Settings -> Organizations & Regions to review the data stored for Organizations, Regions and Countries.
2. The region Other cannot be removed via the user interface as the Other region is used to associate Countries that do not have a defined region.
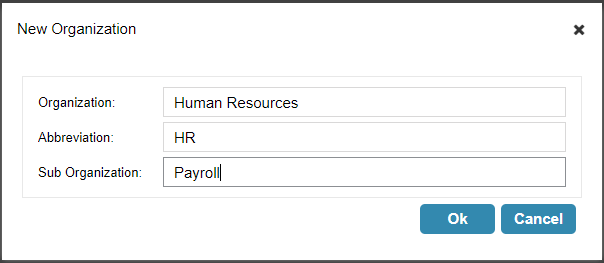
3. To create a new organization, click on the button New Organization.
4. When creating a new Organization, you will be required to provide a value for Organization, Abbreviation and Sub Organization. In this scenario for Organization we provided the value Human Resources, for Abbreviation provide the value for HR and for Sub Organization we provide the value for Payroll.
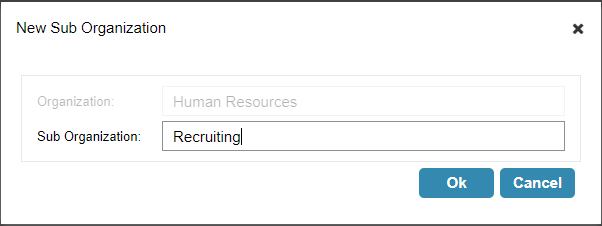
5. Once the top-level organization is defined, sub Organizations can be added by right-clicking on the organization and selecting the option Add Sub Organization.
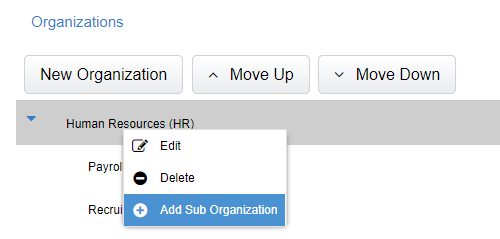
6. When adding a Sub Organization to an Organization all that is required is to provide a value for Sub Organization. The Sub Organization will inherent the abbreviation defined for the top-level organization.
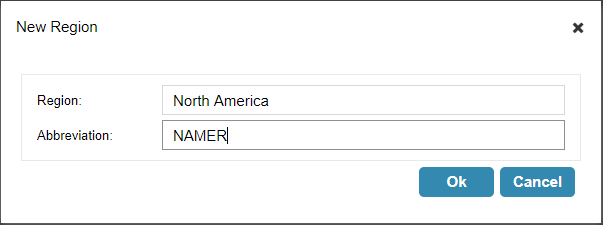
7. After adding Organizations to ICA, the next step in the process will be to create Regions and associate Countries to these Regions. Click on the New Region button to define a region,

8. When defining a Region, the Region Name and the Abbreviation are required. In this case we will provide the value North America for the Region creating an abbreviation entitled NAMER to represent North America.
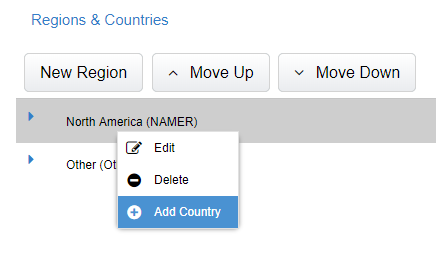
9. When adding a country to a region, right click on the region and select the option Add Country.
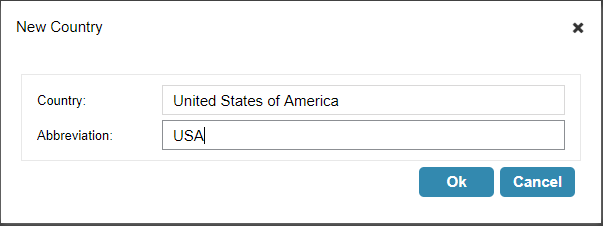
10. When adding the country, you will be required to provide the country name and abbreviation. In this case the country will be United States of America and the Abbreviation is USA.
After creating organization and country information via the ICA user interface this information can now be associated to the other entities like Computer Endpoints and Users. When associating a country to entity you will be required to provide the Country Abbreviation. Providing the country abbreviation to the entity enables ICA to create and associate Countries to the record being loaded via the Integration Wizard.

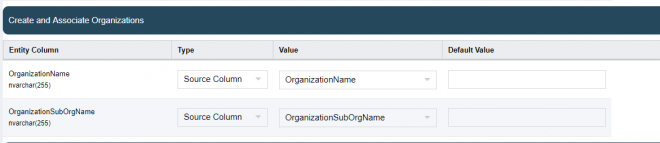
Conversely to associate an Organization to an entity you will need to provide an OrganizationName and OrganizationSubOrgName to the record when loading the data. Providing this information via the integration wizard will effectively create a relationship between an organization and the entity being loaded via the Integration Wizard.
There are corner cases where there is a requirement to load bulk Organizations, Regions and Countries. This can be done via the Integration Wizard
We will now focus our attention loading Organization information via the Integration Wizard using the Organization Entity. To do this we will need to create a new data source, data source query and an integration mapping to properly configure the Integration Wizard. This document will guide you through this process.
1. Launch the ICA user interface and Navigate to the Admin menu, under the Admin menu select the Integration Application.
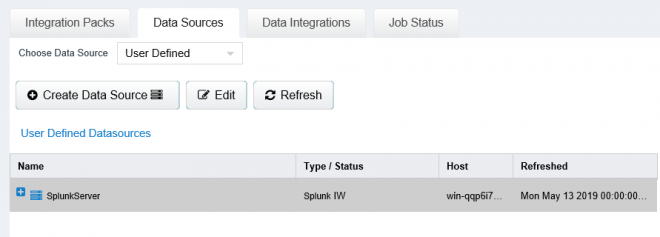
2. After the Integration Application loads, you will need to navigate to the Data Sources tab to create a new data source. This can be done by clicking on the Create Data Source tab and then selecting the Create Data Source button.
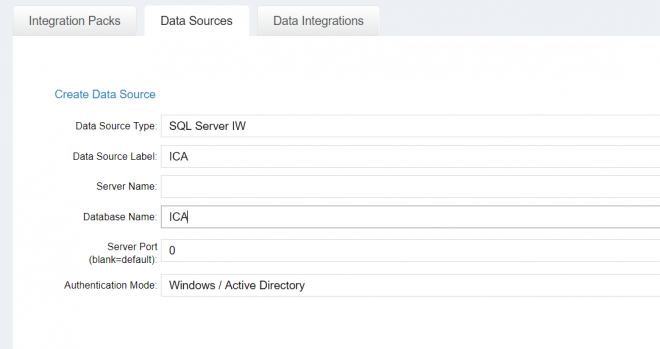
3. In this scenario we will create a new data source that will establish a connection between the ICA application and the ICA database through the Integration Wizard. The ICA database was chosen due to the fact that we have staged the Organization, Country and Region information within this database to load this information. After clicking save you will be re-directed back to the Data Sources tab.
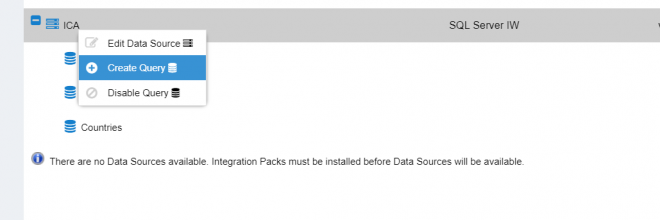
4. After creating the Data Source, right click on the data source and select Create Query. This will allow you to create and associate the query to the data source created in the previous step. The Integration Wizard will support the ability to associate many data source queries to a data source. In order to create the data source query, right click on the data source and select the Create Query option.
5. After defining the data source, you will need to define the data source query to load Organizations. When defining the data source query, you will need to provide a Query Name, Query Description, the Query Statement and the Table Name. Note that the table name in this case will be the staging table where the data will be staged prior to moving it into the Organizations table. Copy the SQL statement into the query statement section of the application.
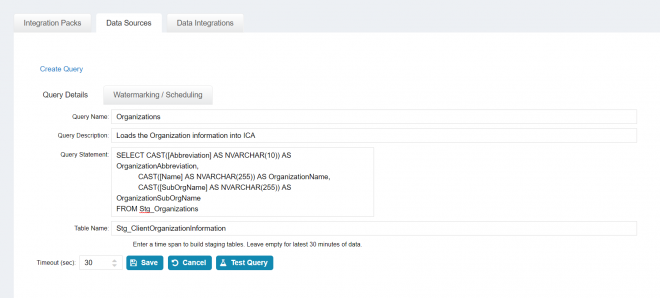
- The SQL Statement in this section can be used as an example to load organization information into ICA. Cast statements are being used to ensure that the data being selected from the staging table is of data type NVARCHAR and aligns with the size of the target column defined within the ICA database. The cast statement will prevent any data sizing issues within the integration by truncating characters from the string that exceed the character limitation of the source column. The column name is also aliased to align with the name of the column within the integration mapping, so ICA will automatically map the columns to the correct entity when it is associated to the query.
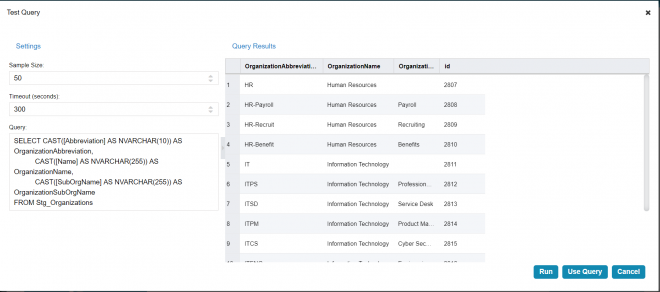
SELECT    CAST(Abbreviation AS NVARCHAR(10)) AS OrganizationAbbreviation,

                 CAST(Name AS NVARCHAR(10)) AS OrganizationName,

                 CAST(SubOrgName AS NVARCHAR(10)) AS OrganizationsubOrgName

FROM Stg_Organizations;
- Optionally, after defining the query for the data source query, you can click on the “Test Query” button to test the integrity of the query you have just created. When clicking “Run” button, the query will be executed, you should see sample results returned from the query to ensure that the query will return results as expected.
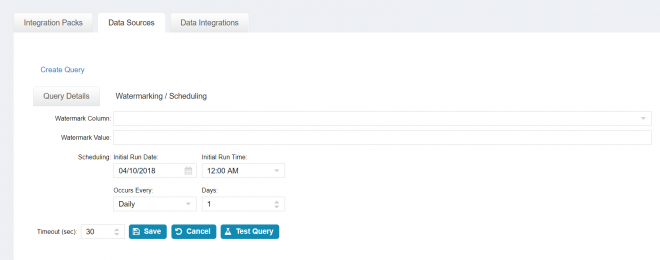
- Once you have the Organization information defined, click on the Watermarking / Scheduling tab. In this scenario you are not required to define a watermark column or watermark value. When a Watermark is not defined for an integration, the Integration Wizard will truncate and rebuild the staging table on a nightly basis. Set the initial Run Date to a date in the past and set the query to run Daily with a value of 1.
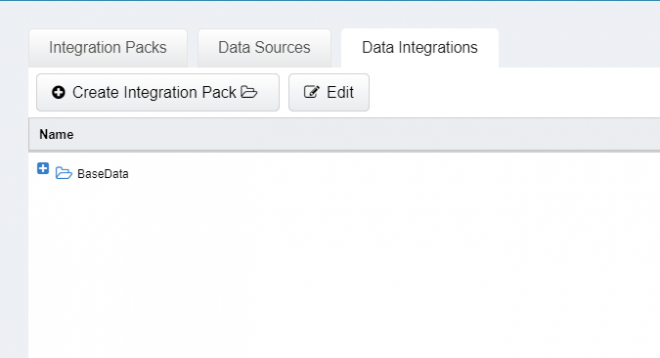
6. Once the query has been created and tested via the user interface, an Integration Wizard Integration Pack will need to be created to associate Import Rules to the Integration. Once the Import Rules are defined, they will be associated to Import Rule Mappings which effectively defines where the data will reside within ICA. To create an Integration pack within the Integration Wizard, click the button Create Integration Pack.
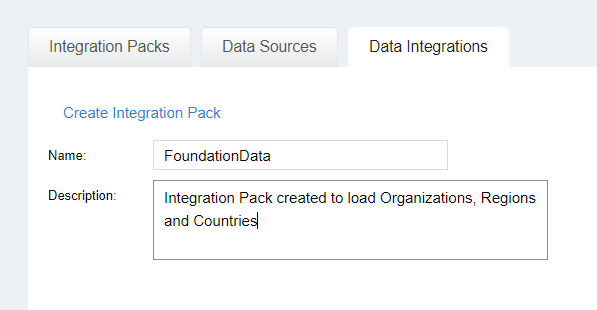
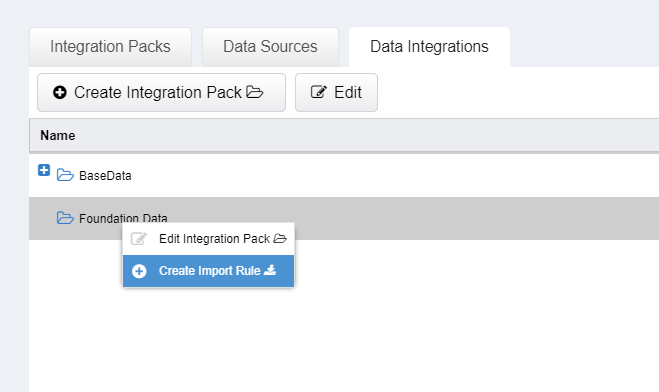
7. After creating the Foundation Data Integration pack, we will now define the Import Rule for Organizations. To create the Import Rule for Organizations, right-click on the ‘Foundation Data’ Integration Pack and click on ‘Create Import Rule’.
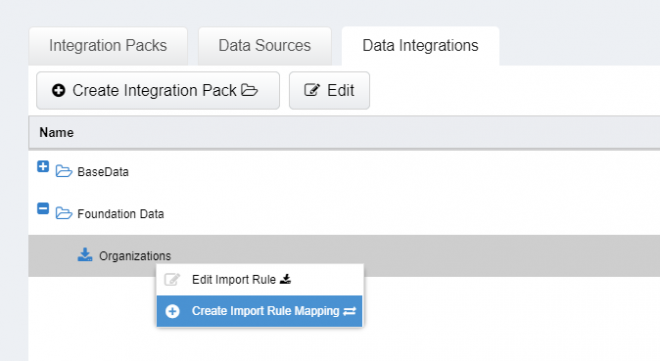
- To create an Import Rule Mapping, right-click on the Import Rule created in the previous step and Select the option ‘Create Import Rule Mapping.
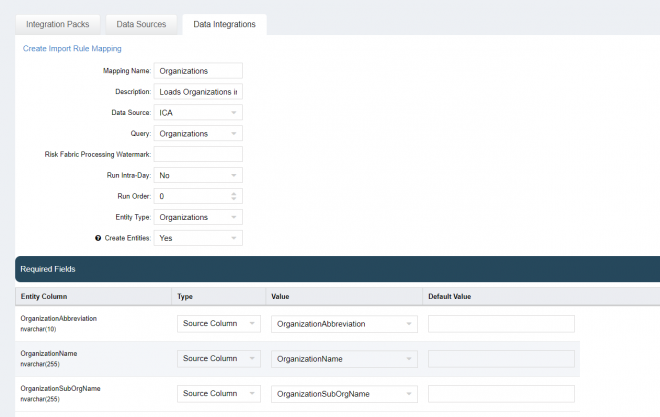
- After clicking on the import rule mapping record, you will be required to define the Import Rule Mapping record for the integration. The key columns here will be Mapping Name, Data Source, Organizations and Entity Type. The Mapping Name and Description are free-form text fields that are used to describe the import mapping. When selecting a data source, select the data source ICA or the data source configured in Step 7. The Entity Type for this mapping will be ‘Organizations’ as the intent is to create Organizations within ICA. Notice that since we provided alias names that align with the corresponding entity column, ICA will automatically map the query column names to the entity column.
8. The next step in the process is to create a data source query to load region information. To do this right click on the Data Source ICA and select Create Query.

- After selecting the Create Query option, define the query name as ‘Region’, the query description as ‘This query will load Region information into ICA’ and use the query in section B to server as the Query Statement. It is recommended to define the table name as opposed to allowing ICA to generate this value. Allowing ICA to randomly assign the table name will make it a little more challenging when it comes to troubleshooting.

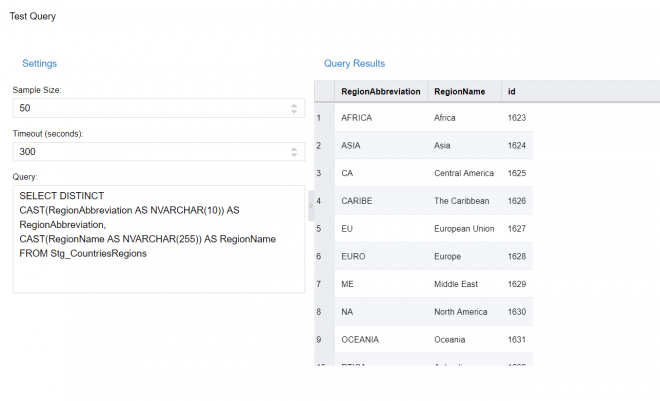
- The SQL Statement in this section can be used as an example to load region information into ICA. Cast statements are being used to ensure that the data being selected from the staging table is of data type NVARCHAR and aligns with the size of the target column defined within the ICA database. The cast statement will prevent any data sizing issues within the integration by truncating characters from the string that exceed the character limitation of the source column. The column name is also aliased to align with the name of the column within the integration mapping, so ICA will automatically map the columns to the correct entity when it is associated to the query.
SELECT DISTINCT

CAST(RegionAbbreviation AS NVARCHAR(10)) AS RegionAbbreviation,

CAST(RegionName AS NVARCHAR(255)) AS RegionName

FROM Stg_CountriesRegions
- Optionally, after defining the query for the data source query, you can click on the “Test Query” button to test the integrity of the query you have just created. When clicking “Run” button, the query will be executed, you should see sample results returned from the query to ensure that the query will return results as expected.
- Once you have the data source query for Regions defined, click on the Watermarking / Scheduling tab. In this scenario you are not required to define a watermark column or watermark value. When a Watermark is not defined for an integration, the Integration Wizard will truncate and rebuild the staging table on a nightly basis. Set the initial Run Date to a date in the past and set the query to run Daily with a value of 1.

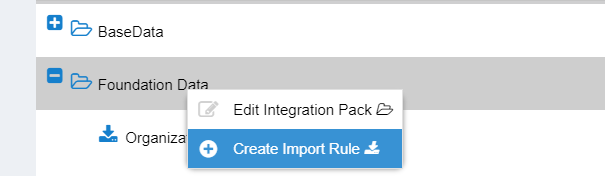
9. The next step in the process is to add an import rule for Regions to the Foundation Data Integration pack. This can be done by right-clicking on the Foundation Data integration pack and selecting ‘Create Import Rule’.
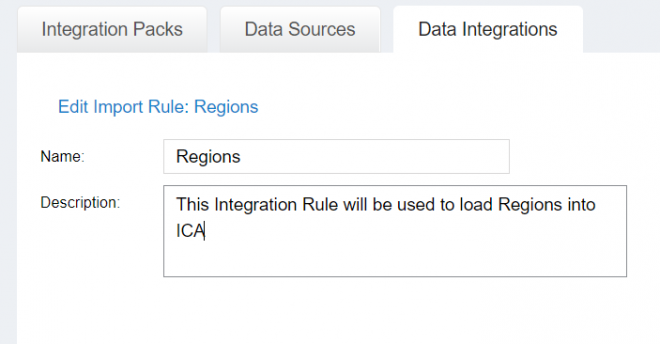
- To define the Import Rule, you will need to provide a name and a description the name description are free-form text fields that can be used define the Import Rule. In this scenario, the name is defined as ‘Regions’ and the Description is ‘This Integration Rule will be used to load Regions into ICA’. Multiple import rules can be associated to an Integration Pack.
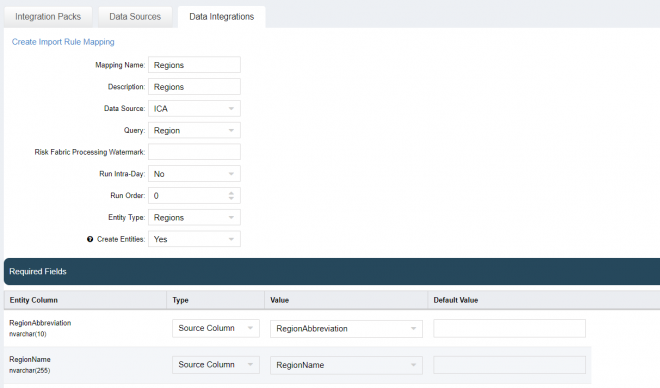
- To create an Import Rule Mapping, right-click on the Import Rule created in the previous step and Select the option ‘Create Import Rule Mapping.

10. The next step in the process is to create a data source query to load region information. To do this right click on the Data Source ICA and select Create Query.
- After selecting the Create Query option, define the query name as ‘Countries’, the query description as ‘This query will load Country information into ICA’ and use the query in section B to server as the Query Statement. It is recommended to define the table name as opposed to allowing ICA to generate this value. Allowing ICA to randomly assign the table name will make it a little more challenging when it comes to troubleshooting.
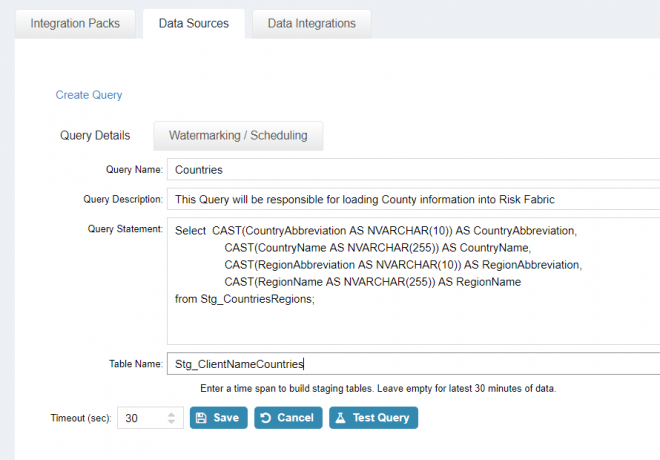
- The SQL Statement in this section can be used as an example to load region information into ICA. Cast statements are being used to ensure that the data being selected from the staging table is of data type NVARCHAR and aligns with the size of the target column defined within the ICA database. The cast statement will prevent any data sizing issues within the integration by truncating characters from the string that exceed the character limitation of the source column. The column name is also aliased to align with the name of the column within the integration mapping, so ICA will automatically map the columns to the correct entity when it is associated to the query.
Select                  CAST(CountryAbbreviation AS NVARCHAR(10)) AS CountryAbbreviation,

                                CAST(CountryName AS NVARCHAR(255)) AS CountryName,

                                CAST(RegionAbbreviation AS NVARCHAR(10)) AS RegionAbbreviation,

                                CAST(RegionName AS NVARCHAR(255)) AS RegionName

from Stg_CountriesRegions;
- Once you have the data source query for Regions defined, click on the Watermarking / Scheduling tab. In this scenario you are not required to define a watermark column or watermark value. When a Watermark is not defined for an integration, the Integration Wizard will truncate and rebuild the staging table on a nightly basis. Set the initial Run Date to a date in the past and set the query to run Daily with a value of 1.

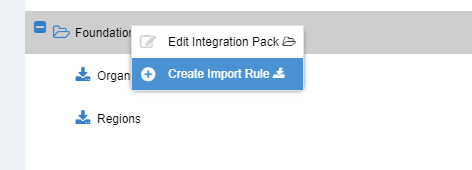
11. Now that the data source query has been created and defined it is time to begin the process of creating an import rule to load the country data into ICA. To do this, navigate to the Data Integrations tab, right click on Foundation Data and select Create Import Rule.
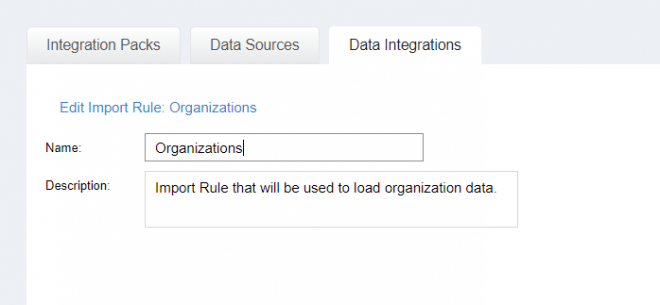
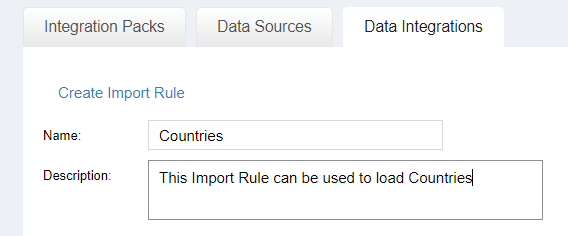
- After creating the Import Rule within ICA for Countries, define the name and the description attributes for the integration. The Name and Description are free-form text fields, in this case for Name use the value ‘Countries’ and for Description, enter the text ‘This Import Rule can be used to load Countries’.
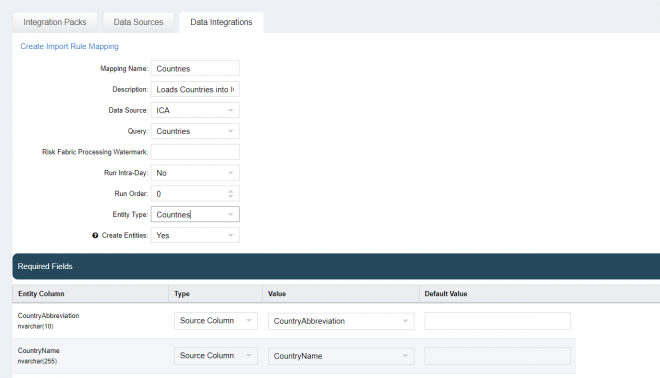
- After clicking on the create import rule mapping record, you will be required to define the Import Rule Mapping record for the integration. The key columns here will be Mapping Name, Data Source, Query and Entity Type. The Mapping Name and Description are free-form text fields that are used to describe the import mapping. When selecting a data source, select the data source ICA. The Entity Type for this mapping will be ‘Countries’ as the intent is to create Countries within ICA. Notice that since we provided alias names that align with the corresponding entity column, ICA will automatically map the query column names to the entity column.
12. Now that the configuration is in place to bring in Countries, Regions and Organizations, the ICA nightly processing task will be leveraged to move the data into the ICA tables where the information will reside moving forward.
For more best practice articles on Symantec Information Centric Analytics see the following posts: