Hello All!
I've been getting few questions about how I got my Portal 4.2 running into a pure CentOS 7.0 Linux AMI instance, without using the provided OVA. I often respond back to those questions by sending a cheat sheet I put together but they are notes that not everybody can understand. Because of that, I decided to write down some step-by-steps that can help you to get your own Portal 4.2 instance.

Let's go through some things you're going to need before:
- A CentOS 7.0 x64 AMI with enough memory. The Portal documentation says that 32GB+ of memory is required. I've heard it is possible to run with less memory, but I haven't tried myself. If you did, please share a comment/feedback below;
- Go to this link and download the online (or offline - I will be using the online in this tutorial) version of the Portal 4.2.0.2;
If you do not have your CentOS image or need some help on getting one, just follow these steps to get your AMI. If you already have it, just skip to the next topic:
Create your CentOS 7 x64 AMI
Step 1: Choose your AMI:
Step 2: Instance Type

Step 3: Configure Instance Details
Usually, I keep the default and just click on Next

Step 4: Add Storage
Here I change the Root volume from 8 to 20 and add a new EBS volume that it is going to be used by Docker and to install anything you want later.

Our engineering did a great job with the Portal 4.2.0.2 patch as now it doesn't mess up the Docker installation to use the device-mapper
Step 6: Configure Security Group
You can create a new Security-Group to be used whenever you have a Portal. Those are the ports I'm using:

Review and launch your instance now. Once you have it running, then you're going to need to get its public IP address in order to create some local DNS names for your new portal:


You got yourself an instance! Let's get started with the Portal installation now!
Adding the DNS entries / hosts file
Before we even access your new server, let's add the DNS entries into your local hosts file. If you want to use a real DNS server, that's fine and you can even use a *.domain pointing directly to your AMI's public address. I have a domain of my own and have been using CloudFlare as my DNS server, but if you don't want to mess with DNS server, you can just use your hosts file and add the following entries:
If you want to copy it here you go:
<YOUR AMI PUBLIC IP/DNS> admin-ssg.apicarocks.lab admin.apicarocks.lab admin-ssg.apicarocks.lab analytics.apicarocks.lab broker.apicarocks.lab enroll.apicarocks.lab sso.apicarocks.lab sync.apicarocks.lab
When you first install the portal your TENANTID is going to be your postal hostname. Do not forget to also add your TENANTID-ssg.yourdomain into your hosts file. In my case, while installing in this tutorial, I will be using the admin as the TENANTID and thus I also need the admin-ssg. Without this entry you're not going to be able to add your tenant later.
When you deploy a tenant to your portal you need to point your tenantID, to the same IP address of your portal. I personally always install my portal using admin.mydomain and then when I first deploy my tenant I call it portal. That would add a new entry into my hosts file, like this: portal.apicarocks.lab.
Preparing your server for the Portal
Obtaining root shell
In order to deploy the Portal 4.2, you are going to need to tweak your new Linux CentOS 4.2 server to accomplish all the requirements. Log in into your new Linux server and get the root shell as follows:
[centos@ip-172-31-44-19 ~]$
[centos@ip-172-31-44-19 ~]$ sudo su -
[root@ip-172-31-44-19 ~]#
[root@ip-172-31-44-19 ~]#

Updating your CentOS
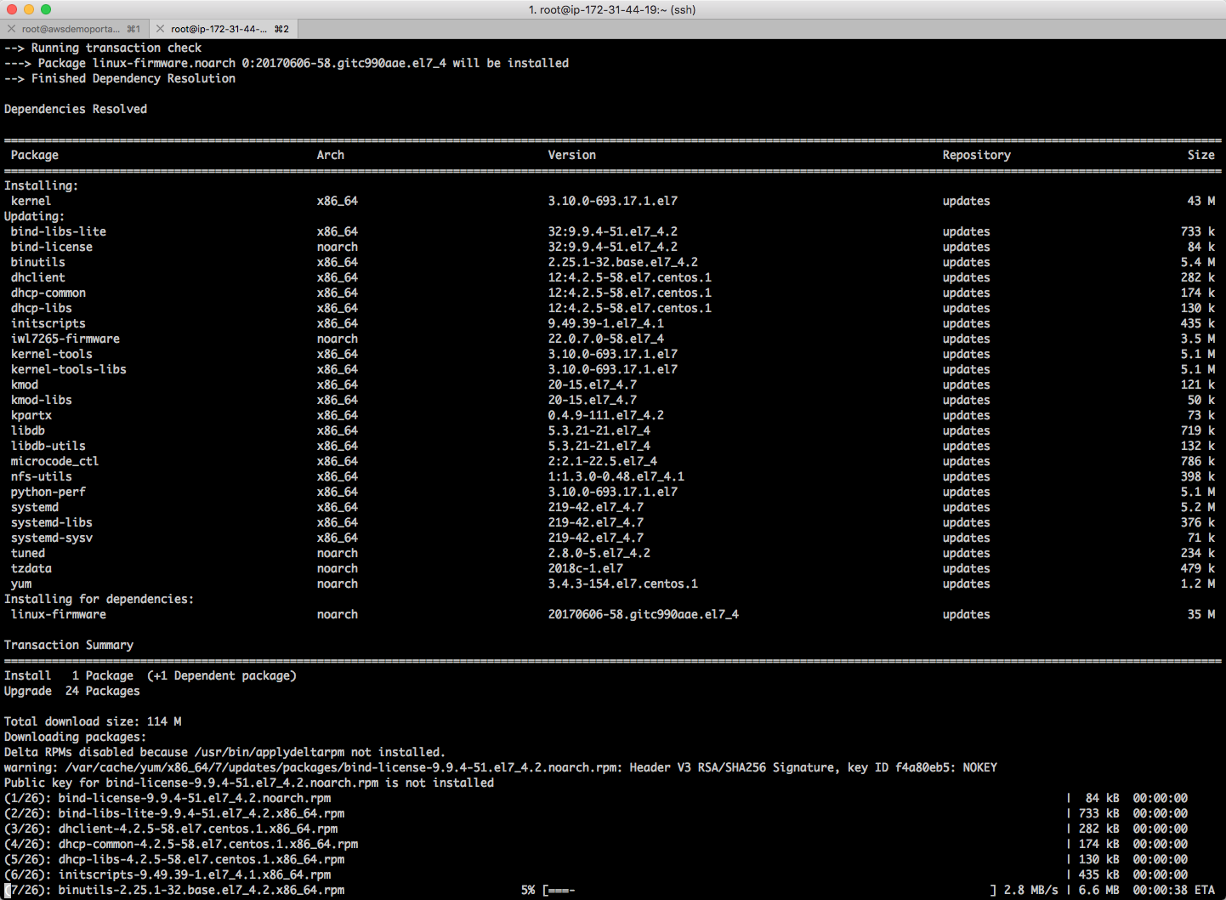
Update your CentOS by running the following command. This might take a little while to finish:
[root@ip-172-31-44-19 ~]# yum update -y
Optional: Docker installation
You can either install Docker manually or let the config.sh portal script do it for you when you run it later. This is how you do it manually if you want to:
[root@ip-172-31-44-19 ~]# yum install -y yum-utils \
device-mapper-persistent-data \
lvm2
[root@ip-172-31-44-19 ~]# yum-config-manager \
--add-repo \
https://download.docker.com/linux/centos/docker-ce.repo
[root@ip-172-31-44-19 ~]# yum install docker-ce -y
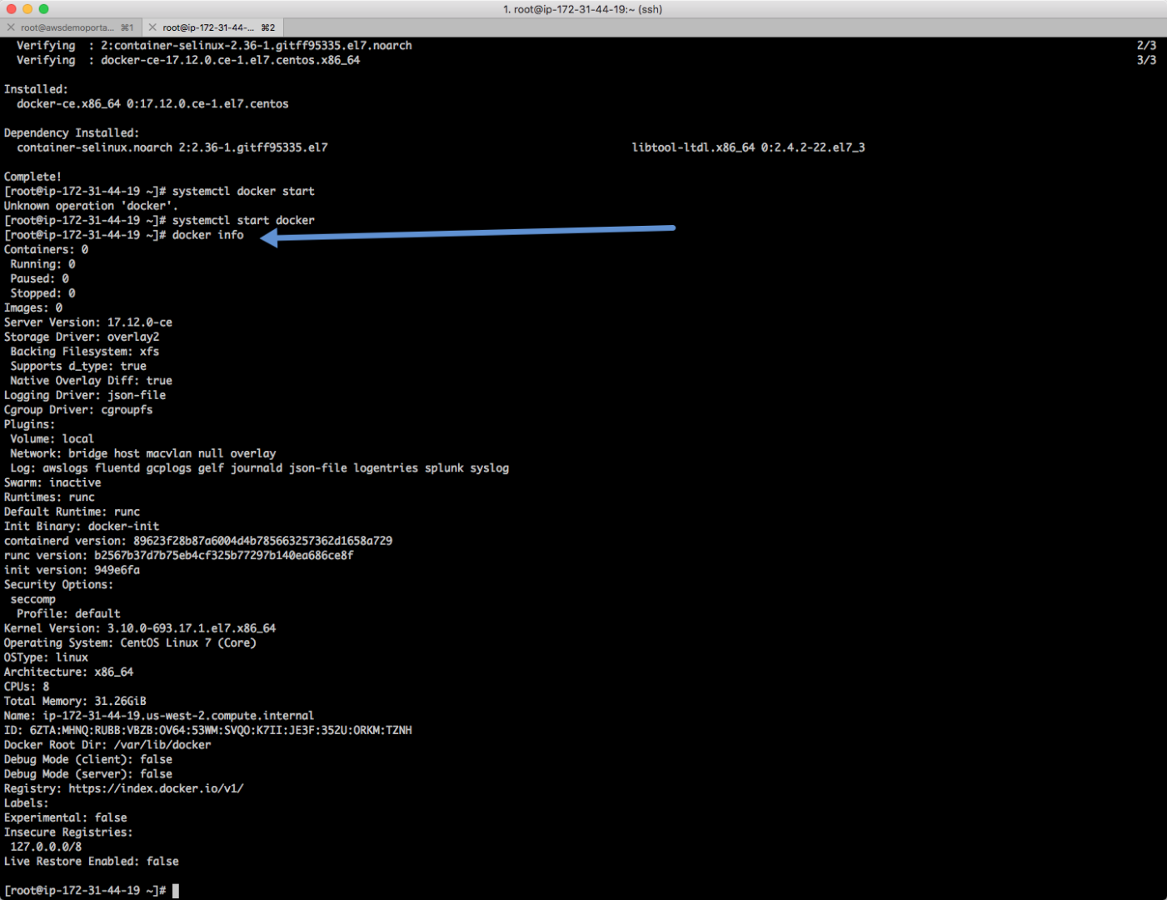
[root@ip-172-31-44-19 ~]# systemctl start docker
[root@ip-172-31-44-19 ~]# chkconfig docker on
After running all the above commands, run docker info to see if your docker is running fine:
Time synchronization (NTP)
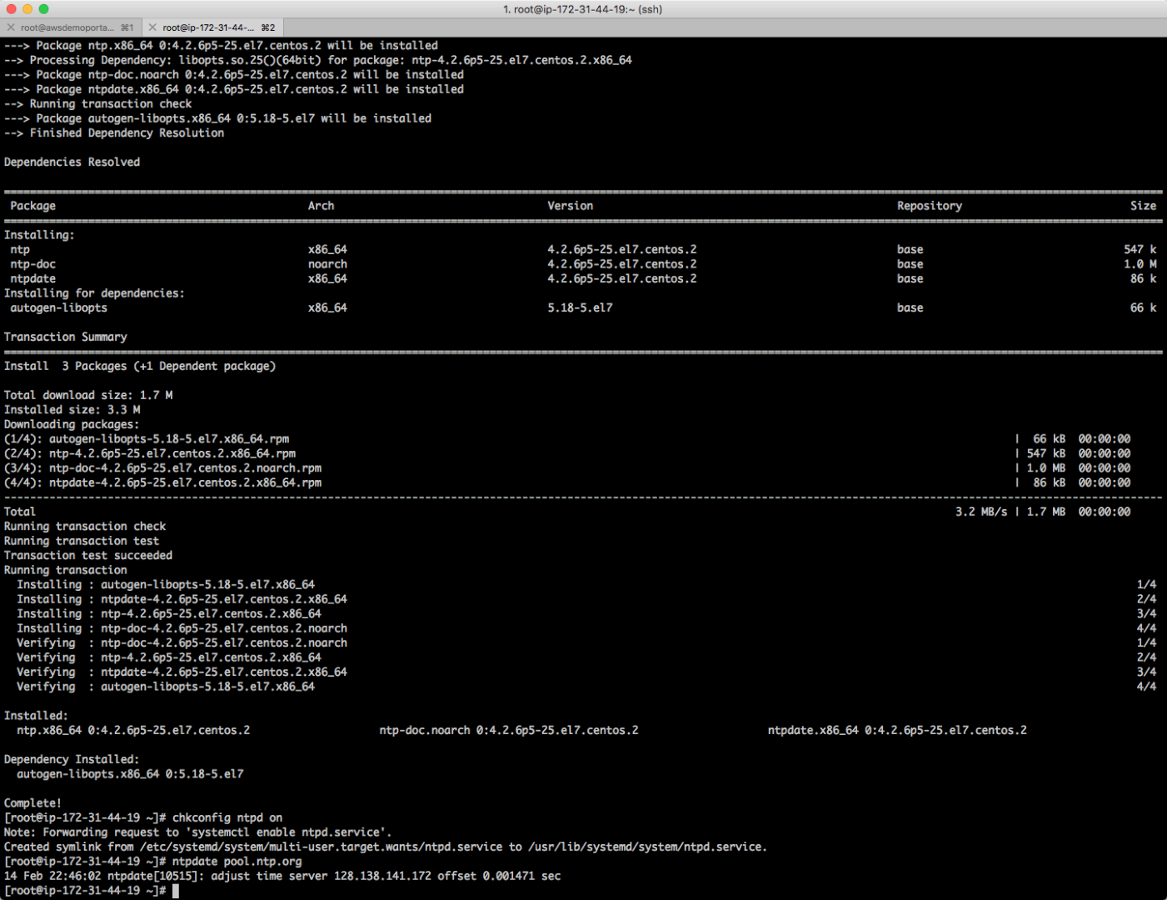
After installing the Docker, let's install the NTP and make sure both the Portal and any gateway you might want to enroll with this portal are using the same NTP server and have their time synchronized:
[root@ip-172-31-44-19 ~]# yum install ntp ntpdate ntp-doc -y

[root@ip-172-31-44-19 ~]# chkconfig ntpd on

[root@ip-172-31-44-19 ~]# ntpdate pool.ntp.org
If you want to use your own NTP server, just replace "pool.ntp.org" with your server IP address/hostname
Optional: changing your server's timezone
You can change your server timezone if you want. This is how you do it to set the Central Time:
[root@ip-172-31-44-19 ~]# mv /etc/localtime /etc/localtime.bak
[root@ip-172-31-44-19 ~]# sudo ln -s /usr/share/zoneinfo/America/Chicago /etc/localtime
Installing the FirewallD
The portal needs the FirewallD and this is how you install it:
[root@ip-172-31-44-19 ~]# yum install firewalld -y
Optional: Install DNS tools
You can install the DNS tools to test name resolution if you want. To do that just type this:
[root@ip-172-31-44-19 ~]# yum install bind-utils -y

Portal Installation
Now the fun part! After getting our server ready to rock and roll, let's run the greatly improved Portal 4.2.X installation. Big shout out to the BU for putting together a really easy way to install the Portal. I have never been able to do 2 installations on the same day before
Copying the installation to your server
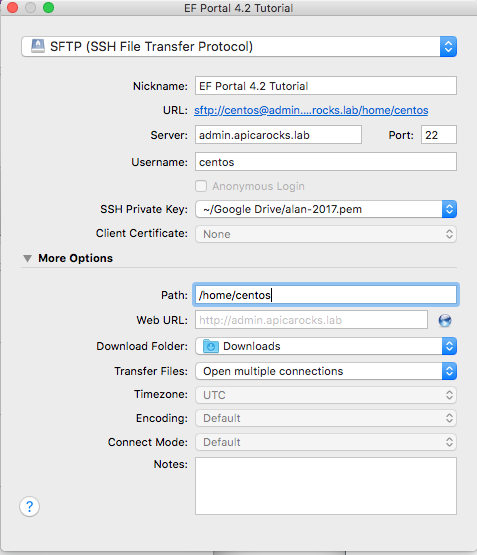
You need to put the Portal 4.2 online downloaded installation into your Linux server. I like to use CyberDuck to do the SCP, but you can use your Terminal too. That's how you configure Cyberduck to use an SSH private key:
Copy the online portal installation file to your Linux server and (important) your portal license file too:
Rename your license file to license.xml to make it easier during your portal configuration step. Also make sure you copy your license.xml to /opt/apim-portal-4.2.0.2-final folder
Extract the installation file
Now go back to your SSH session, still logged as root, to get started with the configuration and installation process. Execute the following commands to extract the copied portal installation into /opt folder. You can use whatever folder you want:
[root@ip-172-31-44-19 centos]# cd /home/centos/
[root@ip-172-31-44-19 centos]# cp apim-portal-4.2.0.2-final.tar.gz /opt/
[root@ip-172-31-44-19 centos]# cd /opt/
[root@ip-172-31-44-19 opt]# tar -xvzf apim-portal-4.2.0.2-final.tar.gz
Run the config.sh script
You can now delete the installation file once you have it extracted into your /opt/apim-portal-4.2.0.2-final folder. The first thing you need to do is to run the config.sh file. You will be also asked for some information about your portal installation. Be ready to answer the following questions:
| Question | What is it? | Example |
|---|
| Tenant ID (PORTAL_TENANT_ID) [apim]: | This is the first TENANTID we talked about previously. For the sake of this tutorial I will be using admin as my TENANDID. | admin |
| Portal subdomain (PORTAL_SUBDOMAIN) | This is the DNS subdomain of my portal intallation. For the sake of this tutorial we are going to be using the domain apicarocks.lab | apicarocks.lab |
| Path to license file (PORTAL_LICENSE_FILENAME) | Path and file name of your portal's license | /opt/apim-portal-4.2.0.2-final/license.xml |
| Enroll notification email address (PORTAL_ENROLL_NOTIFICATION_EMAIL) | Email address used to communicate with the developers | noreply@apicarocks.lab |
| Analytics enabled (PORTAL_ENABLE_ANALYTICS) | Enable Portal Analyctics | y |
Every time you need to change something, like update your license, then you need to run your config.sh script once again.
Run the following commands to configure your portal:
[root@ip-172-31-44-19 apim-portal-4.2.0.2-final]# ./config.sh

APIM Portal configuration

Tenant ID (PORTAL_TENANT_ID) [apim]: admin
Portal subdomain (PORTAL_SUBDOMAIN) [example.com]: apicarocks.lab
Path to license file (PORTAL_LICENSE_FILENAME) []: /opt/apim-portal-4.2.0.2-final/license.xml
Enroll notification email address (PORTAL_ENROLL_NOTIFICATION_EMAIL) [noreply@mail.example.com]: noreply@apicarocks.lab
Analytics enabled (PORTAL_ENABLE_ANALYTICS) [y]: y

                  PORTAL_TENANT_ID:     admin
                  PORTAL_SUBDOMAIN:     apicarocks.lab
           PORTAL_LICENSE_FILENAME:     /opt/apim-portal-4.2.0.2-final/license.xml
  PORTAL_ENROLL_NOTIFICATION_EMAIL:     noreply@apicarocks.lab
           PORTAL_ENABLE_ANALYTICS:     y

Do you want to keep these settings? [Y/n]: y
If you get an error saying that your docker service is not running, then run: systemctl start docker and then docker info to make sure the daemon is running properly.
Running the portal.sh script
Now that you have configured the portal, run the portal.sh script to start the portal deployment. This script will download all the required docker images and make all the configuration to run them properly. This can take between 10 to 20 minutes before everything is downloaded and started.
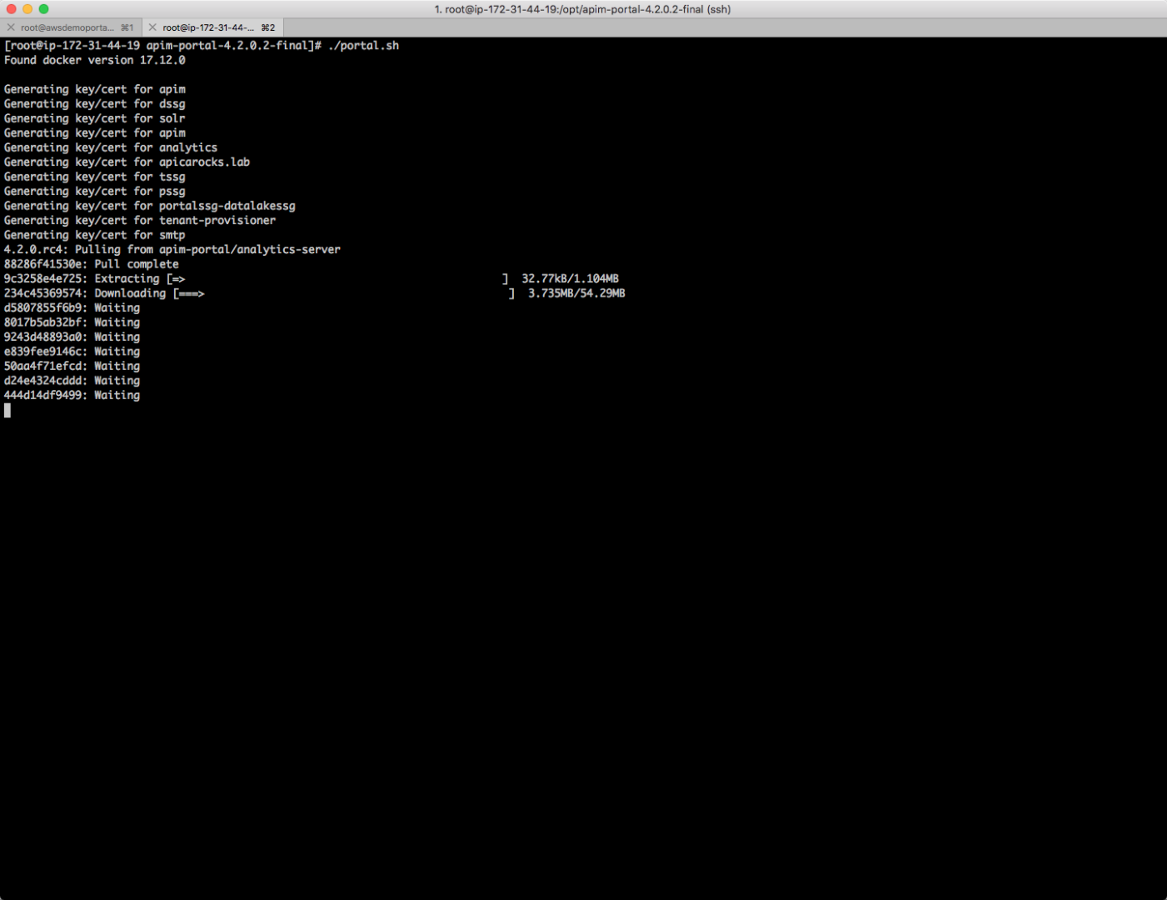
Checking the status
There are two ways to check. The first one is by running the script status.sh. It will check all the images and print whether they are running or not. The second way to check is by running the command docker service ls and check the REPLICAS. You want every REPLICA to be 1/1. Usually the portal_dispatcher is the last one to come up. This is my installation:

Accessing my new installed Portal
Now you can access your portal by opening the URL http://TENANTID.SUBDOMAIN, which in our case here would be https://admin.apicarocks.lab
Remember that the default credentials are: admin / 7layereyal7
Enroll a tenant
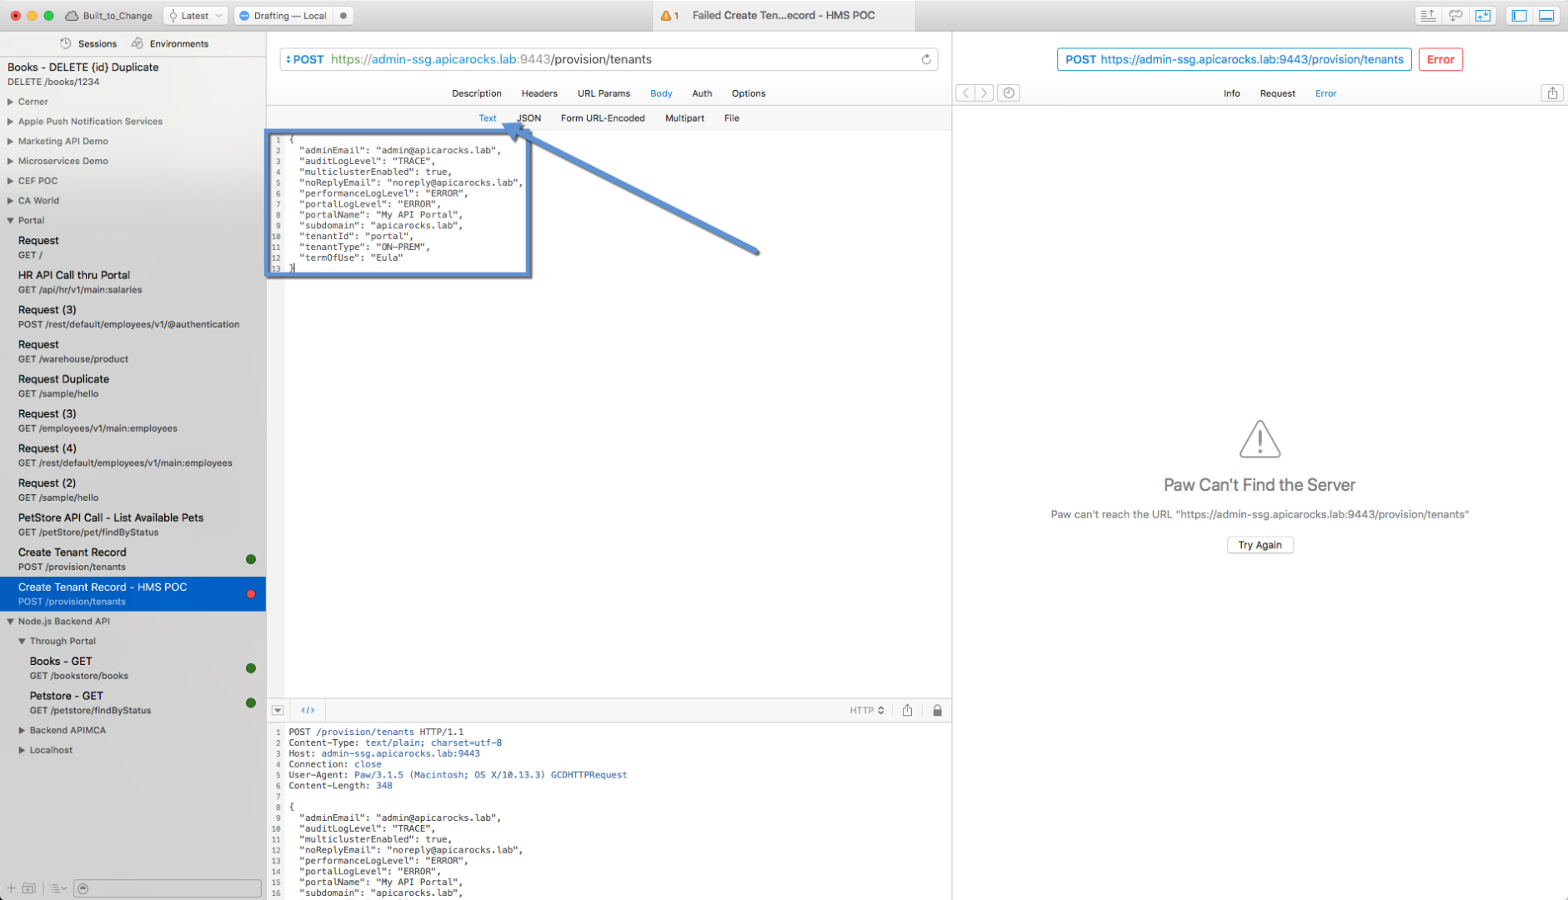
Now you might want to enroll your own Gateway. In order to do that you first need to generate a tenant record and then posting the generated JSON to your TENANDID-ssg.SUBDOMAIN:9443. Make sure the gateway you want to enroll checks all the requisites. Below an example:
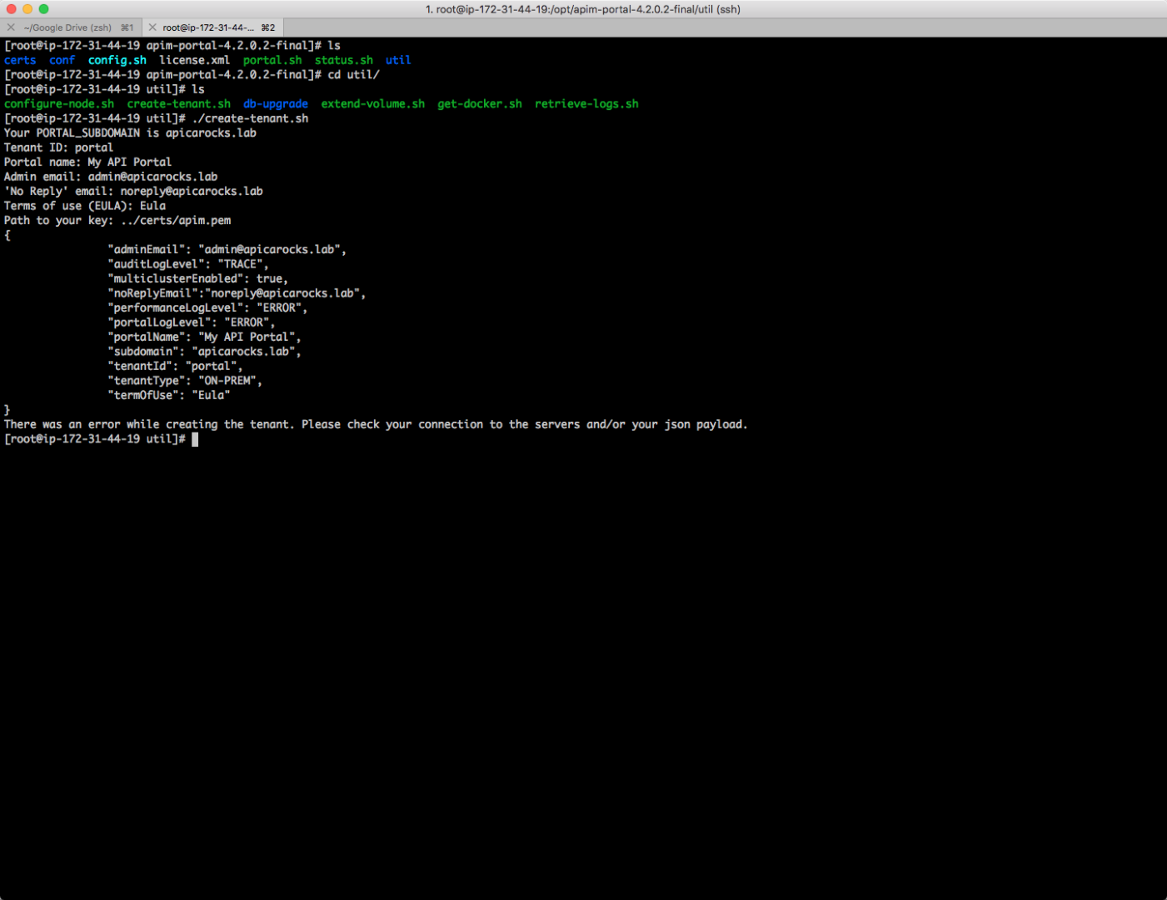
Copy the generated JSON
{
          "adminEmail": "admin@apicarocks.lab",
          "auditLogLevel": "TRACE",
          "multiclusterEnabled": true,
          "noReplyEmail":"noreply@apicarocks.lab",
          "performanceLogLevel": "ERROR",
          "portalLogLevel": "ERROR",
          "portalName": "My API Portal",
          "subdomain": "apicarocks.lab",
          "tenantId": "portal",
          "tenantType": "ON-PREM",
          "termOfUse": "Eula"
}
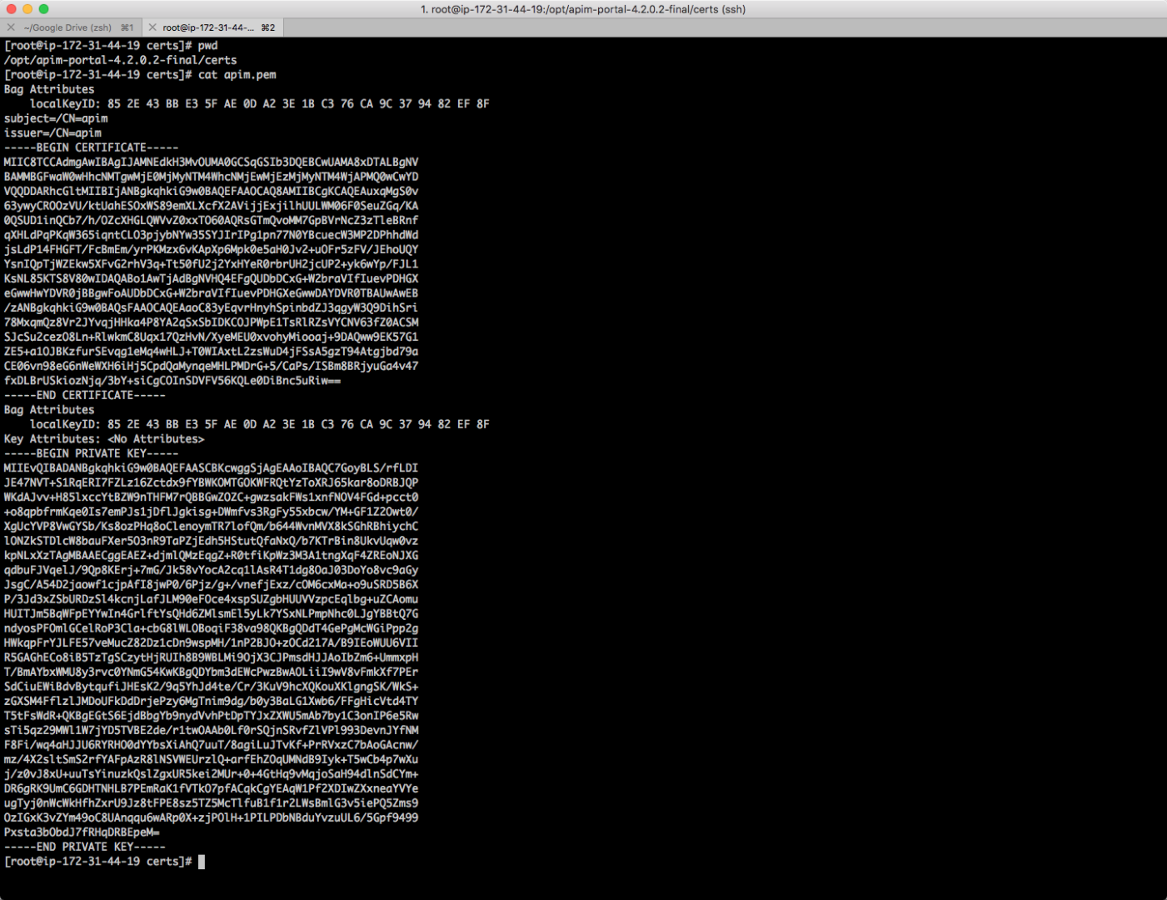
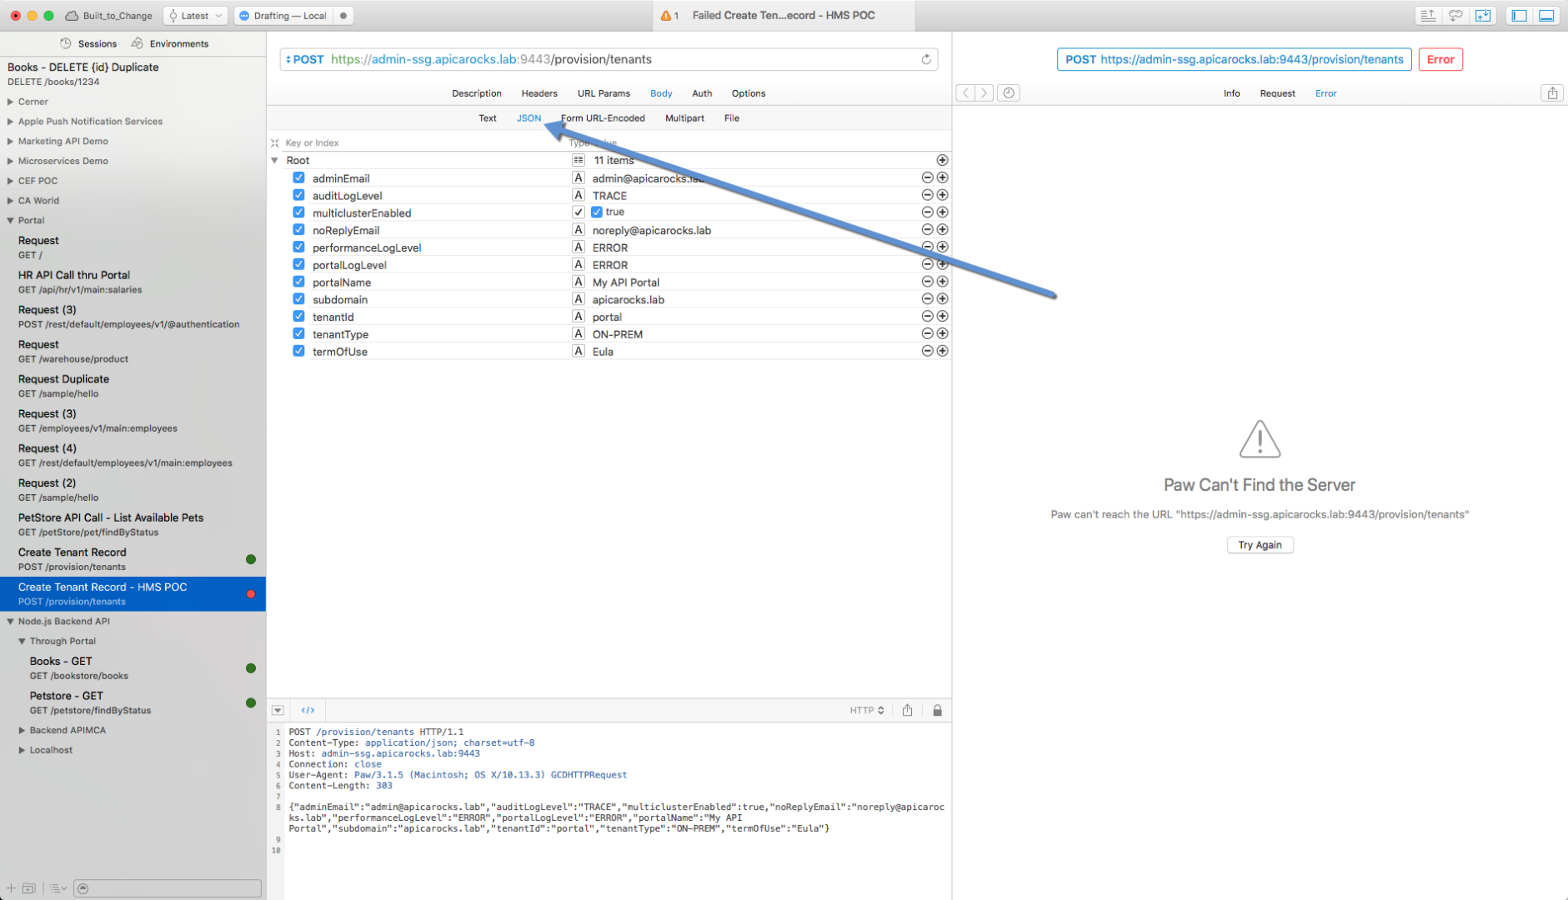
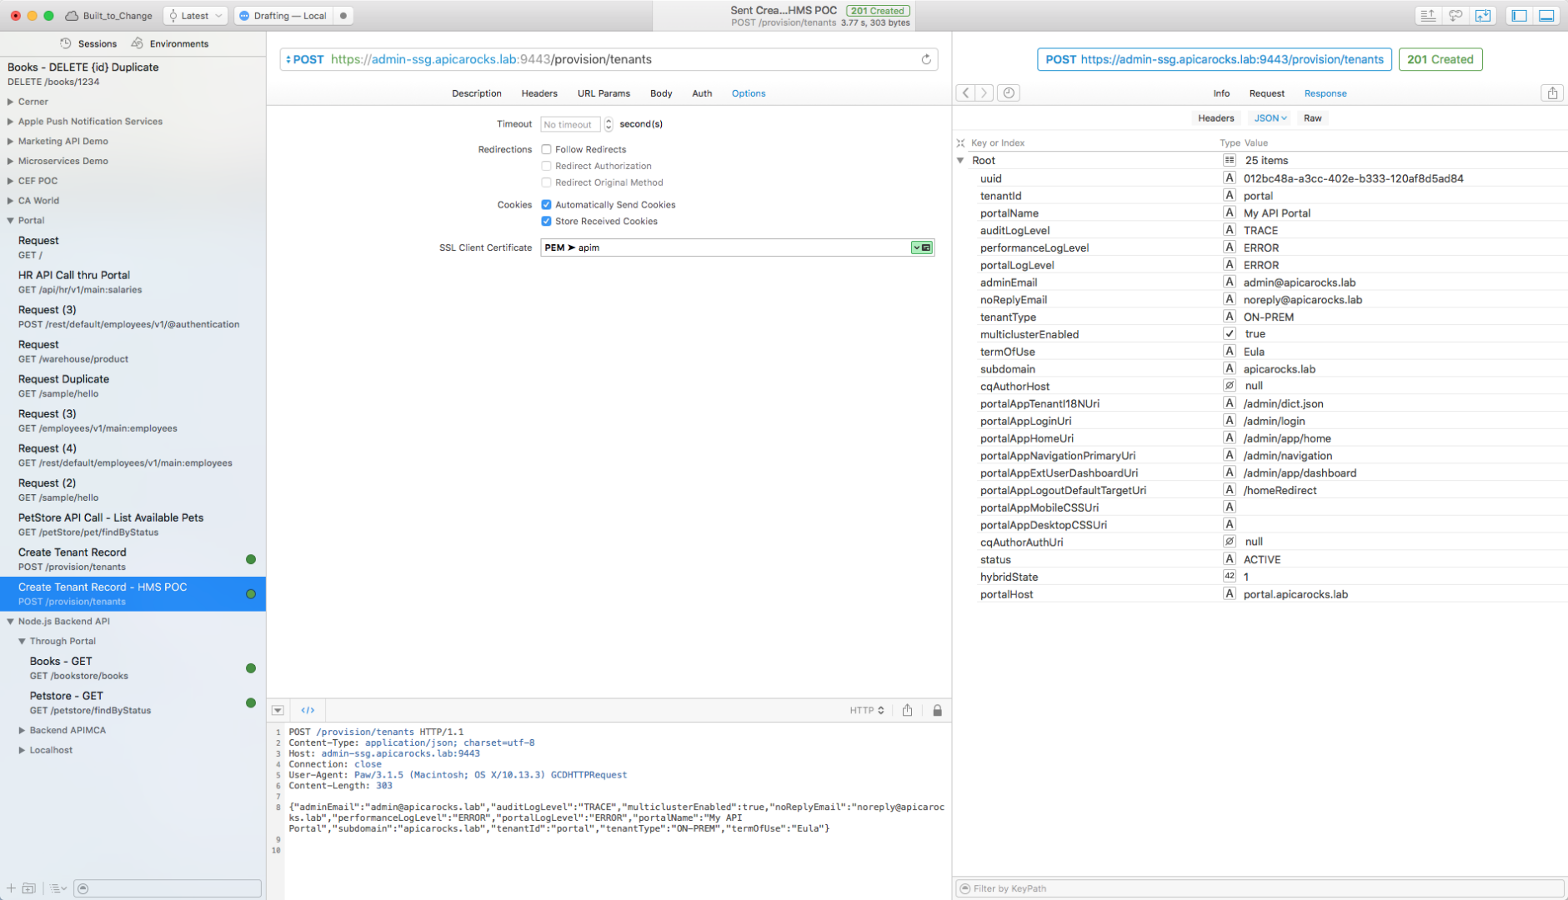
Now you can use cURL or any other REST client you want to do a POST and create the tenant record on the portal. I'm using Paw to do that. Make sure you copy the /opt/apim-portal-4.2.0.2-final/certs/apim.pem content or the mutual SSL will not work and the request will thus fail.


If you see a "Private Key is Missing" error, try to paste the private key before the certificate
Remember that the default credentials to access your new tenant are: admin / 7layer

I hope this tutorial can help you out!