This document describes upgrading CA Software Asset Manager from 4.0 upward from within the SAM User Interface.
This document cannot be followed to upgrade any SAM version prior to 4.x to 4.0.2 (or above) as that requires an upgrade of PHP server to 5.6.
The Upgrade guide to upgrade any SAM version prior to 4.x to 4.0.2 (or above) is available at the following link. https://support.ca.com/phpdocs/7/8572/CA_SAM_Rel4_Upgrade_Manual.pdf?intcmp=searchresultclick&resultnum=2
1. Ensure PHP is at the correct version
Ensure that your PHP system is at version 5.6
Start IIS Manager (InetMgr.exe) and find the CA SAM web site:
Click the PHP Manager

Verify the version:

If it is 5.6 you can continue. If not you need to follow the Upgrade document described above.
2. Prepare for the update
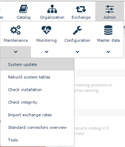
ADMIN-> Maintenance->System Update
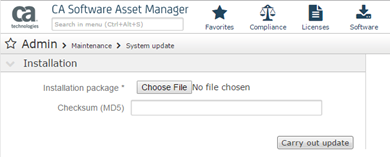
You will be presented with an upload screen that will list items that should be reviewed and remediated before the update is completed.

Example: The above case tells you that write permissions are currently denied but needed for the install.
Once installed, the rights can be reduced to read-only.
Note: If you do not change the security, the screen will return to the above screen, after the upload.
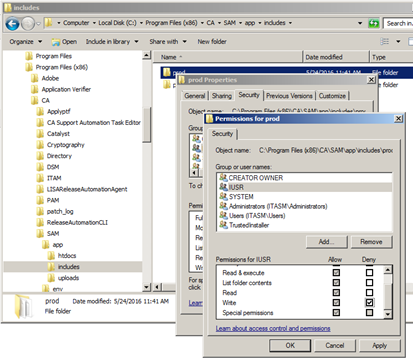
3. Give Write permissions to the IUSR on the htdocs folder
a. Navigate to the app folder, e.g. C:\Program Files (x86)\CA\SAM\app
b. Right click on the htdocs folder and ensure that IUSR (IIS_IUSRS) (Or the user configured as IIS server user) has write access, in this case a Deny policy has been added to protect the folders.

c. Remove or add the Write permission and refresh the WEB page.
If you get this error:

It could be that you have tried the upload before allowing the Write access.
d. Remove the Install folder from the ***\SAM\app\htdocs\{tag}. E.g. : C:\Program Files (x86)\CA\SAM\app\htdocs\prod\install and refresh the browser again. You might need to re-login and select system update.
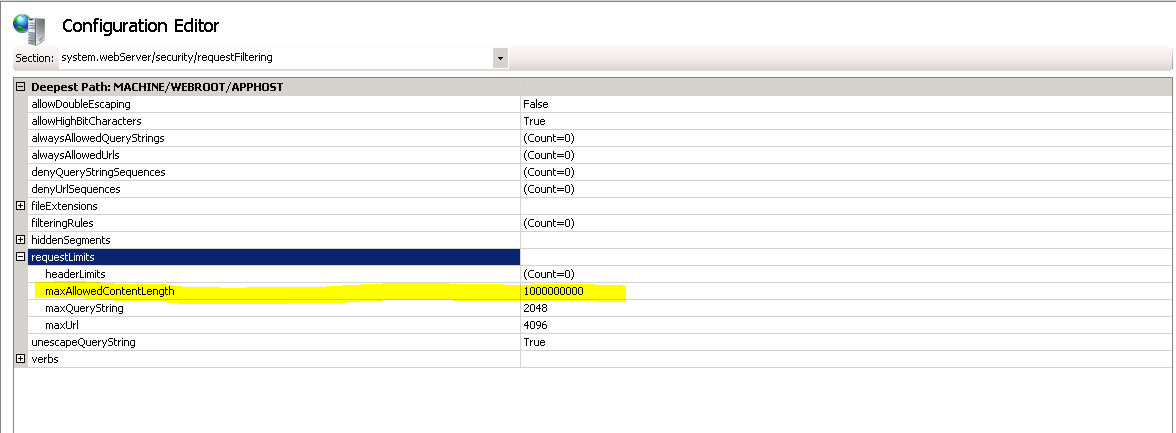
Verify/Modify MaxAllowedContentLength = 1000000000
4. Start the Update
Admin-> Maintenance -> System Update
- Download the ZIP file from : http://www.ca.com/us/support/ca-support-online/product-content/recommended-reading/technical-document-index/ca-software-asset-manager-solutions-catalogs-index.aspx
b. Place the file so it can be browsed from the Browser.
c. Press ‘Choose File’ and select the ZIP file

d. Select ‘Carry out update’
e. Click ‘Ok’ to start the system update

You will first see that the ZIP file is uploaded
The install will start
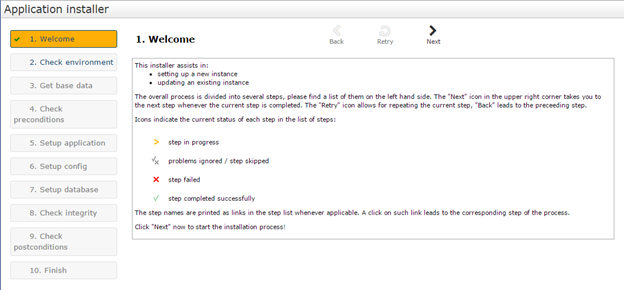
f. Press ‘Next’
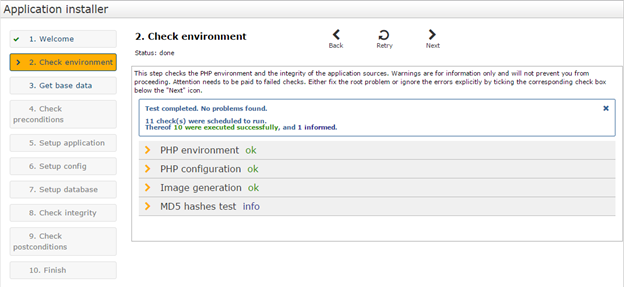
g. Verify that all is good, if you see errors try to correct them and retry
h. Press ‘Next’
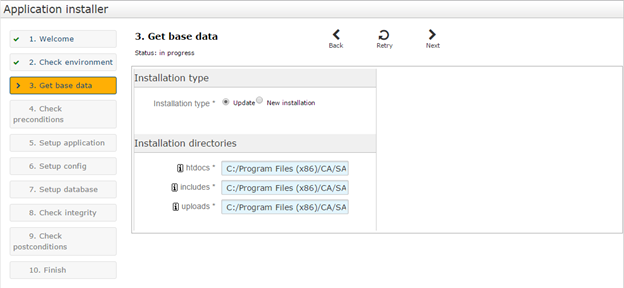
i. Verify data and press ‘Next’
Note: Any errors that are returned need to be corrected

j. Click ‘Retry’
k. Click ‘Next’

l. This is a screen just to ensure that the Pre install conditions are met. If you are sure the prerequisites are met, press ‘Skip step’ or check the 3 check boxes and press ‘Next’

This is a drive space check.
m. Press next – Accept to continue.
It will now move the existing installation to ***\{tag}_old folders for the 3 main folders: htdocs, includes and uploads, and copy the new files to the original folder names.

Note this can take a couple of minutes…
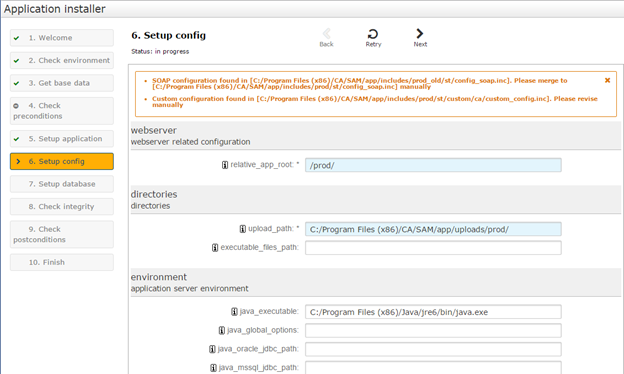
n. Once the copy is done you need verify the configuration. You should not need to change anything as this is an upgrade, but verify the database password is populated

Note: This is important information as the config_soap.ini and the custom_config.ini, we use this information in the post update tasks.
o. Press ‘Next’
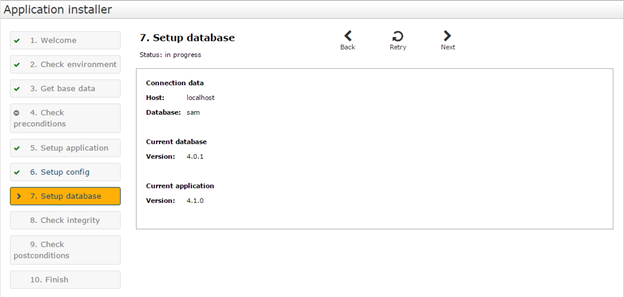
The Setup will look at the database version and update it if needed. In this case it is needed.
p. Press ‘Next’
Note this can take a couple of minutes as well.
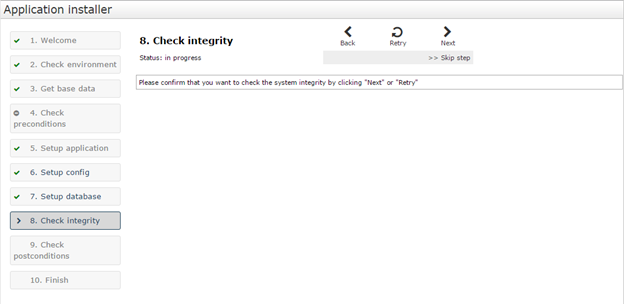
q. Run a System check or Skip the step. You can run the System Check afterwards if you like from Admin -> Maintenance -> Check Installations
r. Press ‘Next’ to test
Note: The test can take a couple of minutes.
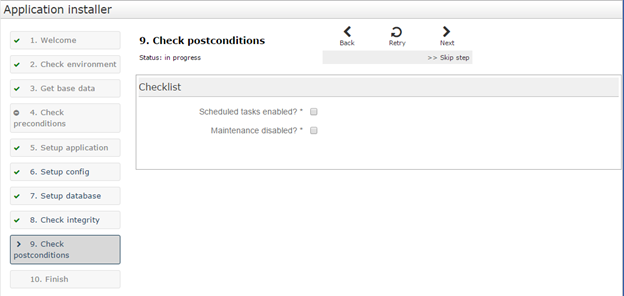
s. Similar to step l above, this is just a maintenance check list. It can be skipped or check all boxes and press ‘Next’.

t. If you leave the Cleanup install checked it will remove the ZIP files from the install but not the {tag}OLD folders created during the install. It is recommended to check the box and clean up the Installation.
Press ‘Next’
u. At the SAM Login screen, sign in to CA SAM
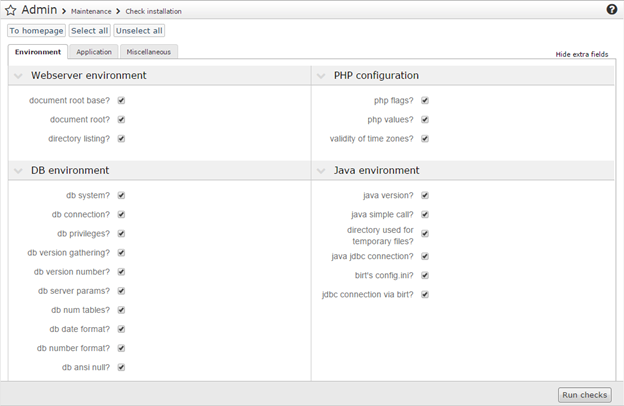
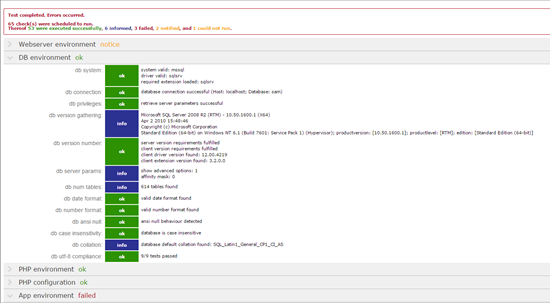
v. click ‘Run Checks’ to verify the installation.
The check can take some time (5-10 minutes). And it will present you with a status like this:
5. Finalizing the Upgrade
Post update steps…
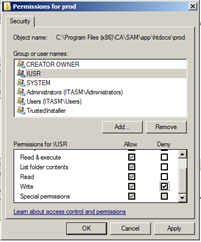
a. Change the Security back to Read Only
Deny Write to the Program Files (x86)\CA\<tag>\htdocs and Program Files (x86)\CA\<tag>\includes
b. Update the config_soap.ini
As noted in the installation you need to check the SOAP configuration. By default SOAP is disabled.
- Open the config_soap.inc file at the following location:
Program Files (x86)\CA\<tag>\includes\prod\st
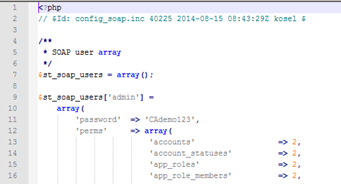
- Copy the login and password from the old config_soap.ini at includes_old\st\config_soap.ini folder into the new config_soap.inc folder
- Remove the comments on line 8 and on line 170
6. Update the license
In some cases you will see that the license file has been overwritten. If you have other Modules enabled than the Base CA-SAM modules you need to copy the license file from
Program Files (x86)\CA\<tag>\includes\prod_old\st\custom\ca\license_file.ini to
to
Program Files (x86)\CA\<tag>\includes\prod\st\custom\ca\license_file.ini
Note: There is no need to restart SAM as the license file will be noticed on the next navigation within CA SAM.