Problem Summary:
Steps to configure the federation partnership to achieve SSO (Single-Sign-On) between CA Single Sign-On, acting as the Identity Provider (IDP), and Amazon Web Services acting as the Service Provider (SP).
Configuration Overview:
1. Configure Identity Provider and Service Provider Entities
a. Local Entity Creation at CA Single Sign-On
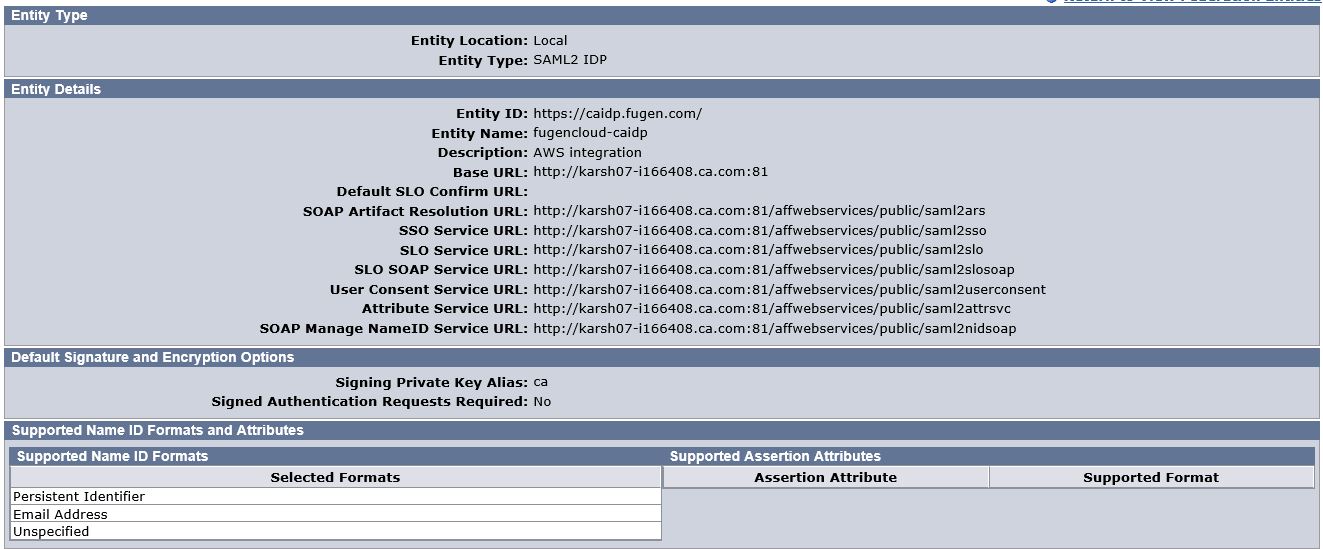
b. Local Entity Metadata Export
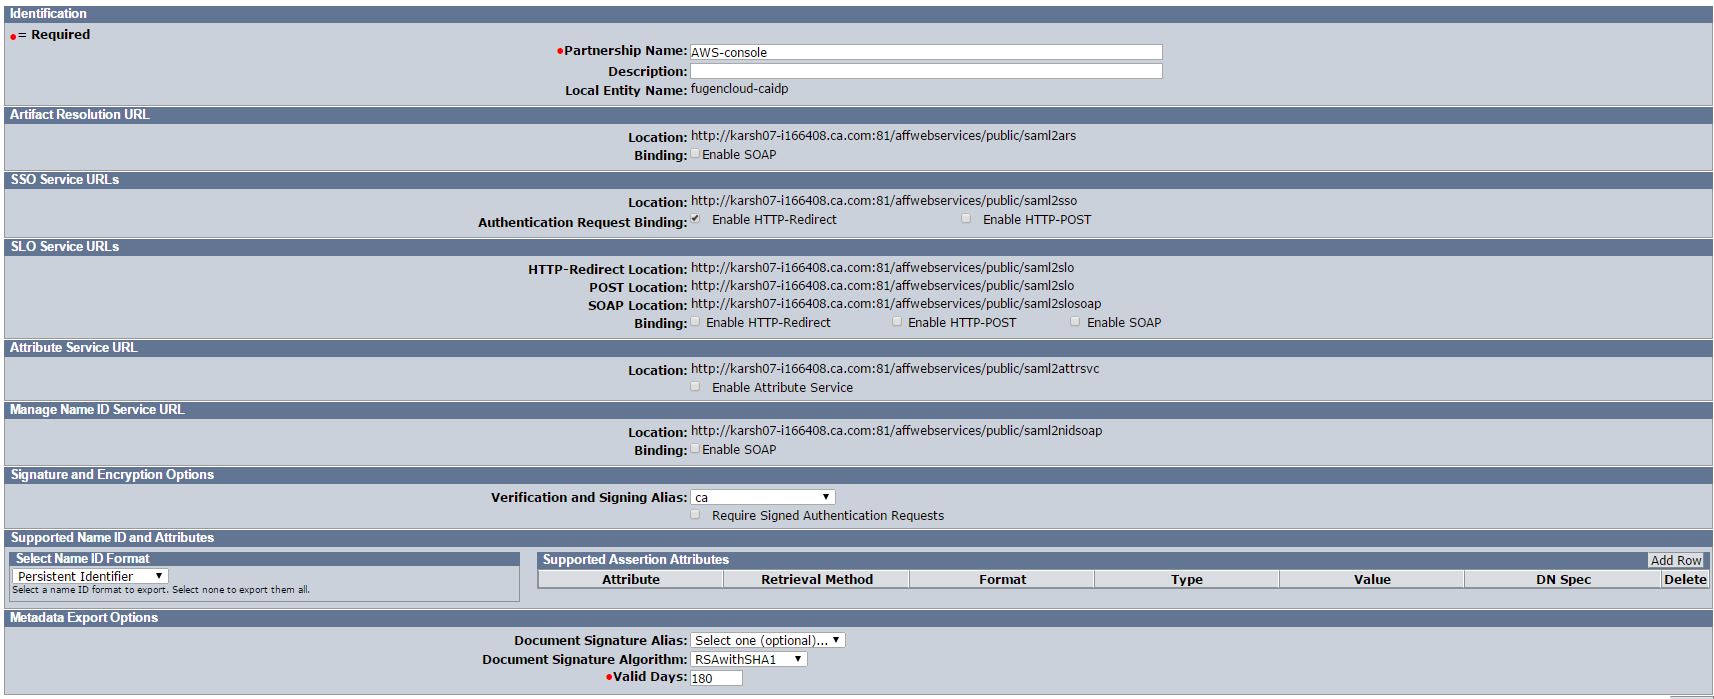
Select above created Local Entity --> Action --> Select Export metadata

Fill the following fields:
- Partnership Name – Any (e.g. AWS-console)
- Description – Any
- Valid days – Validation period for the metadata(e.g. 180)
- Select Export & Save the file
- Exported Metadata file will be uploaded on AWS.
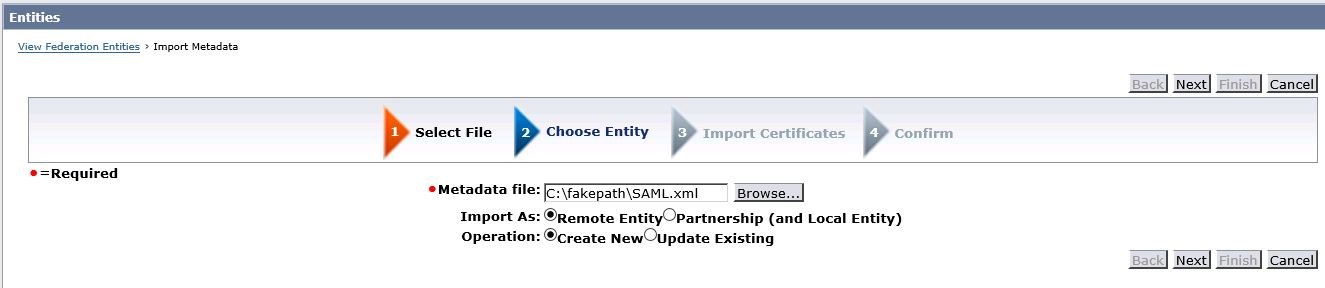
c. Remote Entity Creation
- Obtain Amazon Web Services Metadata for Partnership creation.
- Upload Amazon Web Services Metadata data, by following steps
o From Entity -->Import Metadata
o Browse Amazon Web Services Metadata
o Confirm and uploaded
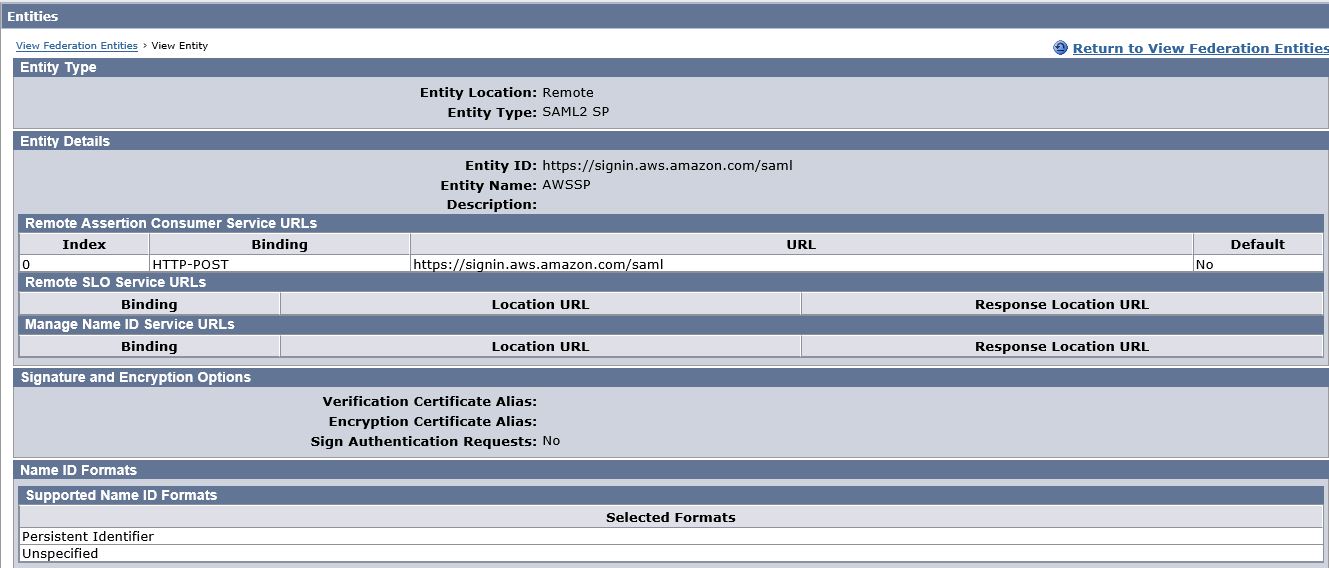
Uploaded Metadata will look as shown below:
2. Configure Federation Partnership between CA –SiteMinder (IDP) & Amazon Web Services (SP)
a. Login to CA SiteMinder and navigate to Federation --> Partnership Federation
b. Modify the partnership created while exporting the metadata
c. Select Remote Partner ID (e.g. https://signin.aws.amazon.com/saml) which you imported in step#1c.
d. Select one or more User Directories in desired search order.

e. Select users that should be allowed to federate(e.g. All Users in Directory)

f. Assertion Configuration
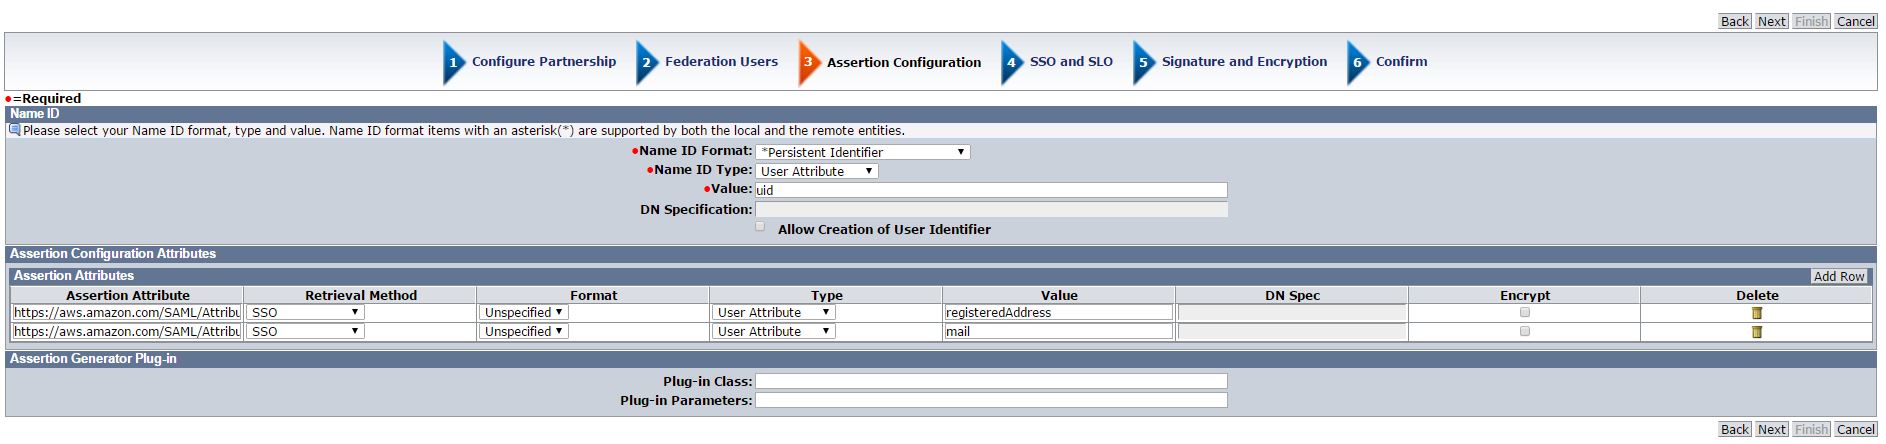
NameID:
Name ID Format – Persistent Identifier
Name ID Type – User Attribute
Value – Should be the name of the user attribute which matches with the Amazon
Assertion Attributes:
Assertion Attribute – https://aws.amazon.com/SAML/Attributes/Role
Important
The value of the Name attribute in the Attribute tag is case-sensitive. It must be set to https://aws.amazon.com/SAML/Attributes/Role exactly.
o Format – Unspecified
o Type – User Attribute
o Value –Attribute containing one or more comma separated AWS's IAM roles mapped for this user. AWS's IAM roles are in Amazon Resource Names(ARNs) format.
This element contains one or more AttributeValue elements that list the IAM role and SAML identity provider to which the user is mapped by IdP. The role and identity provider are specified as a comma-delimited pair of ARNs in the same format as the RoleArn and PrincipalArn parameters that are passed to AssumeRoleWithSAML. This element must contain at least one role-provider pair—that is, at least one AttributeValue element—and can contain multiple pairs. If the element contains multiple pairs, then the user is asked to select which role to assume when he or she uses WebSSO to sign into the AWS Management Console.
For Example:
<Attribute Name="https://aws.amazon.com/SAML/Attributes/Role">
<AttributeValue>arn:aws:iam::account-number:role/role-name1,arn:aws:iam::account-number:saml-provider/provider-name</AttributeValue>
<AttributeValue>arn:aws:iam::account-number:role/role-name2,arn:aws:iam::account-number:saml-provider/provider-name</AttributeValue>
<AttributeValue>arn:aws:iam::account-number:role/role-name3,arn:aws:iam::account-number:saml-provider/provider-name</AttributeValue>
</Attribute>
Assertion Attribute – https://aws.amazon.com/SAML/Attributes/RoleSessionName
Important
The value of the Name attribute in the Attribute tag is case-sensitive. It must be set to https://aws.amazon.com/SAML/Attributes/RoleSessionName exactly.
o Format – Unspecified
o Type – User Attribute
o Value – Attribute containing the username or the email that will be used by AWS as a display name of the federated user.
This element contains one AttributeValue element that provides an identifier for the AWS temporary credentials that are issued for SSO and is used to display user information in the AWS Management Console. The value in the AttributeValue element must be between 2 and 64 characters long, can contain only alphanumeric characters, underscores, and the following characters: + (plus sign), = (equals sign), , (comma), . (period), @ (at symbol), and - (hyphen). It cannot contain spaces. The value is typically a user ID (bobsmith) or an email address (bobsmith@example.com). It should not be a value that includes a space, like a user's display name (Bob Smith).
For example:
<Attribute Name="https://aws.amazon.com/SAML/Attributes/RoleSessionName">
<AttributeValue>user-id-name</AttributeValue>
</Attribute>
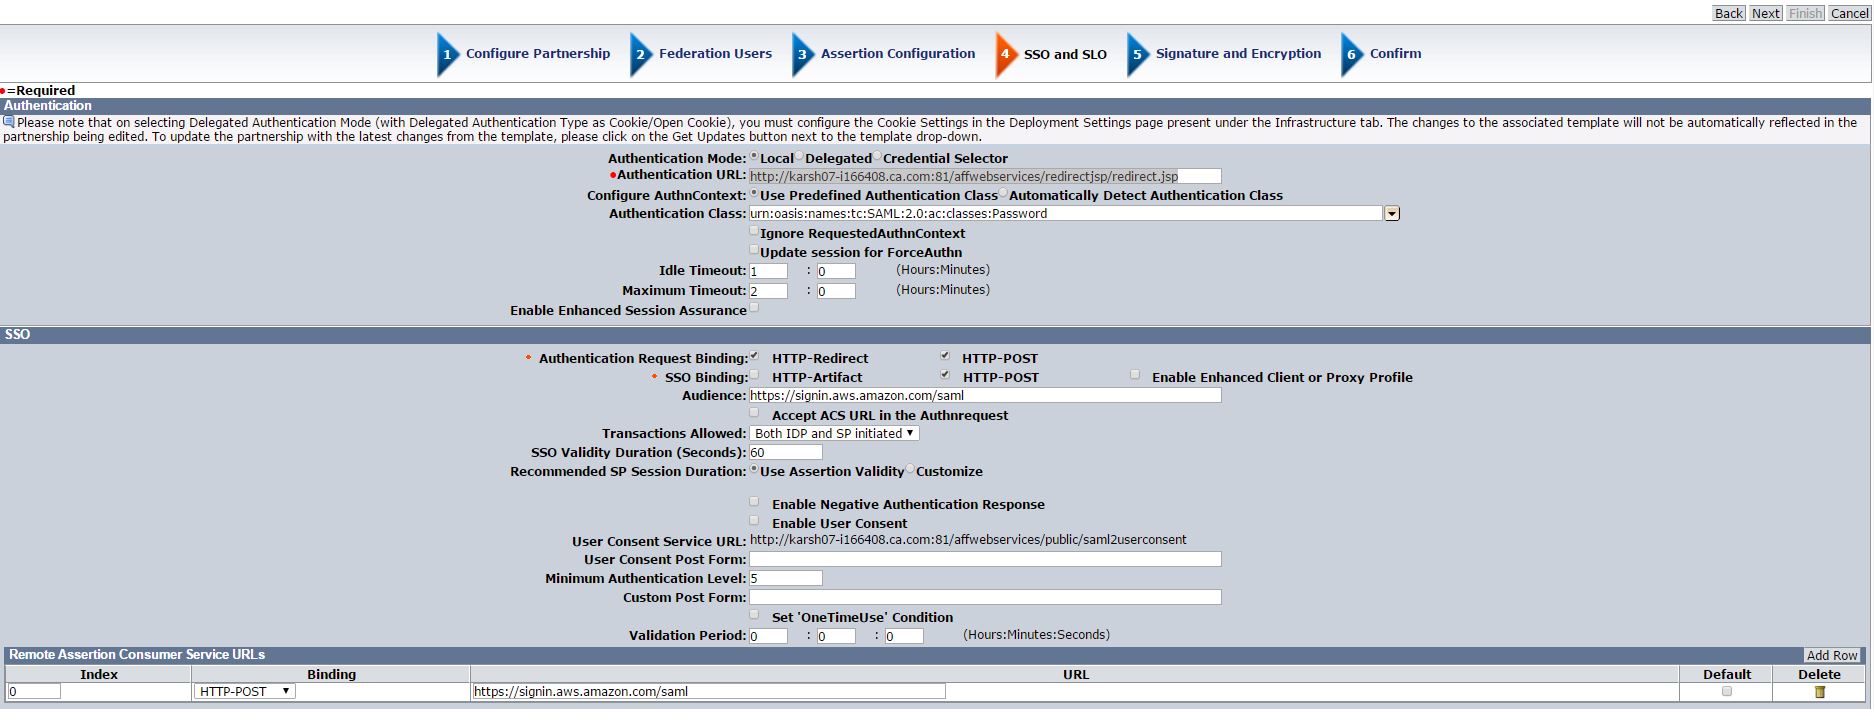
g. Single Sign-On and Sign-Out
<Conditions>
<AudienceRestriction>
<Audience>https://signin.aws.amazon.com/saml</Audience>
<Audience>urn:amazon:webservices</Audience>
</AudienceRestriction>
</Conditions>
Note: Single Logout functionality is not supported in this version of Amazon Web
Services. Hence only Single Sign-on functionality has been configured for Amazon
Web Services.

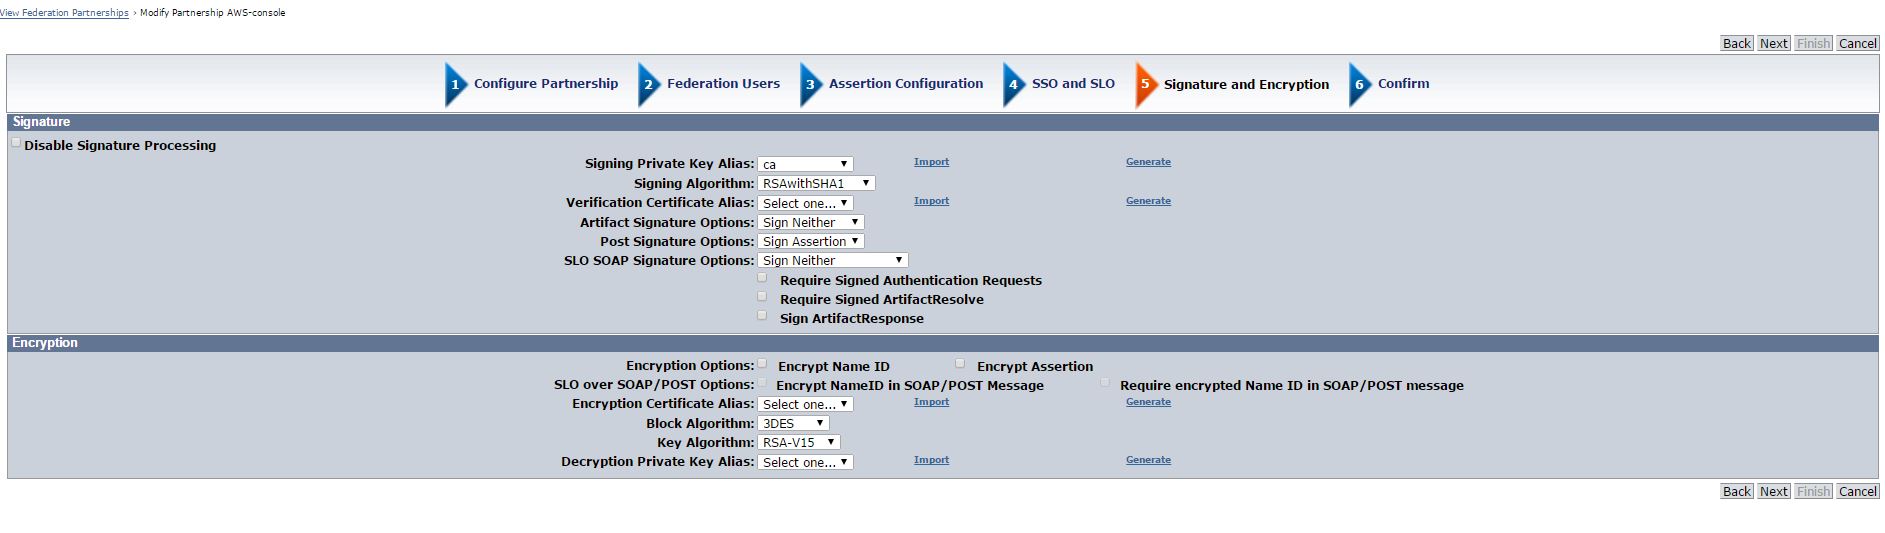
h. Configure Signature and Encryption
Signing Private Key Alias – Select the alias for the imported private key (e.g.ca)
i. Confirmation Page
Confirm the values and save the Partnership
j. Partnership Activation
Activate the Partnership

3. Configuring Service Provider - Configure SAML 2.0 SSO in Amazon Web Services
a. Login to AWS Management Console(https://console.aws.amazon.com)
b. After login to console Click on IAM link under Security, identity & Compliance

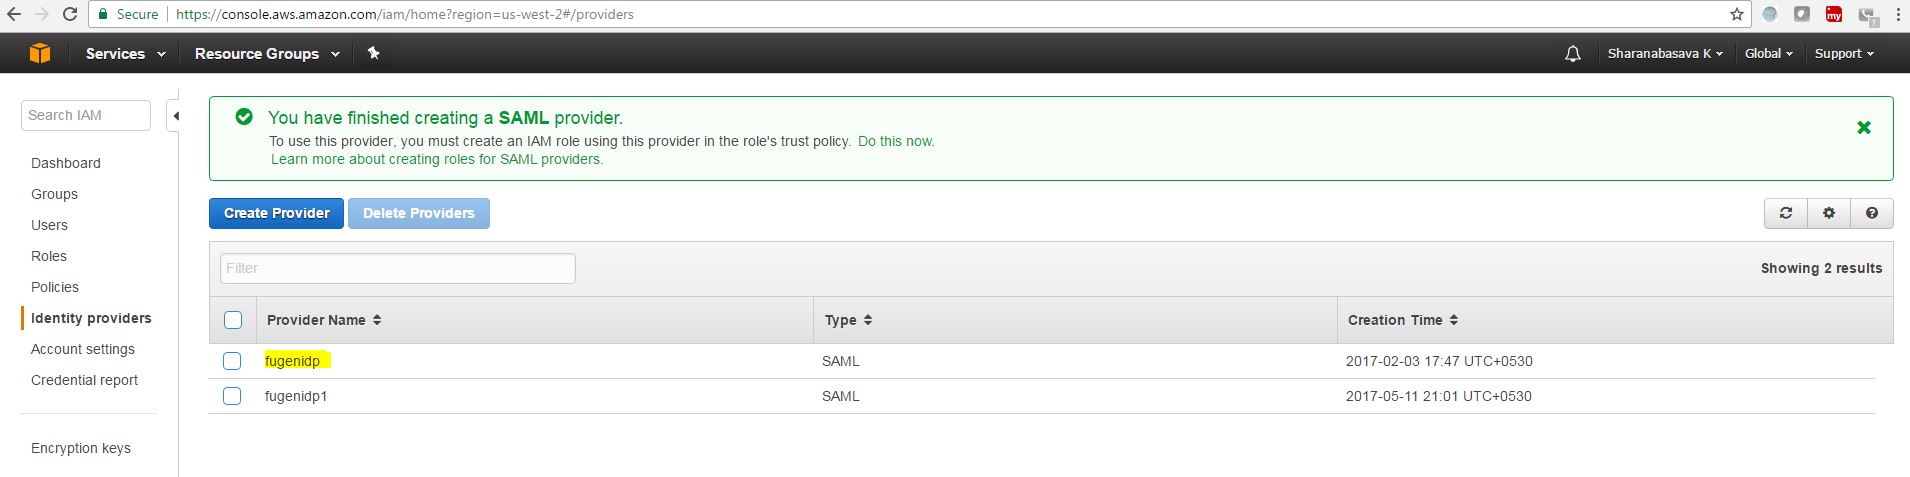
c. Select Identity Provider from the left and Click Create SAML Provider on the top

d. Click on Create SAML Provider ans select the provider type as SAML

e. Enter name for the provider (e.g. fugenidp) and Click Choose file button and upload the Identity Provider Metadata file which was exported from IDP and click Next Step.

f. SAML Provider is created.
g. Configure Role in Amazon Web Services
h. Click on Create new role and Choose Role type as Role for Identity Provider Access and Select Grant Web Single Sign-on (WebSSO) access to SAML Providers

i. Select the SAML provider to trust.
Federated users from the selected provider can access resources from your AWS account using the AWS Management Console. For WebSSO, the audience attribute (SAML:aud) is automatically set to https://signin.aws.amazon.com/saml.

j. Verify Role Trust document and Click Continue

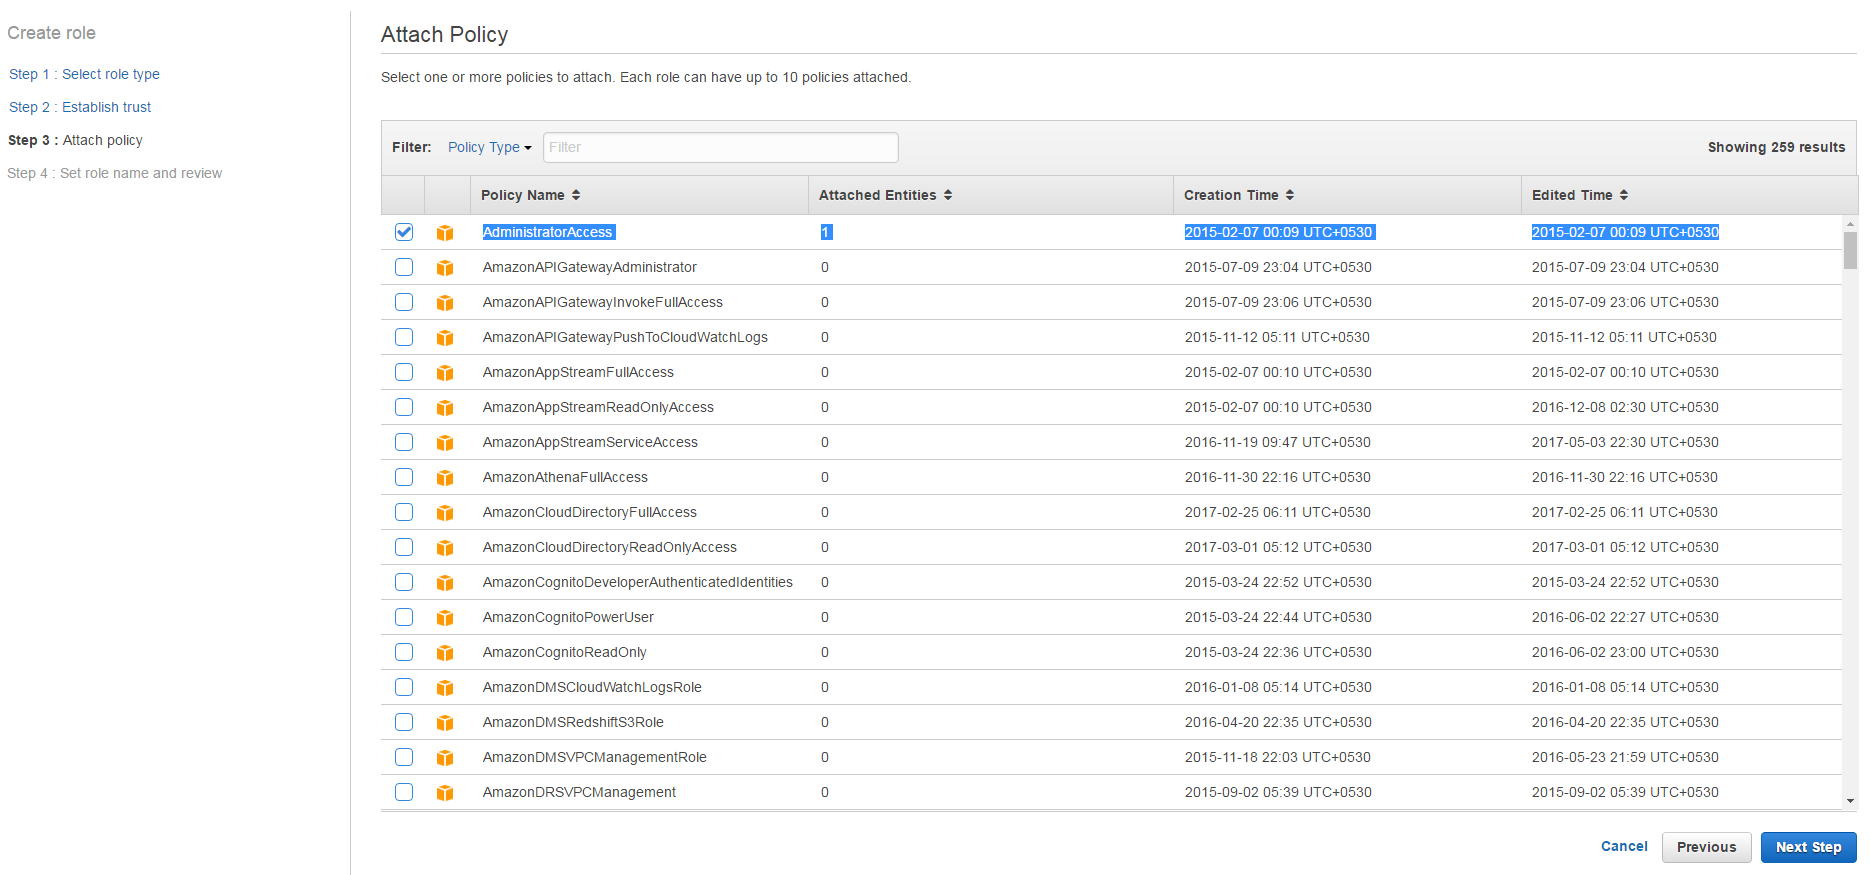
k. Select Permissions for this role
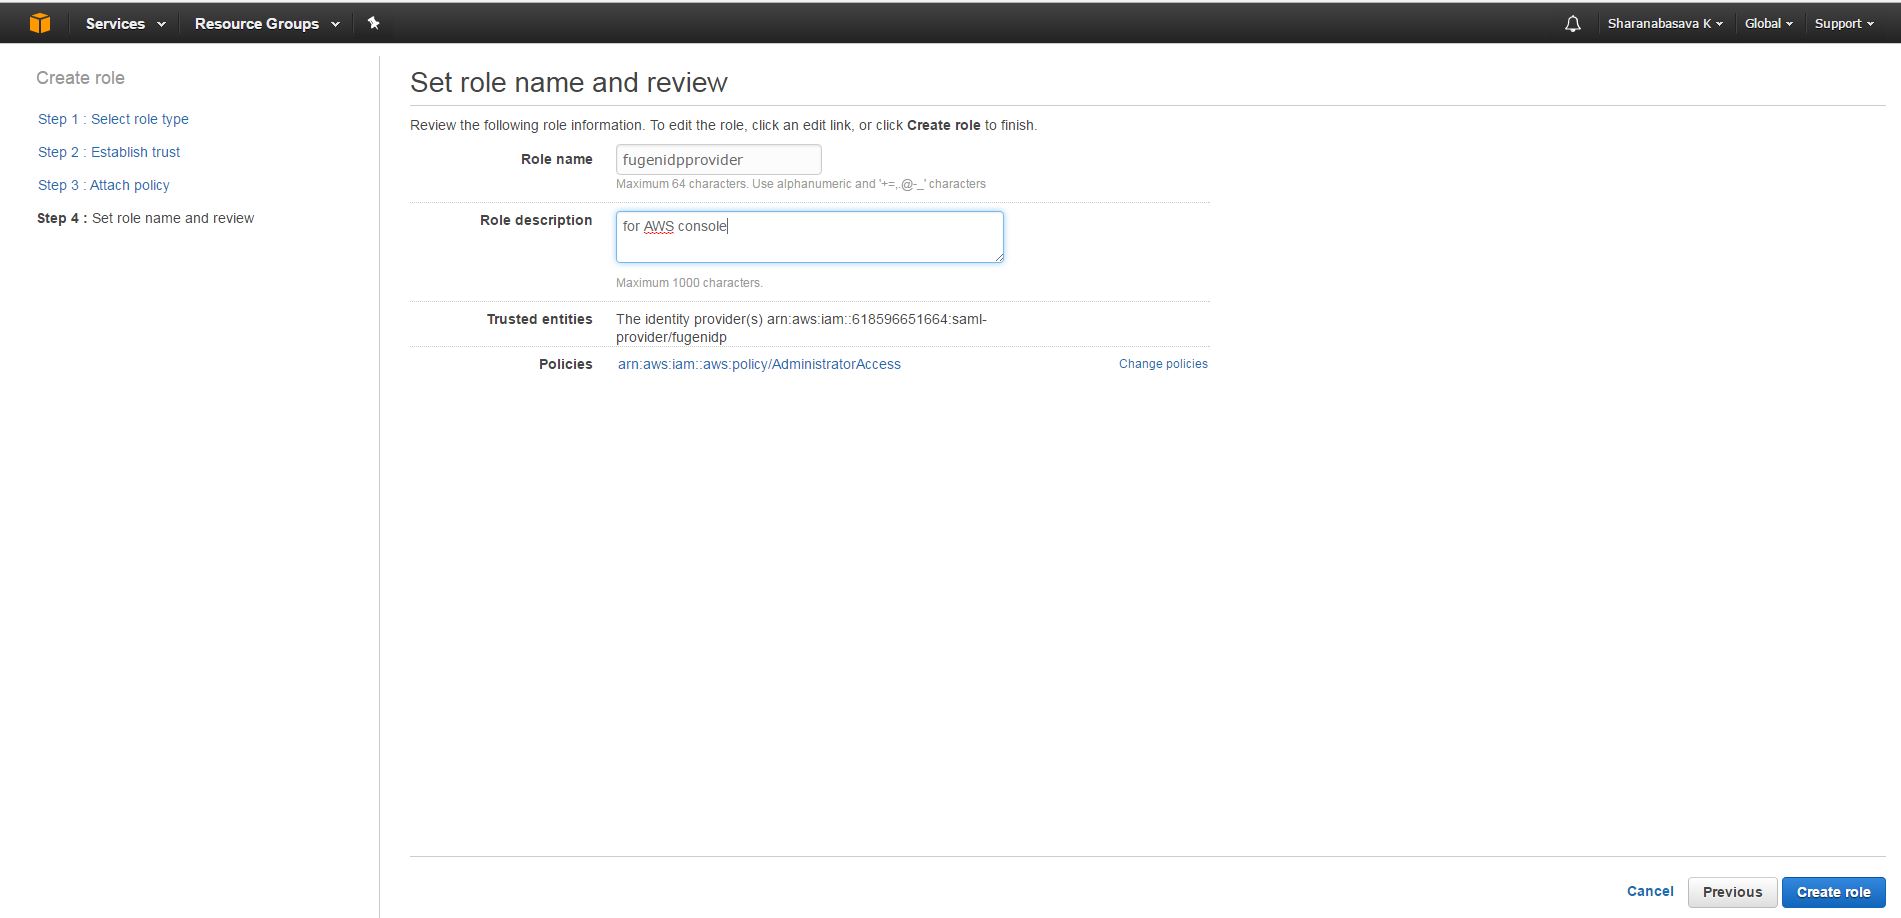
l. Enter the role name and Role description, verify the Trusted entities and policies.
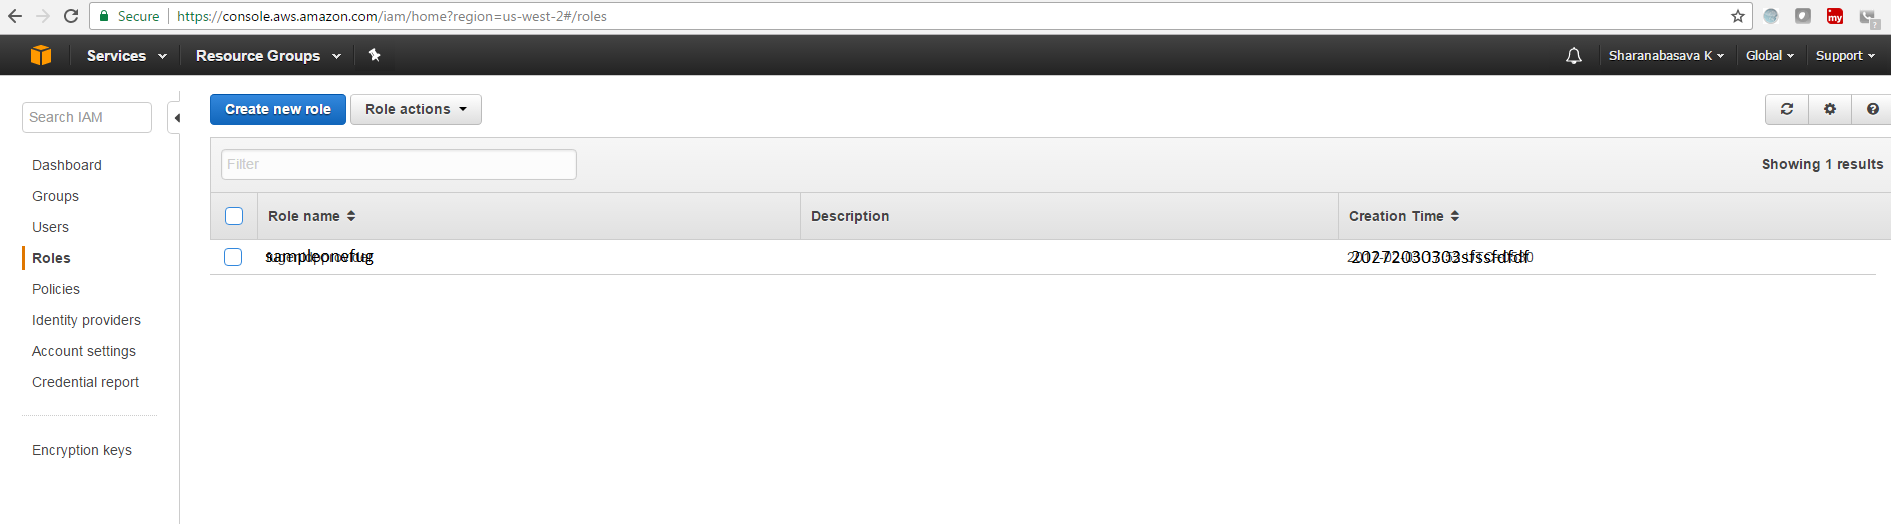
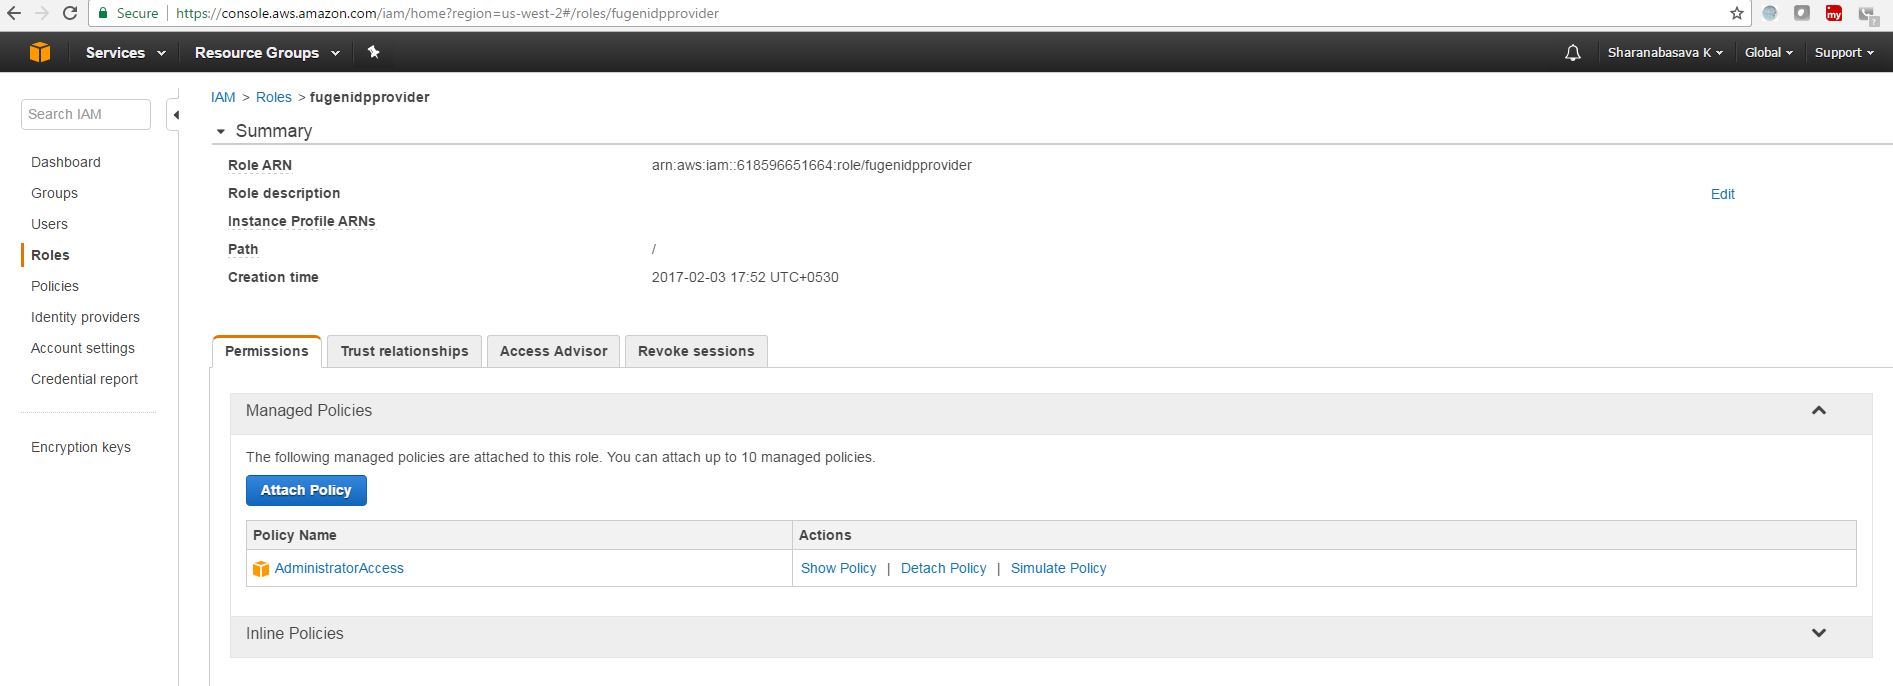
m. click on create role and the role will be created. To view the created role, In AWS console Navigate to IAM--->roles--->click on created role(e.g. fugenidpprovider).
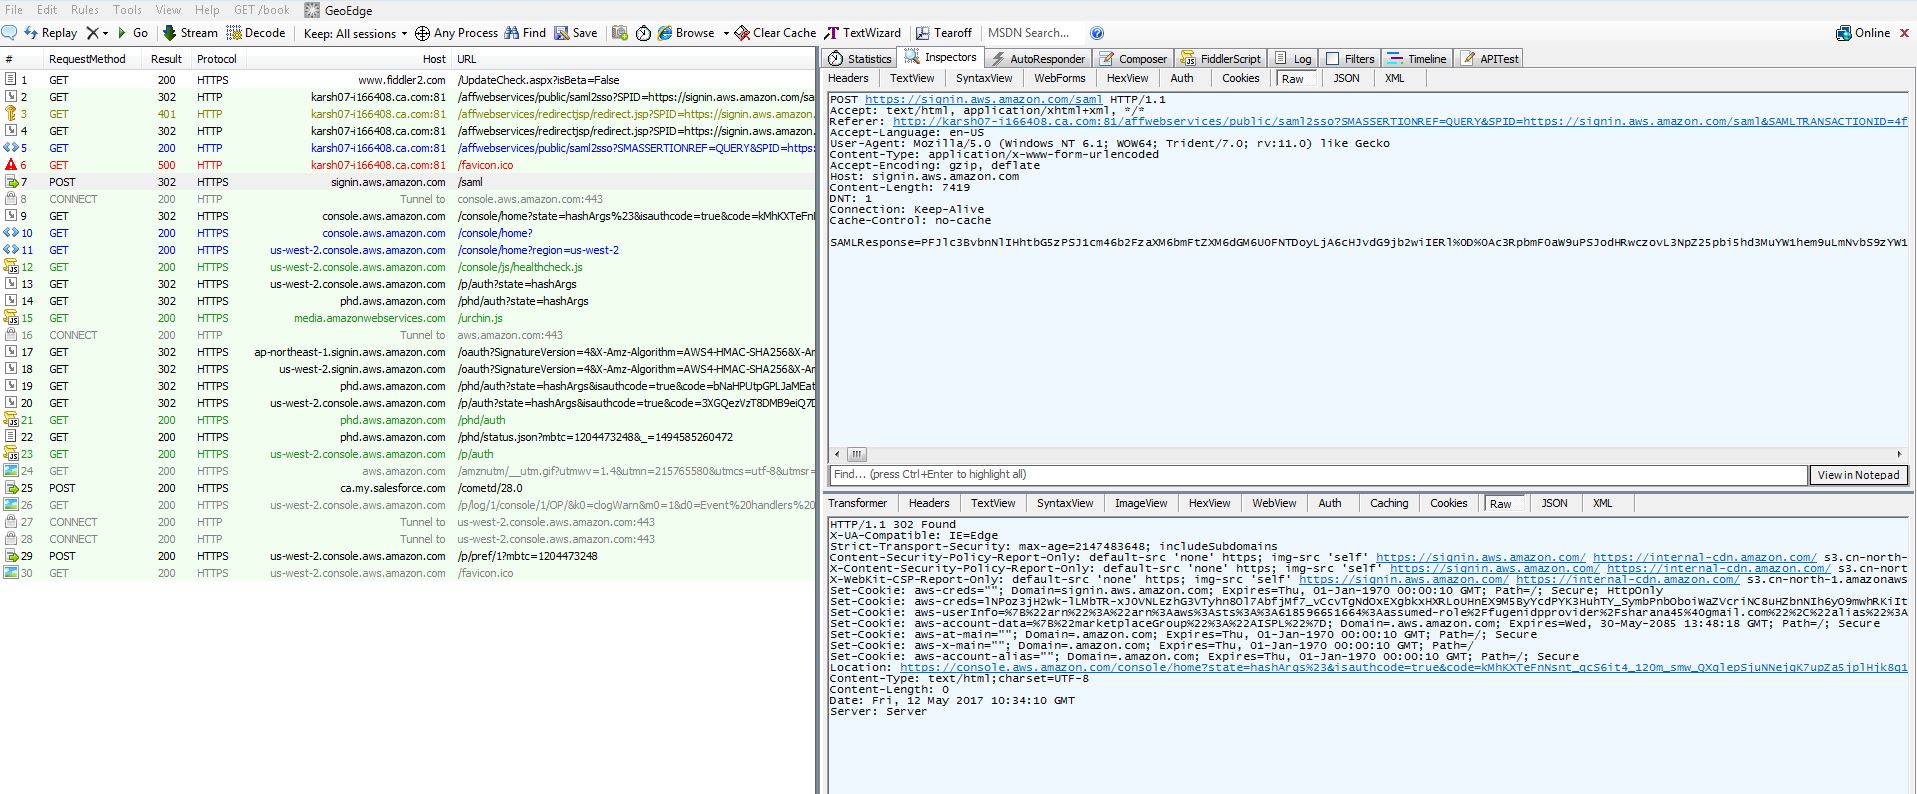
4. Federation Testing
In the case of Amazon Web Services, Identity Provider initiated Scenario was tested.
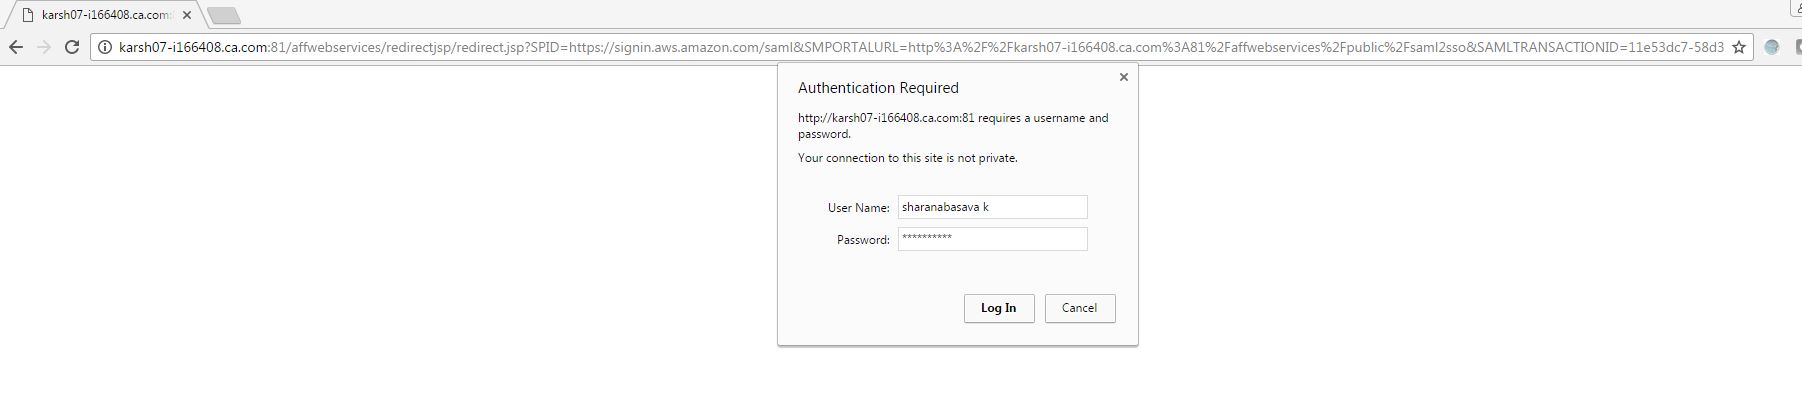
a. Access the IDP Initiated URL.
http://karsh07-i166408.ca.com:81/affwebservices/public/saml2sso?SPID=https://signin.aws.amazon.com/saml
b. The User is asked to enter the credentials.
c. After the successful login, the user is redirected to the Amazon Web Services home page

5. Exceptions
a. When SiteMinder Partnership is Inactive
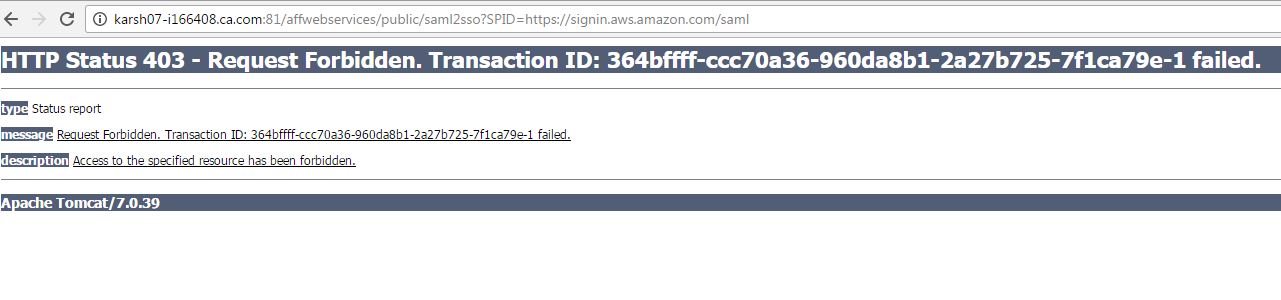
b. Amazon Web services requires signed assertion, if you dont enable digital signature processing then you will get below error at Amazon web services end.
c. When the Assertion Consumer Service URL is given wrong in SiteMinder side
Assertion Consumer Service URL in the Amazon Web Services --> https://signin.aws.amazon.com/saml
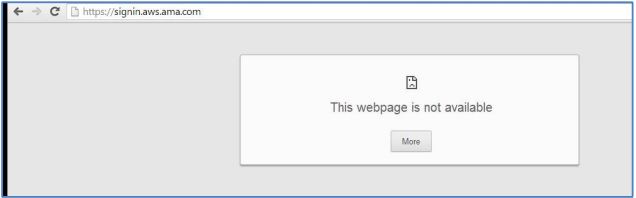
Assertion Consumer Service URL given in SiteMinder --> https://signin.aws.amazon.com
Test Assertion Consumer Service URL given in SiteMinder --> Result --> Authentication at the Identity Provider side and gives following error:
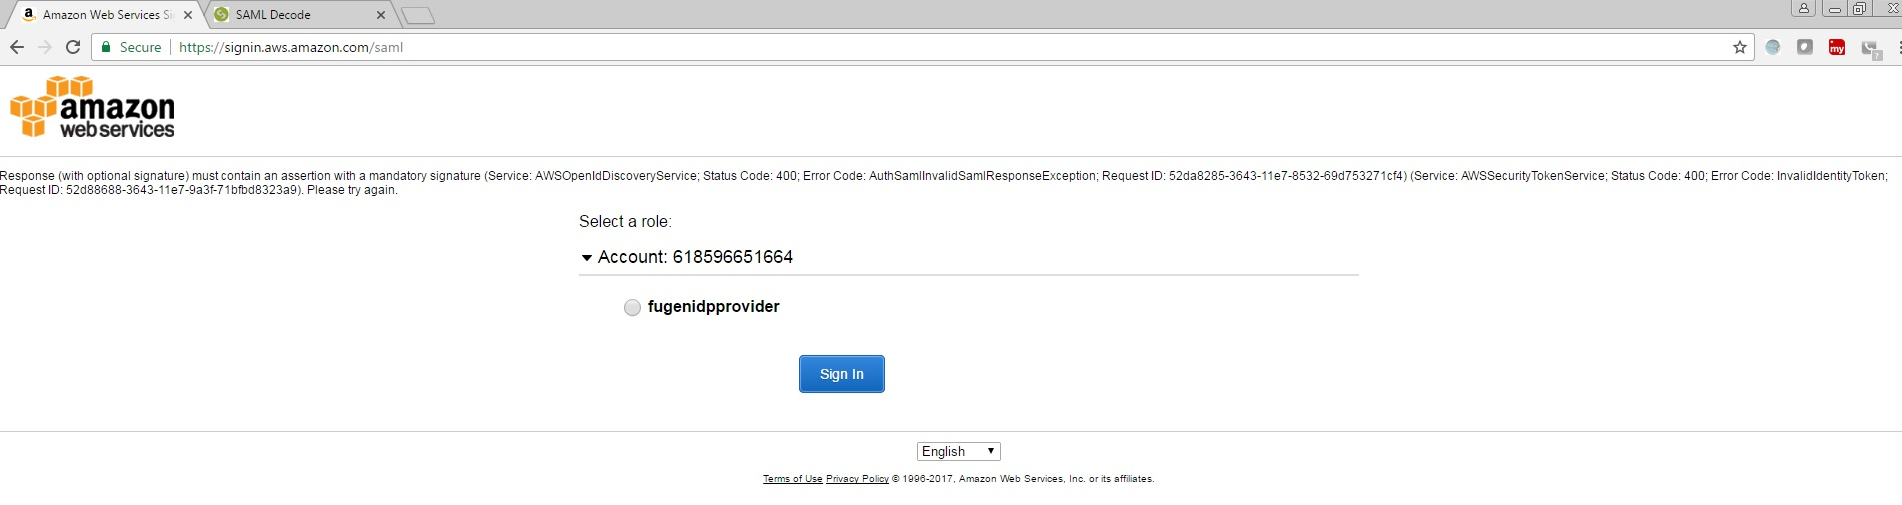
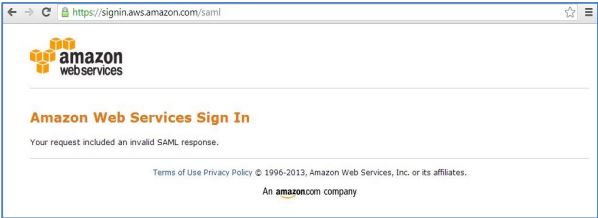
d. here we get same results for two conditions.
1. When SiteMinder Authenticated User who is not in Amazon Web Services trying to login through SiteMinder.
This is a user that is authenticated to SiteMinder but not provisioned to Amazon Web Services.
User ID used --> xyztest
2. SiteMinder User who doesn’t have desired attributes in the user store.
UserID --> abcuser
This user doesn’t have the registered address attribute which is the Assertion Attribute used in the Partnership.
Below screenshot having registeredAddress which is having the value of role and identity provider specified as a comma-delimited pair of ARNs in the same format as the RoleArn and PrincipalArn parameters that are passed to AssumeRoleWithSAML.

If any one of them are missing then you will get below error.
Result --> After authentication following error page appears at Amazon Web Services.
And for more exceptions, Please refer below mentioned runbook and refer Chapter 5: Exception Handling.
SAP Portal Services