The CA PPM Practitioners have spoken, and CA has been listening! The latest CA PPM release (15.2) is now public. This blog series is our first look into the solution’s enhancements and how they help us deliver desirable value outcomes to our organizations. Other blogs in this series include:
- Adaptive Project Management and Conversations
- Enhanced Time and Work Transparency
- CA PPM and Agile Central Better Together
Check them out .
This post focuses on the new User Experience (UX) expansion to include Resource Management. I am so excited to share some of the highlights of this functionality with you! Customers have long requested many of these features and they have arrived.
Resource Management New UX
Logging into the new UX brings us to the Projects landing page. Clicking on the Resources icon (outlined in red) takes us to the Resources landing page. The top of the page shows resources we have booking rights to or who are our direct reports. The bottom of the page shows requests for roles that need to be filled.

Two views are available – Investments to Resources and Resources to Investments. We can switch between views by clicking on Investments to Resources or Resources to Investments in the upper left corner.
Resources to Investments View
This view shows the resource allocation information in a time-scaled view. Because allocation data is color coded, we can easily see under-allocated resources in green and over-allocated resources in red. The blue and white circles let us know there are soft bookings. Both of these indicate places we need to focus.
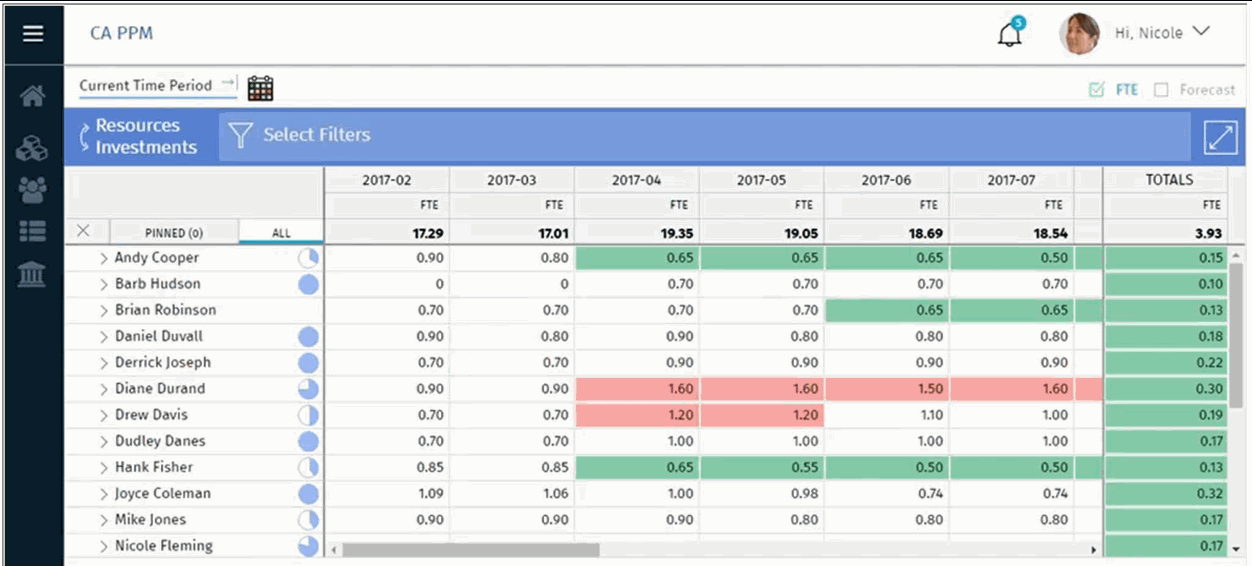
We can resolve allocation issues, hard book resources, and balance our team’s workload. Filtering this view by Resource Manager allows us to focus on our own team.
Investments to Resources View
This view shows investments we have view or edit rights to and resource allocation information. From here we can update resource allocations to specific investments.
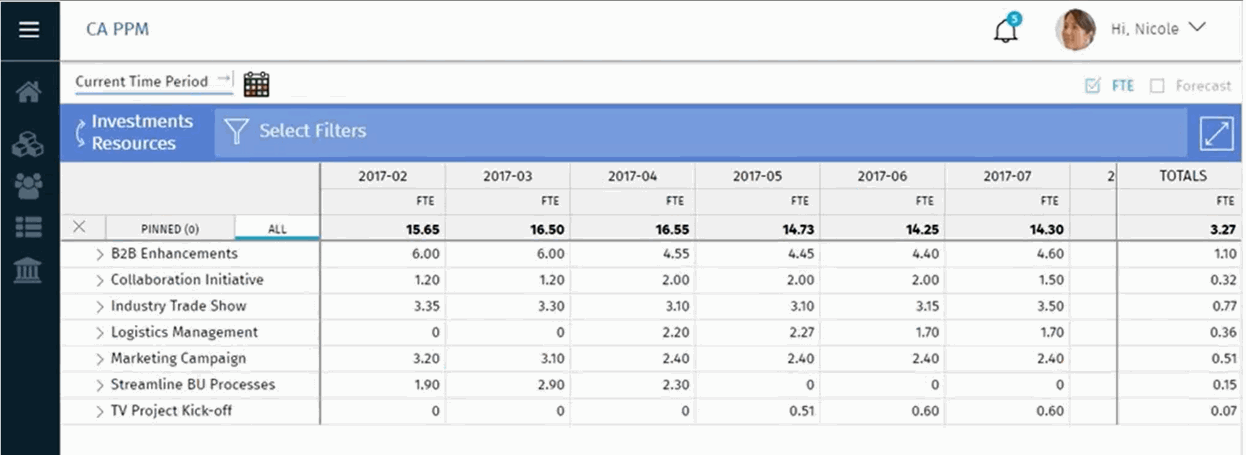
Expanding the arrow by the investment will show us of resources and roles allocated to the investment. If we have rights, we can replace roles with resources, change allocation information, add roles or resources, etc. in this view. This is also useful for Project Managers to find and add roles or resources to their projects.

Requests
As an example, we can add a Systems Analyst to the project, then add detail to the request by clicking on the role name. The detail includes the start and finish date of the allocation, the forecast rate for the role (the target rate for cost), and the Resource Manager who should fill this role.
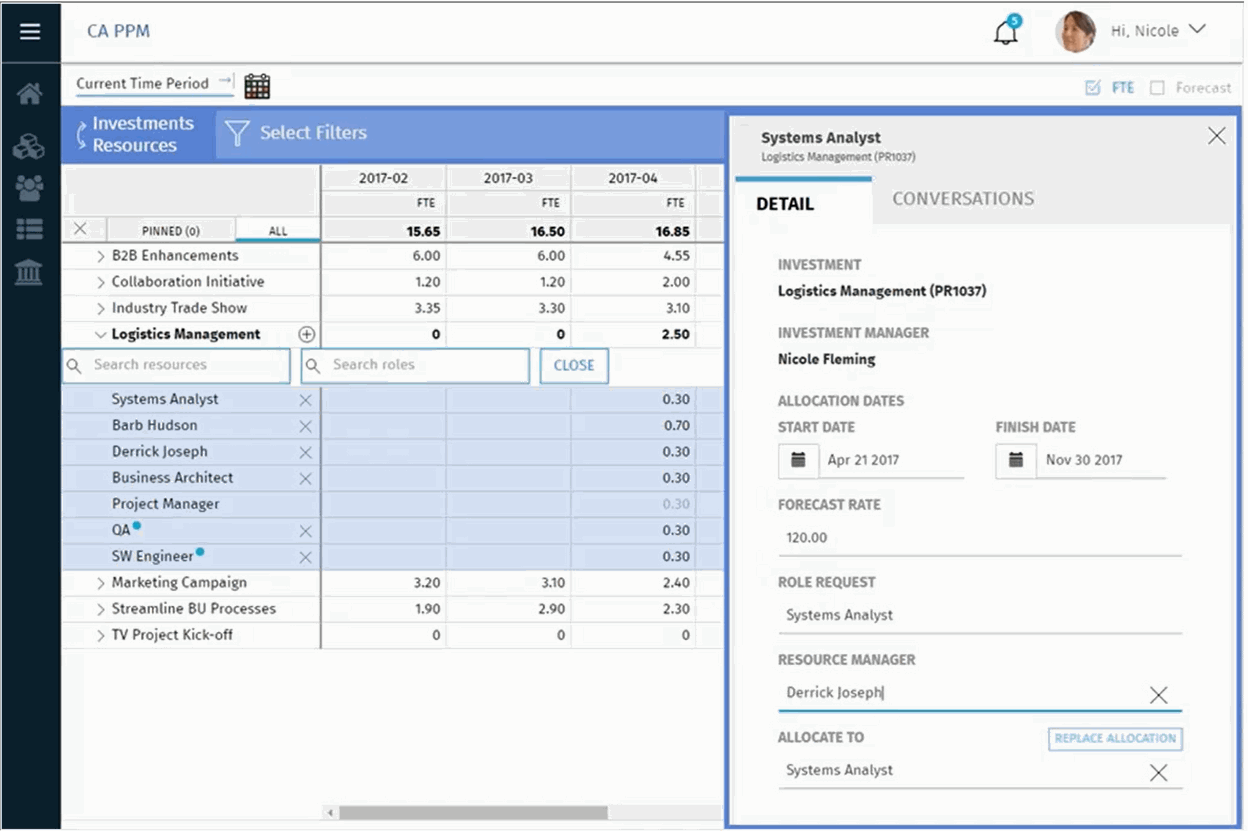
Clicking on the Conversations tab allows us to add more information about the request, tagging the Resource Manager so he/she is notified.

The tagged Resource Manager can log in and review the conversation, look at the request, add to the conversation, and fill the role with a resource.

Telescoping and User Settings
Since we always look at staffing for a rolling time horizon, we need to define the scale of the time periods looking forward. We can adjust the time periods available for selection by clicking the down arrow by our name, then clicking Settings.

In Settings, we select the start period, and the number of periods for each type. Time periods are based on fiscal periods created in CA PPM. Below we see Monthly, Quarterly, and Annually have been created and can be selected.
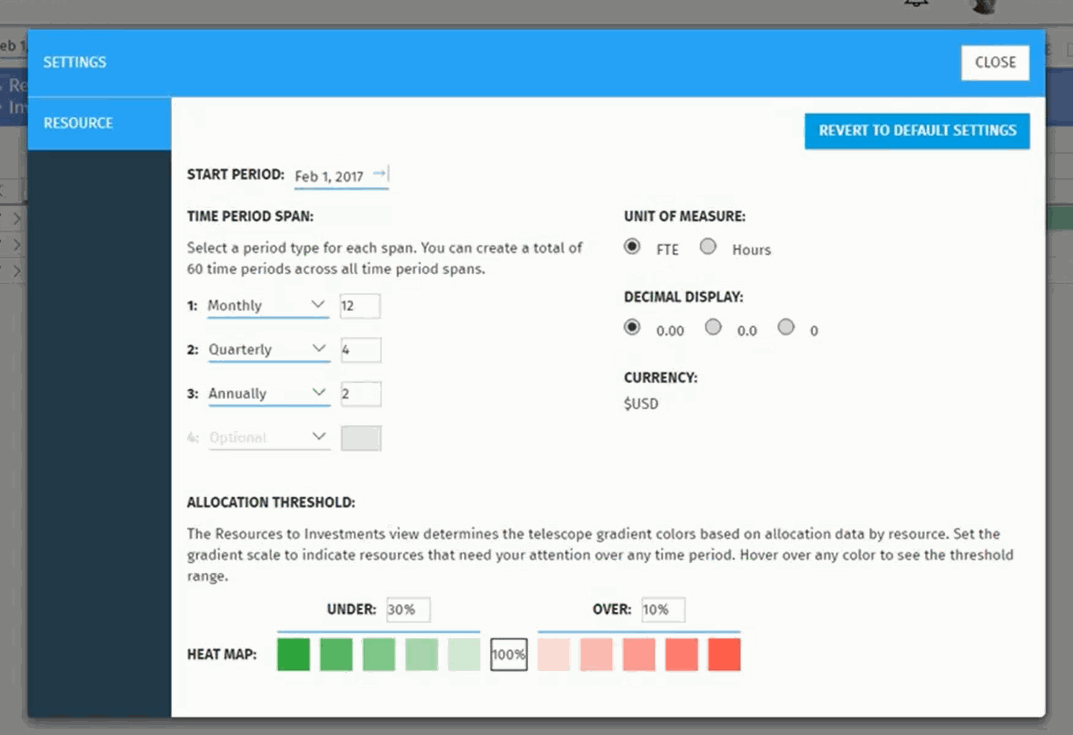
Also on this screen are the allocation threshold, units, and decimal settings that we can adjust. Updates are automatically saved, and clicking Close takes us back.
Next we can select the time periods are shown on the screen by clicking on the telescope icon (outlined in red).

The next screen displays the configured time periods – 11 months, 4 quarters, and 2 years. The light green color identifies under-allocation, the red color identifies over-allocation, the white color is the sweet spot between under and over allocation, and the bright green identifies no allocation. Blue indicates the selected time periods to show in the view.

Pinning and Filtering
Clicking in the space before the ">" value adds the pin icon next to resource names. We can then narrow our focus to these resources by clicking the "PINNED" tab.
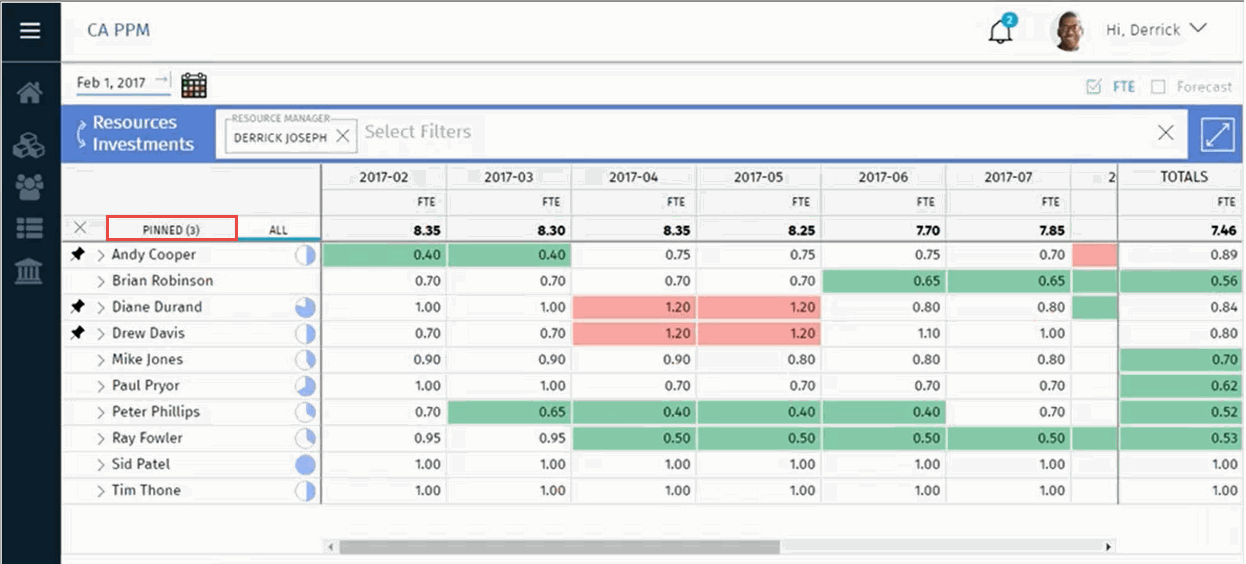
Now we can fix the resources/ under/over-allocation issues, then click the "ALL" tab to see the whole list again. We can then unpin these resources by clicking the "X" and selecting a new set of resources to focus on.

Select, Copy-and-Paste and Select-and-Delete
Making changes is even easier with copy-and-paste. We select a cell (outlined in blue) and press CTRL-C to copy the value. Or we can copy values from a spreadsheet.

Then we select the cells (outlined in blue below) we want to change.

Press CTRL-V to paste the value into these cells.

Visual Indicators and Icons
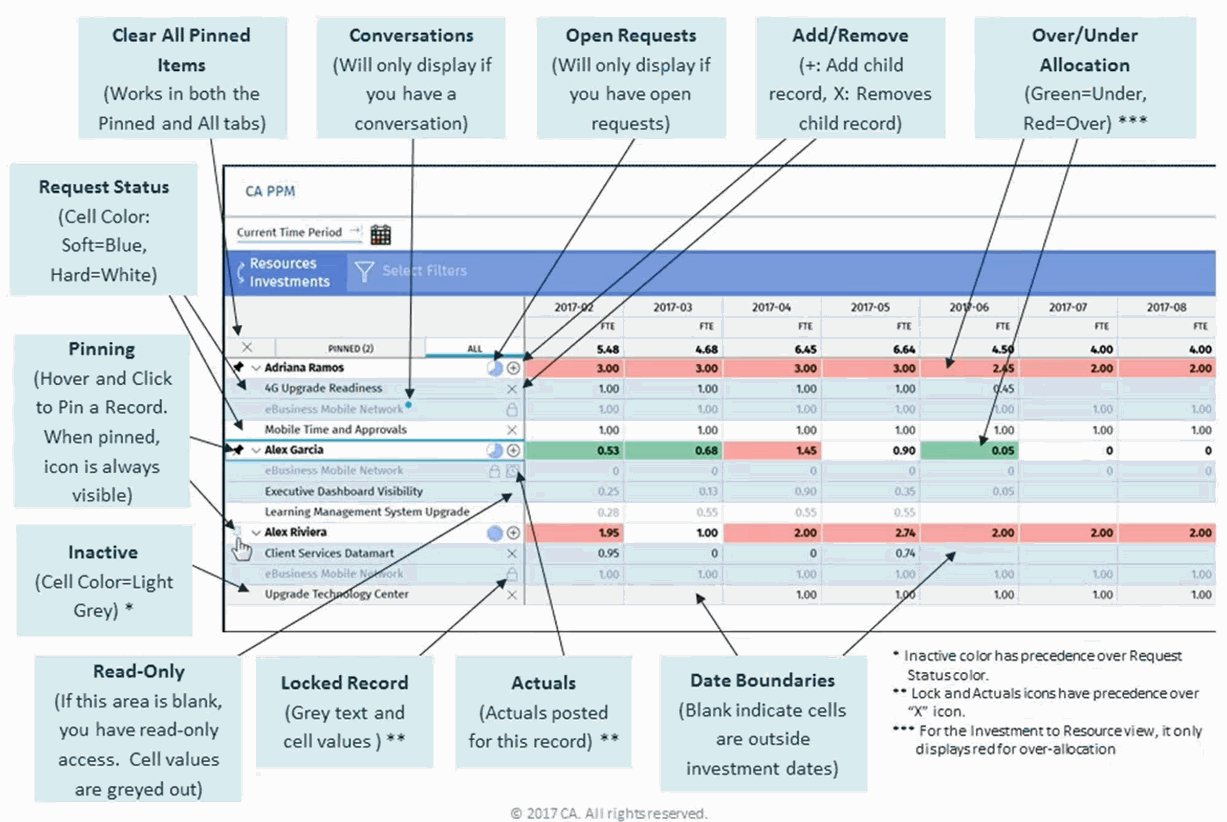
The new UX has many visual indicators and icons that show us what we need to do. Below is a graphic with this information for you to reference.
Setup
Setting up the new user interface is done by our CA PPM administrator and includes running a few jobs, setting up some financial information, and adding security rights to correct groups.
For readers interested in more detail, check out DocOps. I encourage you to participate in the best-in-class site, where you have access to your peers, events and support. You can also reach out to CA Services for information about CA PPM Release 15.2 upgrades/implementations, and individualized business outcome references and analysis. Feel free to post in the comments section of this blog or contact me directly via email and Twitter @janetulrich.