As you may know, CA SSO has seen a lot of changes lately—the biggest being the move from a 32-bit to a 64-bit app, improving its performance across the board. Not only that: Many new features have been added to the 64-bit versions of SSO, starting with version 12.6, many of which let users more easily interact with CA SSO programmatically.
In my last blog post, I talked about using REST APIs to do migrations or upgrades programmatically. In this post, I’ll talk about one of the great new features in CA SSO 12.8: OpenID Connect. The feature enhances programmatic interaction with CA SSO, thus helping to create a modern software environment where APIs, JSON format and ID tokens run the show.
Here’s the simple setup for using this feature:

As you may know, the OpenID Connect provider feature was added in version 12.7; version 12.8 enhances this feature even more.
The first thing to do when using this feature is to define CA Access Gateway as your authorization provider, as shown below.
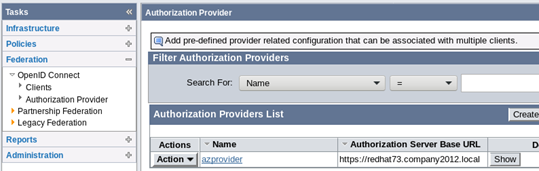
CA Access Gateway is the host for “Authorization Server Base URL.” When you create the azprovider, you can map your client’s chosen scopes to specific attributes from your user store.
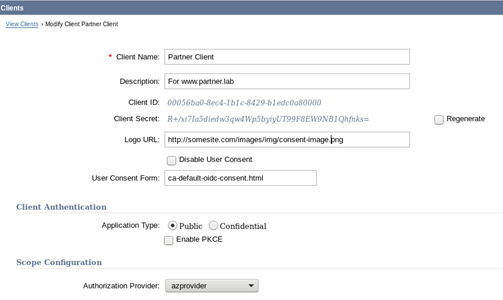
Your next move is to establish the clients this server will work with. The most important elements in creating a client are the Client ID and Client Secret. These are auto-generated by CA SSO and need to be shared with the client. If you get errors when you try to generate IDs or secrets, make sure you have configured and enabled JCE.
Previous versions of CA SSO could do only Authorization Code Flow; version 12.8 can also do Implicit Flow and Refresh Token grant types. You can see all these features when you create an OpenID Connect client using the admin UI.
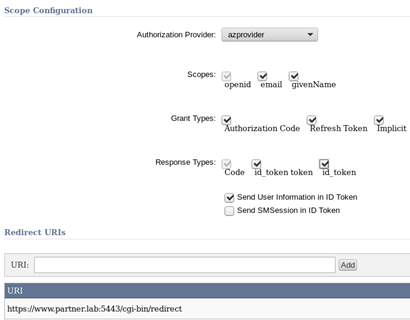
Additional scopes like email and givenName are visible, since azprovider defined them. In the above example, the client can ask for Authorization Code Flow with Refresh Token or Implicit Flow. For a good explanation of these flows, look at our documentation.
The main difference between Authorization Code Flows and Implicit Flows is that in Implicit, everything goes through the browser, so everything is visible to the world if you aren’t using HTTPS. That’s why you can’t configure Implicit Flow clients using http for the redirect URI.
When the client is set up with the right authorization provider, you can see all the good stuff for programming at the bottom:
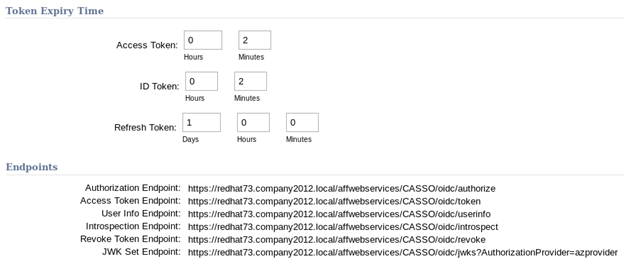
These endpoints are what your applications/clients will use to interact with CA SSO for authorization, validation, revocation, etc.
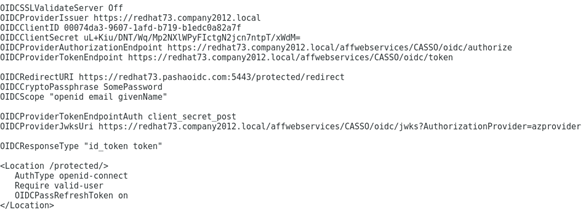
Now that you have the OpenID Connect client set up with ID and Secret on the CA SSO side, you just need to set up the relying party with that information. The relying party can be any OpenID Connect clients, but since not all clients can handle various flows, great care should be taken when choosing such clients. In my lab, I used Apache OpenID Connect module. For example, my httpd.conf looked like this:
For a great example of how this setup can be extended for other partnerships, take a look at my colleague Mark O’Donohue’s post here.
There you have it—a primer on OpenID Connect. Questions? Comments? Contact me at Amin.PashapourAlamdary@ca.com.